Updated July 8, 2025 02:11PM
Death Valley National Park: Death Valley Traverse
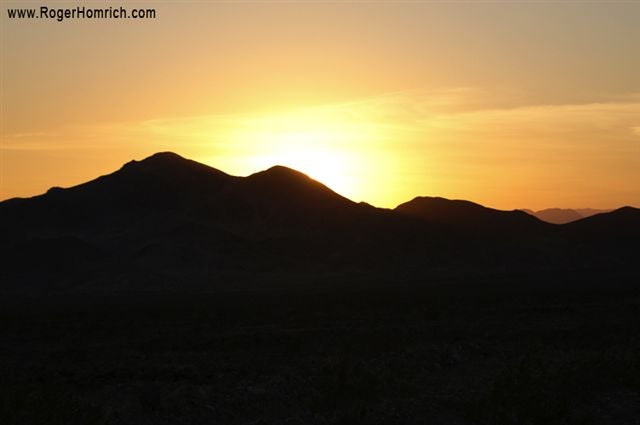
Walk through Death Valley National Park on this grueling, 14-day, 221-mile thru-hike of the largest national park in the contiguous United Sates.
Whether completed in 14 days or 20 days, this 221-mile trek is a burly endeavor over sand dunes, mountains, deep washes, alluvial fans, salt pans, and isolated canyons. Hikers will gain more than 34,000 feet of elevation, reaching the lowest point in the western hemisphere and then climbing to the top of 8,000-foot mountains in the Last Chance Range. Terrain and fitness aside, thru-hiking Death Valley National Park requires the ability to route-find using a map and compass in addition to careful cache planning and wilderness survival skills.
Editor’s Note: This Gaia GPS map includes cache locations for water storage. Because there is no water available throughout the park, place your potable water in plastic containers and drop them off at cache locations a couple of days before starting the thru-hike. Mileage and elevation gain and loss are listed after each day’s description.
Day 1: Prepare to start your trek by moving slowly over sandy terrain. Climb over the soft Ibex Dunes, then hike north 5 miles, passing dunes and rugged hills. Between the dunes and Ibex Spring, you’ll gain 800 feet of elevation on a long, low-grade slope. The first 600 feet of climbing are soft and sandy; the remaining 200 feet are much rockier. Next, you’ll head through rocky and rutted terrain toward the large, white stains on the hills of Buckwheat Wash, which are remnants of an 1800s mine.
Set up camp in Buckwheat Wash at the abandoned mine (look for the large pile of talc at the base of the Talc Hills). The next day, leave camp and hike north along a rutted wash with hard-packed terrain. Stay along the base of the mountains to the west.
ADVERTISEMENT
Mileage: 14.33. Elevation gain/loss: 1,729 feet and 690 feet.
Day 2: Hike toward Hanging Rock, a massive, oblong boulder protruding 12 feet out of the side of sediment walls. Continue north through tall channels of water-carved sediment, which will narrow and reveal a thin, private slot canyon with 100-foot walls, warm colors, and a sandy bottom. Continue hiking through the canyon, and be aware of flash floods. Exit through the canyon’s widest mouth, and follow the path to the old American Mine.
Follow a slot canyon to the old American Mine, then climb to the top of Salsberry Pass, hugging the eastern border of Calico Peaks. (Optional side trip: Hike up to American Mine to explore this hidden mining camp and a wooden homestead built into the mountain. Bottles, cans, and metal debris cover the area. When finished, retrace steps back to the old mining road.)
Then, hike across a series of wash crossings that leads you to a mountain pass with views of the highest peak in Death Valley, 11,049-foot Telescope Peak. Follow the road until it intersects with I-178, then bear right onto the highway and walk up Salsberry Pass. What this pass lacks in elevation, it makes up for in scenery with its pastel rocks and wildflowers.
ADVERTISEMENT
Hike toward Greenwater Valley. The monolith is visibly distinct from the surrounding terrain and offers high-lying flat spots to camp. Camp on a high, flat spot to avoid flash floods.
Mileage: 16.44. Elevation gain/loss: 3,750 feet and 2,482 feet.
Day 3: Head northwest across the alluvial contours of the Calico Peaks and scramble up boulders and scree to an unnamed, low pass with vast views of Greenwater Valley and Gold Valley. From the pass, hike west down a broad slope into a narrow cut in the mountains. Then, you’ll enter Gold Valley and catch a breathtaking glimpse of Telescope Peak from Sheep Saddle before dropping into Sheep Canyon.
Watch your footing as it is a 700-foot descent on loose talus from here to the canyon floor. Once you reach the hard and smooth canyon floor, climb along the right wall of the canyon, around a series of three 30-foot, dry waterfalls. From there, continue west down the canyon.
ADVERTISEMENT
From here, pick a flat shelf at the bottom of the canyon where the walls are high and steep. This spot is very secluded and the view of the night sky past the rock walls is unforgettable.
Mileage: 19.36. Elevation gain/loss: 3,048 feet and 3,183 feet.
Day 4: After hiking northwest for 8 miles from Badwater Road (a few hundred feet below the sea) over flat and salty terrain, continue along West Side Highway. This is a seldom-traveled dirt road with a few unreliable springs: Shorty’s Grave and Bennett’s Last Stand.
Continue across Badwater Basin, a vast salt pan that sits a few hundred feet below sea level. This is also a cache site. Park rules dictate backpackers must camp 2 miles away from West Side Road. Though this route cuts across alluvial material to tonight’s camping spot, turning left off West Side Road onto Trail Canyon Road makes for an easier route.
Mileage: 27.22. Elevation gain/loss: 1,520 feet and 3.450 feet.
Day 5: Head north on West Side Road. The Panamint Mountains are to the left; Amargosas to the right. Continue through Middle Basin, which looks like a small, frozen lake. Reach Corduroy Cross, an old settler’s crossing. From here, hike toward the transmission lines to the north that run from Furnace Creek to Stovepipe Wells. Follow the telephone lines as they bend northwest toward the base of Tucki Mountain. Slice through Middle Basin with the Panamint Mountains looming in the distance. Camp at a flat spot on the eastern base of Tucki Mountain, near Cottonball Marsh. The marsh is a shallow pool of salty water with polygonal salt formations beneath it.
Mileage: 19.04. Elevation gain/loss: 203 feet and 963 feet.
Day 6: From camp, hike over alluvial material and detour around small washes, losing the transmission lines in the meantime. Cross I-178 and walk toward the dunes to the west. After exploring the dunes, rejoin the road, and follow it to Stovepipe Wells Campground. Climb more than 600 feet up a steep grade back to I-178. Skirt the base of Tucki Mountain and sand dunes on the way to Stovepipe Wells, the only designated campground on this thru-hike. Here, a sign notifies travelers that they are at sea level. Fires are permitted here. There is also a general store, gas station and a motel with $4 showers. The ranger station is next to the general store.
Mileage: 12.91. Elevation gain/loss: 875 feet and 673 feet. End of Day 6:
Day 7: From Stovepipe Wells Campground, head northwest toward a major alluvial fan and Marble Canyon, about 8 miles away. Both features are very noticeable. Walk through a low dune and then climb the fan, using the washes as routes into the canyon’s mouth. Enter the wide mouth of Marble Canyon on a 4WD road, where, at the entrance, you can find petroglyphs. Marble Canyon and Cottonwood Canyon merge here. Continue west, following Marble Canyon as it narrows.
At a fork in the canyon, bear left, and continue southwest for 2.5 miles through a series of stunning, water-carved narrows to Deadhorse Junction. Marble Canyon and Deadhorse Canyon intersect at an open, flat area. Stay in Marble Canyon and proceed west through a narrow cut. At the end of the day, pick a high shelf along the right side of the canyon. Be sure to check for loose rocks above the dark marble walls.
ADVERTISEMENT
Mileage: 18.03. Elevation gain/loss: 6,742 feet and 3,574 feet.
Day 8: This day, you’ll continue through three canyons, beginning with Marble Canyon and ending with Harris Canyon. The final canyon is thick with vegetation, and the ruins of Goldbelt Mine, a few rusted trucks, and dilapidated structures mark the end of it. A dumptruck indicates the location of Goldbelt Spring. From here, follow the mining road northwest to an intersection with a sign designating that Quakenbush Mine is ahead. Here, you’ll pass through a field of Joshua trees with stunning views of Sand Flat and the surrounding mountains.
Continue toward the diagonally striped mountains ahead and the entrance of Sand Flat, an ancient lakebed. Walking toward the bottom of this dry lake, high ground will surround you quickly. Pass through the flat and reach a minor saddle with great views of Hidden Valley. As you pass through Hidden Valley, a large but intimate area with a reticulated mud floor and shrubs, you’ll head toward toward two mounds. Favor the mound to the south—at its base, pick one of the many flat areas with views of this secret valley to camp. No water sources are available.
ADVERTISEMENT
Mileage: 15.51. Elevation gain/loss: 3,521 feet and 2,091 feet.
Day 9: From camp, climb up a few hundred feet toward a visible saddle. After reaching the top, hike northwest toward a narrowing gorge that leads you to a rocky overlook.
This overlook offers views of the Racetrack, Ubehebe Peak, and the rest of the valley. You’ll traverse the Racetrack, a 3-mile-long, 1-mile-wide playa with a protruding granite island called the Grandstand. The Grandstand rises up like a granite island from the playa surface. From here, head toward the southern end of the playa and explore Sliding Rock, one of the mysterious moving boulders of the Racetrack. Then proceed southwest toward the next prominent boulder.
ADVERTISEMENT
After checking out another boulder, hike toward the Grandstand and continue for 2 miles across the hard playa past the Grandstand, a very large cluster of granite that protrudes a hundred feet or more from the playa floor. From here, cross Racetrack Road, a rutted, dirt jeep path, and continue north through a pass and across an open, flat area until the space between the mountains narrows again. A faint mining road will skirt the eastern hills and proceed in a northeasterly direction as it drops down from the hills. Pass up and down a wash toward a large canyon opening in the mountains. Near the opening of the canyon, the alluvial fan has flat shelves that offer places to camp. Be sure to camp high in case of a flood.
Mileage: 15.06. Elevation gain/loss: 1,615 feet and 1,699 feet.
Day 10: From camp, proceed north to a narrow canyon with very steep walls a few hundred feet above the canyon floor. Follow the canyon for a little over 2 miles until a side canyon appears to the east. Follow it up a narrow, dry, creek bed that disappears as it climbs up onto an open plateau. Stop at a large, open plateau with views of Tin Mountain to the east. After taking in the scenery, head north to a saddle that overlooks a large, dry lake.
Reach a saddle with great views of the largest of the Virginia Dry Lakes. Continue though a series of washes and saddles until it joins the Racetrack Valley Road. Follow it north until the black soil of the Ubehebe Crater becomes visible. Park rules require that backpackers camp 2 miles from Ubehebe Crater.
ADVERTISEMENT
Mileage: 15.41. Elevation gain/loss: 1,669 feet and 3,494 feet.
Day 11: From camp, hike northwest for about 1.5 miles over rutted washes and black soil toward Ubehebe Crater. Stay high on the contours to avoid the deep washes. Skirt around Little Hebe Crater and approach the southwest rim of Ubehebe Crater, a 500-foot deep, half-mile wide crater formed when magma heated the water table to the point where it exploded and covered the area in volcanic cinders. From the crater, cross over Racetrack Valley Road twice (it is a one-way loop) and head north for 3 miles over rolling terrain to Death Valley Wash.
Follow the wash northwest for about 3.5 miles. The low-lying hills to the west will start to flatten out. After an intersection between a mining road and the wash, climb west for about 3.5 miles toward a notch in the mountains. Though the road leads to the notch for a short distance, it soon turns away from the mountains. This stretch gains about 1,200 feet. Reach an unnamed notch in the mountains. It looks very similar to the mouth of a canyon, but after walking through a narrow gorge, the route leads to a large, open area. Just past the narrow notch in the mountains, a wide slope offers a few flat areas to camp (it can get really windy here). No water is available. This is a very private area in Last Chance Range that is rarely, if ever, visited.
ADVERTISEMENT
Mileage: 13.39. Elevation gain/loss: 2,058 feet and 674 feet.
Day 12:
From camp, hike southwest and gain a quick 1,000 feet over undulating terrain en route to the second notch in the mountains.
After climbing up to a very obvious gap in the mountains, continue southwest along the wash until the split. Continue south along the left-hand wash toward a saddle, gaining about 800 feet.
ADVERTISEMENT
After passing the ruins of an old, abandoned mine, summit a saddle. The rocks in this area are extremely colorful. Reach the second saddle, which showcases Joshua trees and red, purple, and orange rocks. From here, descend a steep wash toward Dedeckera Canyon. Huge walls of reticulated stone tower above the gravel-covered canyon floor. Descend 2 miles north through the canyon. At the canyon mouth, find views of Eureka Valley, the Inyo Range and Eureka Dunes, which at almost 700 feet tall, are the tallest dunes in California and nearly the highest in the U.S.
Walking on the dunes or along their base is slow and tedious because the sand is so soft. Camp on the alluvial material to the north of the dune’s peak. From this area, campers have great views of the valley and Inyo Range as well as unforgettable sunsets and sunrises. There is also a primitive camp in the area. No water or protection is available at this spot.
Mileage: 13.46. Elevation gain/loss: 2,002 feet and 3,163 feet.
Day 13: From camp, hike north, gaining 400 feet, to a stellar view of Eureka Dunes and the foothills of Last Chance Mountain. Take a moment to stop and look around at this panoramic point, which showcases the dunes and the snowy Inyo Range.
After climbing another 400 feet, rest at the open, flat area between two 4,000-foot foothills. Continue north through the canyon, following the wash. The canyon walls are a few hundred feet higher than the wash.
ADVERTISEMENT
At an intersection between two canyon washes, bear left. Pass beautifully colored canyon walls for three-quarters of a mile before reaching another fork in the canyon. Bear left and continue northwest toward Big Pine Road to Crater Mine.
After bearing left onto Big Pine Road, turn right and continue north past the mining area. Camp off the dirt road; pick a spot with protection because this area can get very cold and windy.
Mileage: 11.58. Elevation gain/loss: 3,184 feet and 658 feet.
Day 14: From camp, follow the dirt road until it dead ends into the mountains. A mineshaft is at the end of the road. Route-finding will be necessary during the next 12 miles because there is no trail and the terrain is extremely rugged. Summit no less than 11 peaks, including Last Chance Mountain.
You’re saving the biggest and best peaks for last; at 8,456 feet, Last Chance is the highest point on the whole thru-hike. This day, you’ll also cross the unmarked border of Nevada to end the thru-hike of Death Valley National Park. As you approach it, you’ll pass through surrounding hills with the mountains high above and mining prospects scattered among the hillsides. Before you embark on your thru-hike, you should coordinate a pick-up ride from the terminus: It’s recommended that thru-hikers get picked up from the terminus instead of leaving a car there.
ADVERTISEMENT
Mileage: 12.48. Elevation gain/loss is 5,117 feet and 4,179 feet.
Pro Trip Info
Contact
Furnace Creek Visitor Center & Museum (760) 786-3200
Scotty’s Castle Visitor Center (760) 786-2392 ext.231
nps.gov/deva
Keep a full tank in your vehicle as distances are great. Nearest gas stations: Stovepipe Wells (45 miles south), Furnace Creek (53 miles south), and Beatty, Nevada (60 miles southeast).
Groceries: Limited groceries in park at Furnace Creek Ranch General Store. Panamint Springs Resort and Stovepipe Wells have convenience stores. Outside the park, buy basics in Beatty, Nevada, and Shoshone, California. The nearest supermarket is in Pahrump, Nevada.
ADVERTISEMENT
Where to Eat
The Oasis At Death Valley Dining Room: Reservations recommended. (Formerly known as the Furnace Creek Inn.)
Lobby Bar: Don’t miss afternoon tea.
Stovepipe Wells Village Toll Road Restaurant: Breakfast, lunch and dinner; casual. Limited hours. No lunch in summer.
Badwater Saloon: Drinks and appetizers served in afternoon and evening.
Panamint Springs Resort Dining & Bar: Breakfast, lunch and dinner year-round.
ADVERTISEMENT
Lodging options inside park
The Oasis At Death Valley
Death Valley, CA 92328
oasisatdeathvalley.com
Stovepipe Wells Village
California 190
Death Valley Junction, CA 92328
escapetodeathvalley.com
Panamint Springs Resort & RV Park
California 190
Death Valley, CA 92328
panamintsprings.com