Death Valley National Park: Stovepipe Wells Campground to Racetrack Valley Road

*Editor’s Note: This map includes cache locations for water storage. Since there is no water available throughout the park, place your potable water in plastic containers and drop them off at cache locations a couple of days before starting the thru-hike. Mileage and elevation gain and loss are listed after each day’s description.
Day 1: From Stovepipe Wells, follow the petroglyph-covered Marble Canyon. Mileage: 18.03. Elevation gain/loss: 6,742 feet and 3,574 feet.
Day 2: Continue through Marble Canyon, passing clusters of Joshua trees, Quackenbush Mine and sand flats en route to Hidden Valley. Mileage: 15.51. Elevation gain/loss: 3,521 feet and 2,091 feet.
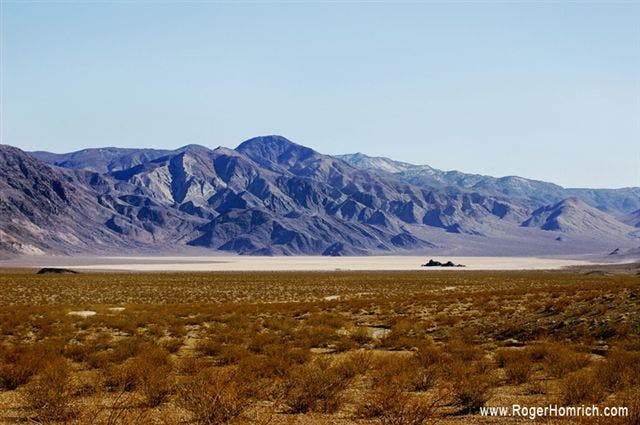
Day 3: Traverse the Racetrack, a huge playa with a protruding granite island called the Grandstand. Mileage: 15.06. Elevation gain/loss: 1,615 feet and 1,699 feet.
Day 4: Follow a narrow canyon to a saddle with panoramic views of the Virginia Dry Lakes. Mileage: 15.41. Elevation gain/loss: 1,669 feet and 3,494 feet.
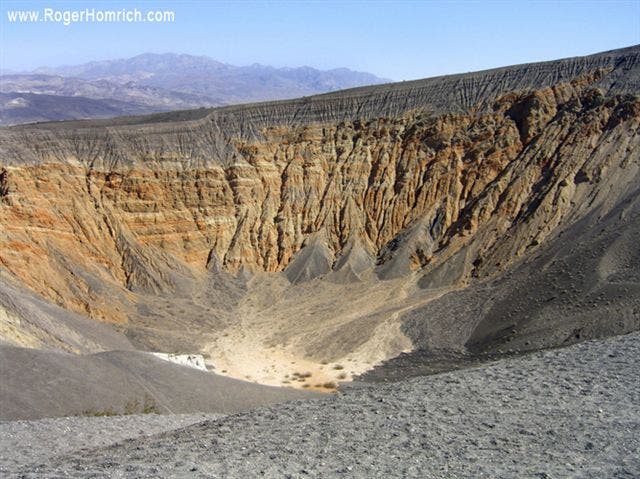
Day 5: Explore Ubehebe Crater and Little Hebe Crater before ending this section at Racetrack Valley Road. Mileage: 2.14. Elevation gain/loss: 226 feet and 291 feet.
-Mapped by Roger Homrich, the first person to thru-hike the Death Valley Traverse.
PRO Trip Info
Contact
Furnace Creek Visitor Center & Museum (760) 786-3200
Scotty’s Castle Visitor Center (760) 786-2392 ext.231
nps.gov/deva
Potable Water: Water can be found at all park communities, visitor centers, contact stations and museums.
Fuel: It’s best to keep a full tank in your vehicle as distances are great in and around the park. The nearest gas stations are at Stovepipe Wells (45 miles south), Furnace Creek (53 miles South), and Beatty, Nevada (60 miles southeast).
Groceries: Limited groceries can be purchased in the park at the Furnace Creek Ranch General Store. Panamint Springs Resort and Stovepipe Wells have convenience stores. Outside the park, buy basics in Beatty, NV and Shoshone, CA. The nearest supermarket is in Pahrump, NV.
Weather: Death Valley is the hottest and driest place in North America. Summer temperatures can reach 120°F (49°C) in the shade, with overnight lows dropping into the 90s°F (mid 30s°C.) Average rainfall is less than 2 inches. Occasional thunderstorms, especially in late summer, can cause flashfloods.
Where to Eat
Furnace Creek Resort (closed in summer)
Dining Room: Serves breakfast, Sunday Brunch, lunch and dinner (dress code). Reservations recommended.
Lobby Bar: Drinks in the afternoon and evening. Don’t miss about afternoon tea.
Furnace Creek Ranch
Forty-Niner Cafe: Breakfast, lunch and dinner. Limited summer hours.
Wrangler Steakhouse & Buffet: Buffet-style breakfast and lunch. Steakhouse for dinner. Limited hours.
Corkscrew Saloon: Drinks and snacks served in afternoon and evening.
The 19th Hole: Burgers and sandwiches next to the golf course. Closed in summer.
Stovepipe Wells Village
Toll Road Restaurant: Breakfast, lunch and dinner; casual setting. Limited hours. No lunch in summer.
Badwater Saloon: Drinks and appetizers served in afternoon and evening.
Panamint Springs Resort
Dining & Bar: Breakfast, lunch and dinner year-round.
Lodging options inside the park
Furnace Creek Resort
328 Greenland Boulevard
Death Valley, CA 92328
(760) 786-2345
furnacecreekresort.com
Stovepipe Wells Village
California 190
Death Valley Junction, CA 92328
(760) 786-2387
escapetodeathvalley.com
Panamint Springs Resort & RV Park
California 190
Death Valley, CA 92328
775-482-7680
A few lodging options outside the park
Beatty, NV – Bailey’s Hot Springs RV Park; 775-553-2395
Amargosa Valley, NV – Longstreet Motel & RV Park; 775-372-1777
Death Valley Junction, CA – Amargosa Hotel; 760-852-4441
Pahrump, NV – Pahrump Nugget Hotel; 866-751-6500
Shoshone, CA – Shoshone Inn; 760-852-4335
Tecopa, CA – Ranch House Inn B&B; 760-852-4360
Ridgecrest, CA – Motel 6; 800-466-8356
Inyokern, CA – Mayfair Motel; 760-377-4321
Olancha, CA – Rustic Motel; 760-764-2209
Lone Pine, CA – Mt. Whitney Motel; 800-845-2362
Independence, CA – Independence Courthouse Motel; 800-801-0703
Big Pine, CA – Big Pine Resort Cottages; 760-938-2922
Bishop, CA – Thunderbird Inn; 760-873-4215
Trail Facts
- Distance: 106.2
Waypoints
DVN035
Location: 36.6066933, -117.1465607
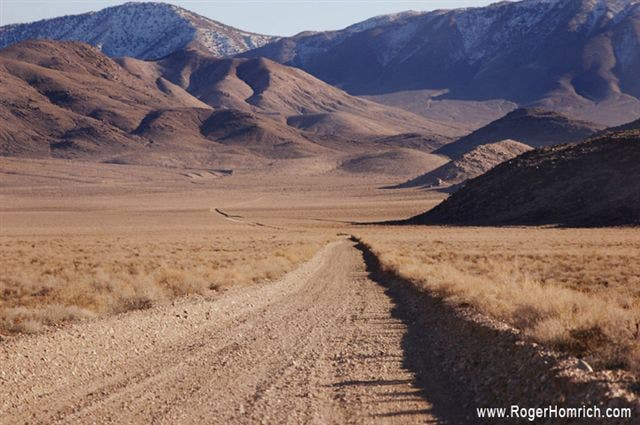
This section hike starts at Stovepipe Wells Campground, the only designated camping spot along this route. A sign notifies travelers that they are at sea level. Fires are permitted here. There is also a general store, gas station and a motel with $4 showers. The ranger station is next to the general store. From Stovepipe Wells Campground, head northwest towards a major alluvial fan and Marble Canyon, about 8 miles away. Both features are very noticeable. Walk through a low dune and then climb the fan, using the washes as routes into the canyon’s mouth.
DVN036
Location: 36.6436043, -117.2727814
Enter the wide mouth of Marble Canyon on a 4WD road. Petroglyphs can be found at the entrance of the canyon.
DVN037
Location: 36.6320534, -117.2955399
Marble Canyon and Cottonwood Canyon merge here. Continue west, following Marble Canyon as it narrows. Cottonwood Canyon heads southwest.
DVN038
Location: 36.6187782, -117.3304901
The 4WD road ends here. A barricade indicates that jeeps cannot travel any further through the canyon. Continue southwest through Marble Canyon.
DVN039
Location: 36.6072311, -117.33564
Make a short detour around a massive boulder that is wedged in a narrow gap. Climb up and to the right to bypass it.
DVN040
Location: 36.6099319, -117.3504639
Reach a fork in the canyon and bear left. Continue southwest for 2.5 miles through a series of stunning, water-carved narrows to Deadhorse Junction.
DVN041
Location: 36.5830307, -117.3719635
Marble Canyon and Deadhorse Canyon intersect at an open, flat area. Deadhorse heads south and appears much more prominent. Stay in Marble Canyon and proceed west through a narrow cut.
DVN042
Location: 36.5828285, -117.3731842
End of Day 1: Pick a high shelf along the right side of the canyon. Be sure to check for loose rocks above the dark marble walls. From camp, head west further up the narrow canyon.
DVN043
Location: 36.5870705, -117.3859863
Reach the first of three canyon junctions. At this point, the canyon area widens. Proceed climbing west. Do not head north up the side canyon.
DVN044
Location: 36.5861168, -117.4005508
Second canyon junction. Follow the fork to the northwest. Do not head up the side canyons to the west or north here.
DVN045
Location: 36.5922279, -117.4202271
At the third canyon junction, follow the western fork.
DVN046
Location: 36.5922775, -117.4212494
Climb up the large rock slabs of a small, dry waterfall.
DVN047
Location: 36.5936127, -117.4250412
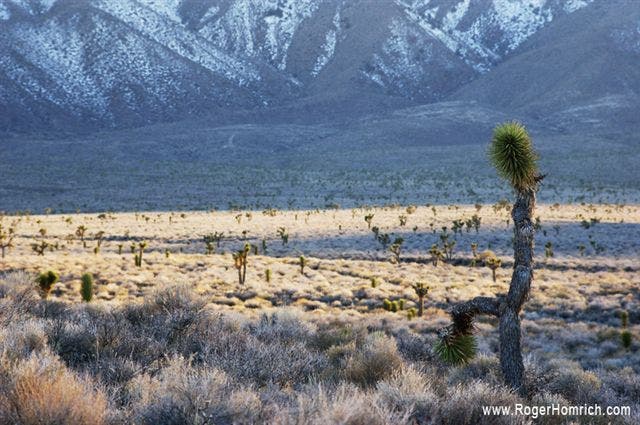
At the cluster of Joshua trees, continue west. Do not follow the side canyon to the north. The correct route climbs northwest. It curves through a narrow, rocky gorge and then bends down to the southwest, intersecting with Harris Canyon.
DVN048
Location: 36.5973549, -117.4385223
Continue west-southwest at the junction with Harris Canyon, which heads south. This area is thick with vegetation.
DVN049
Location: 36.5984268, -117.4479218
The ruins of Goldbelt Mine, a few rusted trucks, and dilapidated structures mark the end of the canyon. A dump truck indicates the location of Goldbelt Spring. Check in advance to see if it is flowing. From here, follow the mining road northwest to an intersection with a sign designating that Quakenbush Mine is ahead.
DVN050
Location: 36.6008911, -117.4505539
Follow the road north-northwest past the open pits and trusses at Quackenbush Mine.
DVN051
Location: 36.6131325, -117.4550095
Take a right on the 4WD road and hike to the north. Drop through a field of Joshua trees with stunning views of Sand Flat and the surrounding mountains. The road travels northeast for a while, and then abruptly bends east before making a U-turn. Continue northeast at the bend, leaving the road for shallow washes. Head towards the diagonally striped mountains ahead and the entrance of Sand Flat.
DVN052
Location: 36.6336937, -117.4428406
Cache
DVN053
Location: 36.6420479, -117.4393845
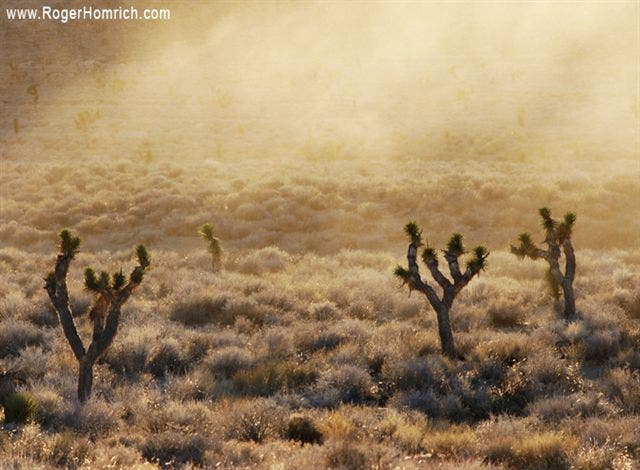
Two converging mounds are bisected by a wash, marking the entrance to the ancient lakebed. Walking toward the bottom of this dry lake, high ground quickly surrounds hikers. Hug the western edge of the flat and walk north towards the rounded point ahead.
DVN054
Location: 36.6670303, -117.4360275
Bend to the northwest after skirting the base of the mountain to the left.
DVN055
Location: 36.6733055, -117.4454803
A prominent foot sticks out of the mountain to the south, head southwest and climb up a steep and taxing grade. After reaching the top of the foot, continue west-southwest to a large, flat area.
DVN056
Location: 36.668705, -117.4558868
From the flat area, proceed northwest to a minor saddle.
DVN057
Location: 36.6778755, -117.4704971
Reach a minor saddle with great views of Hidden Valley. Follow a steep wash to the northwest down towards the valley. The wash soon bends to the west and releases hikers onto the valley floor.
DVN058
Location: 36.6786537, -117.480484
Enter Hidden Valley, a large but intimate area with a reticulated mud floor and shrubs. Two very large, dark mounds sit prominently northwest of this point. Head across the valley towards them, favoring the mound to the south.
DVN059
Location: 36.6858063, -117.5016861
End of Day 2: At the base of the southern mound, pick one of the many flat areas with views of this secret valley. No water sources are available. From camp, head west and climb up a few hundred feet to a visible saddle.
DVN060
Location: 36.6867981, -117.5102692
After reaching the top of the saddle, hike northwest from this open area down towards a narrowing gorge. Do not follow it northwest once it begins to constrict. Instead, bend to the southwest towards a rocky overlook.
DVN061
Location: 36.6920204, -117.5266495
This rocky overlook offers views of the Racetrack (a 3-mile-long, 1-mile-wide playa), Ubehebe Peak, and the rest of the valley. The Grandstand rises up like a granite island from the playa surface. Head south and descend from the overlook on a very steep slope that narrows into a rock wash constricted by boulders and a few dry falls. Follow the wash as it turns west and puts hikers on the border of the hard, cracked playa surface. Skirting the base of the mountains you just descended, head south-southwest toward the southern end of the playa.
DVN062
Location: 36.6739006, -117.5513916
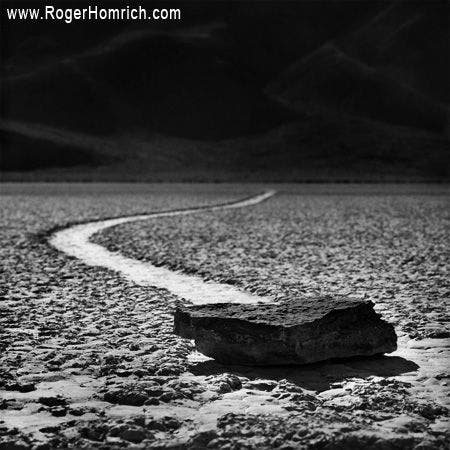
Explore Sliding Rock, one of the mysterious moving boulders of the Racetrack. Then proceed southwest toward the next prominent boulder.
DVN063
Location: 36.6709671, -117.5558777
After checking out another boulder, turn back to the north-northwest and walk toward the Grandstand. Hike for 2 miles across the hard playa.
DVN064
Location: 36.6930313, -117.5664597
Pass the Grandstand, a very large cluster of granite that protrudes a hundred feet or more from the playa floor. From here, continue north to an intersection with Racetrack Road, a rutted, dirt jeep path.
DVN065
Location: 36.7473946, -117.570137
Cross Racetrack Road and continue north to a pass. The route will curve northwest as the pass narrows.
DVN066
Location: 36.7498322, -117.5689545
Cache
DVN067
Location: 36.7645416, -117.5750885
From the pass, hike northwest across an open, flat area until the space between the mountains narrows again. Follow a faint mining road that skirts the eastern hills and proceeds in a northeasterly direction as it drops down from the hills. The road makes an abrupt turn to the west as it lowers hikers down to a wash.
DVN068
Location: 36.7756157, -117.5814209
Head north-northeast into a broad, sloping wash. Hike up the wash toward a large canyon opening in the mountains ahead that becomes visible shortly after beginning the climb.
DVN069
Location: 36.8087769, -117.5707321
End of Day 3: Near the opening of the canyon, the alluvial fan has flat shelves that offer places to camp. Be sure to camp high in case of a flood. From camp, proceed north to the canyon opening.
DVN070
Location: 36.8177681, -117.5680237
Enter a narrow canyon with very steep, 6,000-foot walls. Follow the canyon north-northeast for a little over 2 miles.
DVN071
Location: 36.8456535, -117.553421
At the large, open area, the canyon constricts to the north and a side canyon appears to the east. Walk in that direction up a narrow, dry, creek bed. The small creek eventually disappears as it climbs up onto an open plateau.
DVN072
Location: 36.8453522, -117.5384216
Stop at a large, open plateau with views of Tin Mountain to the east. After taking in the scenery, head north to a saddle that overlooks a large, dry lake.
DVN073
Location: 36.84972, -117.5387192
Reach a saddle with great views of the largest of the Virginia Dry Lakes. Descend to the north and enter the dusty lake at its southwest corner. Proceed to its northeast corner between a dark, rocky gap. Then hike west-northwest to the second dry lake.
DVN074
Location: 36.8631325, -117.5257416
The second dry lake is smaller, but just as beautiful as the first. From here, walk toward a flat saddle covered in large boulders.
DVN075
Location: 36.8677216, -117.5238495
After making it to a flat saddle, hike north down a very steep wash until reaching a wash that bends to the right.
DVN076
Location: 36.8863525, -117.5197525
From here, the wash curves to the right and joins with Racetrack Valley Road. Proceed north to the southern base of the rock mound. Follow its eastern base and then hike along the road.
DVN077
Location: 36.9112358, -117.4973297
After hitting the road, follow it north until the black soil of the Ubehebe Crater becomes visible.
DVN078
Location: 36.9851494, -117.4667664
End of Day 4: Park rules require that backpackers camp 2 miles from Ubehebe Crater. From camp, hike northwest for about 1.5 miles over rutted washes and black soil toward Ubehebe Crater. Stay high on the contours to avoid the deep washes. Skirt around Little Hebe Crater and approach the southwest rim of Ubehebe Crater.
DVN079
Location: 37.0080795, -117.4547577
Ubehebe Crater: This 500-foot deep, half-mile wide crater was formed when magma heated the water table to the point where it exploded and covered the area in volcanic cinders. Descend into it or walk the long way around its rim. From the crater, head north to Racetrack Valley Road.
DVN079a
Location: 37.0116344, -117.4547482
Section hike ends at Racetrack Valley Road.
Joshua Field
Location: 36.5938911, -117.422905
©Roger Homrich
Sand Flat
Location: 36.6379128, -117.4417038
©Roger Homrich
Hidden Valley
Location: 36.6817741, -117.4919128
©Roger Homrich
Stone
Location: 36.6758538, -117.5485611
©Roger Homrich
Racetrack
Location: 36.6810837, -117.5643539
©Roger Homrich
Cactus
Location: 36.8136826, -117.5696716
©Roger Homrich
Ubehebe
Location: 37.0100923, -117.4549627
©Roger Homrich