Published August 12, 2010 03:24PM
Knot Tying: Learn the Clove Hitch, Single Line Method
A readily adjustable rope-end knot for trees and large objects, but tougher to visualize than its mid-rope version.
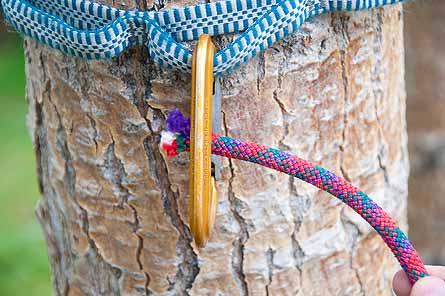
'Put the free end of the rope around your desired object.'

Put the free end of the rope around your desired object.

Thread the rope end into a single loop.

Continue into a one-and-a-half loop, crossing the free end to avoid a simple spiral.

Once you’ve threaded two loops, take the free end and put it beneath the overlap, so both departing ropes are centered in the knot, with the central portion running over them, and snugging down.

Tighten the knot and adjust for tension as with the mid-rope version.

CAUTION: When tied anywhere close to a rope end, the clove hitch should be backtied to prevent slippage, especially on slick, small-diameter objects like carabiners. A simple overhand in the free end works well.
Text and photos by Steve Howe
Need a primer on knot tying terminology? Click here.