Published December 2, 2021 12:36PM
Take Your Trail Views Home With These Beginner-Friendly Art Skills
They say a picture is worth a thousand words, but what about a painting? Nikki Frumkin walked us through watercolor art for backpackers.
(Photo: Nikki Frumkin)
Painting is a magical way to capture the feeling of a place—especially in the wilderness, where the light is constantly changing, the wind might be blowing, and there are infinite small details to discover. It offers hikers a chance to observe the landscape in new ways, and to notice things they might otherwise miss. Observing your surroundings on the hike makes it easier to focus on the moment, and you might even lose track of time for a bit.
You don’t have to be an expert to give painting a shot; you just have to be willing to embrace the discomfort of trying something new.
Step 1: To keep it simple, don’t even start with paint. Grab a pencil and go outside. Head to the nearest patch of green space: a sidewalk, a state park, or the mountains on your next backpacking trip. There is so much to see and process outside, and art can be a great way to study it.
Step 2: What captures your attention? Does your gaze linger on things close to you or far away? Are you drawn to small details, or do you prefer to take in the whole landscape at once? There are no wrong answers; just notice what you like to look at and start there.
Step 3: Try a sketch. I like to begin with a contour drawing because it is such a simple way to look at something. Make an outline of what you see without lifting the tip of your pen or pencil from the page. Keep the pencil going in one continuous line and don’t erase anything. There are no mistakes—keep going as long as it is fun. Then, repeat the process a few times. Keep the whole drawing smaller than your hand, and try a few different versions to see what is most exciting for you.
ADVERTISEMENT
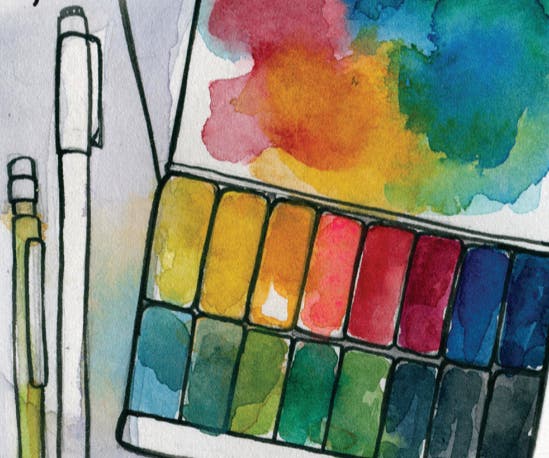
Supplies
Your materials will not add much weight to your pack because you don’t need a lot. Start with what you already have, like a pencil or an old marker and a few sheets of paper. From there you can build up to a full watercolor set:
- Watercolor palette filled with paint
- Mechanical pencil with an eraser
- Waterproof pen
- Big, thumb-size brush for broad-stroke painting
- Two small, sealable water containers (One for clean water, and one for packing out your paint water)
- Loose watercolor paper or a mixed-media sketchbook, like the Stillman and Birn Beta Series
- Paper towel for cleaning up messes
- Something to carry it all in (I use Art Toolkit’s carrying case, but a freezer bag works well, too)
Leave No Trace: Remember, pack out everything you pack in.
Gather your senses
A place is more than what it looks like. The mood of a place is influenced by sounds, smells, and even temperature. Close your eyes for a few minutes and think about what you feel on your skin and under your feet. What do you smell and hear? Make a few notes on the page next to your contour drawing. This information can influence your painting later.
ADVERTISEMENT
Now that you’ve made a few sketches, it’s time to try adding in some watercolor and ink. Watercolors are luminous and soft, whereas ink is opaque and has hard edges. Together, they create a fun contrast. This combo is also great for mountain art because it can make for a very speedy painting. Take five minutes to paint over a snack break, or spend an hour as the sun rises. Either way, you’ll have a memory that pops on the page.
Learn your watercolor techniques
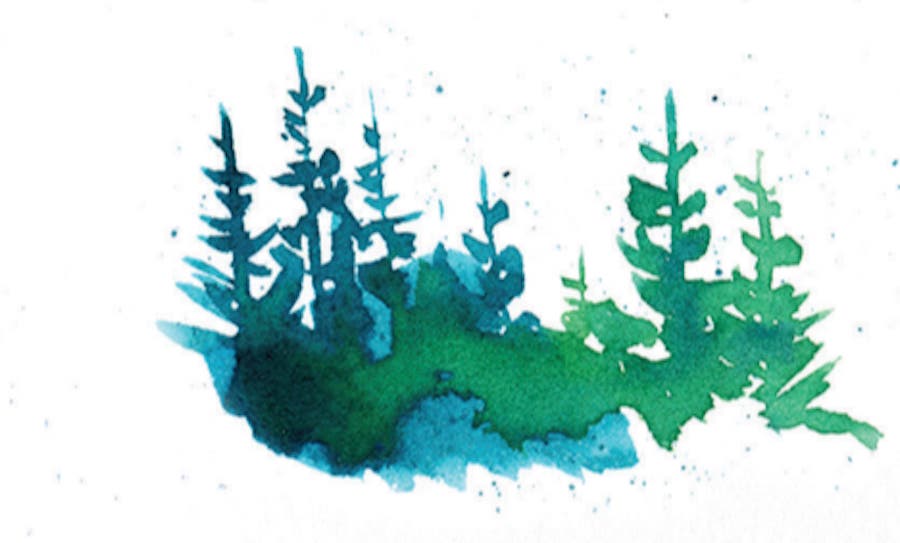
Wet on wet: Dampen your whole page with a big brush and add some color into the wet area. Your colors will blend and explode on the paper. Add more color and water to see what happens. Tilt your paper and see where the paint travels. This is great for covering large areas like a starry night sky, water, a glacier, or a colorful fall leaf.
Wet on dry: Use this technique when you want more control. Load up your biggest paintbrush with watercolor and draw with it on a dry page like a marker. This approach is best for details, objects close to you, or anything with a defined edge.
Layering: This is the key if you feel like your painting is missing something. Adding layers can give your work depth and make it feel glowy. Choose an area of your painting, like the sky made using your wet on wet technique. Once it’s dry, paint a second layer. You can do the same process again or use different colors or a new technique. I usually paint at least three layers, especially in places I’m scared to go back over again. Be brave!
ADVERTISEMENT
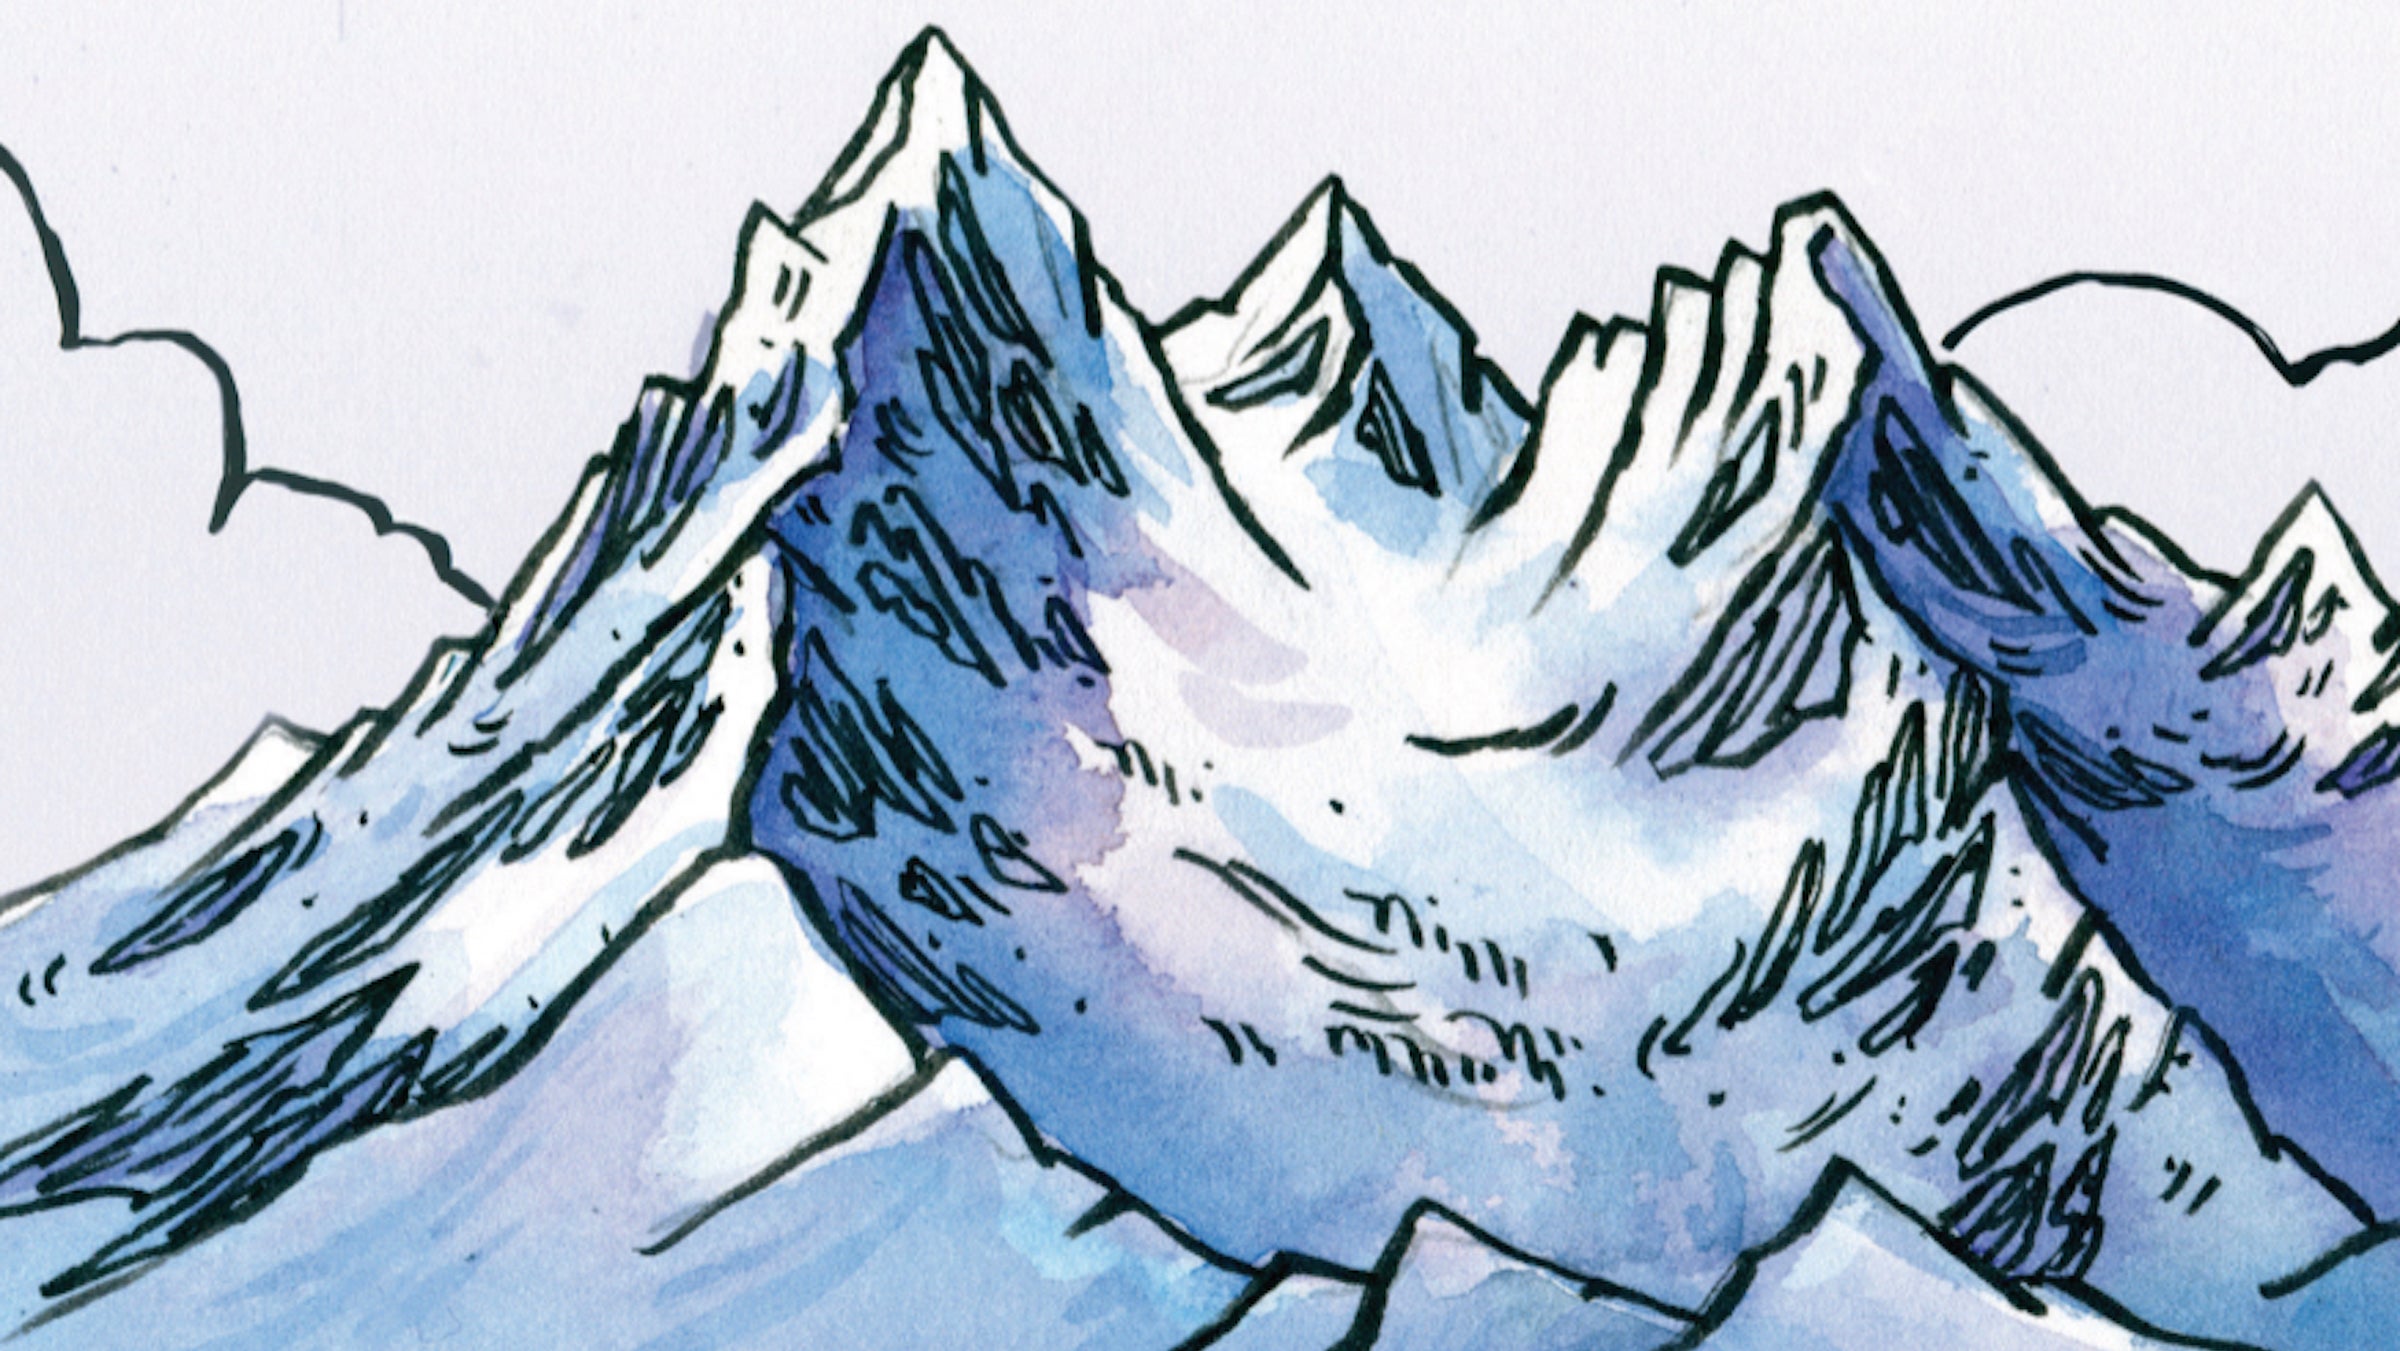
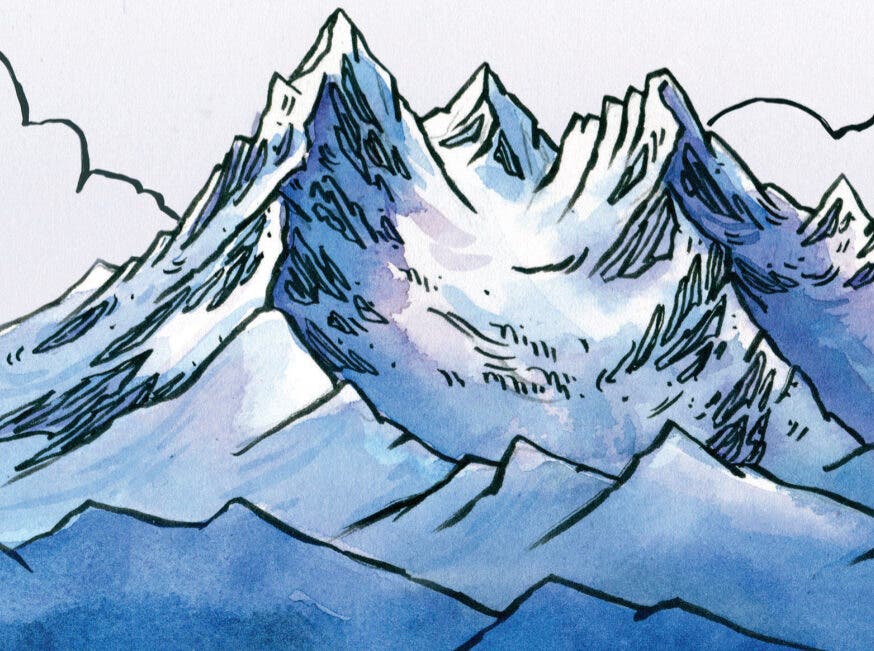
Use ink to outline the ridges of a mountain
Choose a piece of paper and get it really wet. There should be a puddle on your page. Add in two to three of your favorite colors and see what happens. Does anything surprise you? Do some colors act differently than others? As your page dries, see what happens when you add another layer. Does the paint look different? Does it feel different?
Now it’s time to add ink. Pen ink is very dark compared to the translucency of watercolor, so it captures your attention. Because of this, ink can be used for emphasis or to help a viewer’s eye travel around the page. Try using your pen in places where you want people to focus, kind of like following a trail through the painting. What are you most inspired to look at? Mountain ridges, snowfields, a wildflower, clouds? Use your ink there first to draw attention to your favorite parts.
ADVERTISEMENT
Step 1: Pick a mountain that you love, either that you can see or from a picture. Make a pencil contour drawing of it like we did before. Then, with your pen, start where the mountain meets the sky and outline just that part.
Step 2: Imagine you were going to drop a ball off the top of the mountain/the line you just made. Hold your pen loosely and let it travel or bounce it’s way down those ridges. These lines will create volume.
Step 3: Now add in some details, like the shape of a rock formation or the pattern of tiny trees growing far away.
Step 4: Hold it back so you can see the little mountain you just made.
ADVERTISEMENT
Pack out your paintings
Watercolor dries fast, so odds are you can tuck your art in the top lid of your pack or against the frame at your back. If your painting is too big to fit in your backpack, use a bit of cordage to tie it to the outside.
Now that you have tried watercolor and ink a few times, you are ready to keep practicing on your adventures. Have fun! Embrace mistakes. Maybe they will turn out better than anything you could have planned.
ADVERTISEMENT
You don’t have to paint exactly what you see. Exaggerate your favorite parts, or leave out the things you just aren’t interested in. Paint what a place feels like, not just what it looks like. Embrace the chaos. If it’s raining while you paint, the rain drops can add some fun textures to your paper, and so can snow. Seek out some iffy weather and see what it adds to your art.
Take a picture of your painting in front of the landscape for memories. Tag #drawntohighplaces and @backpackermag on Instagram so we can see it!
Nikki Frumkin is a watercolor artist and climber based in the PNW. Her work is created on hiking and climbing adventures as a way to capture the movement and magic of time spent outside. Find more at drawntohighplaces.com and follow her adventures on Instagram at @drawntohighplaces.