Published November 9, 2022 02:46PM
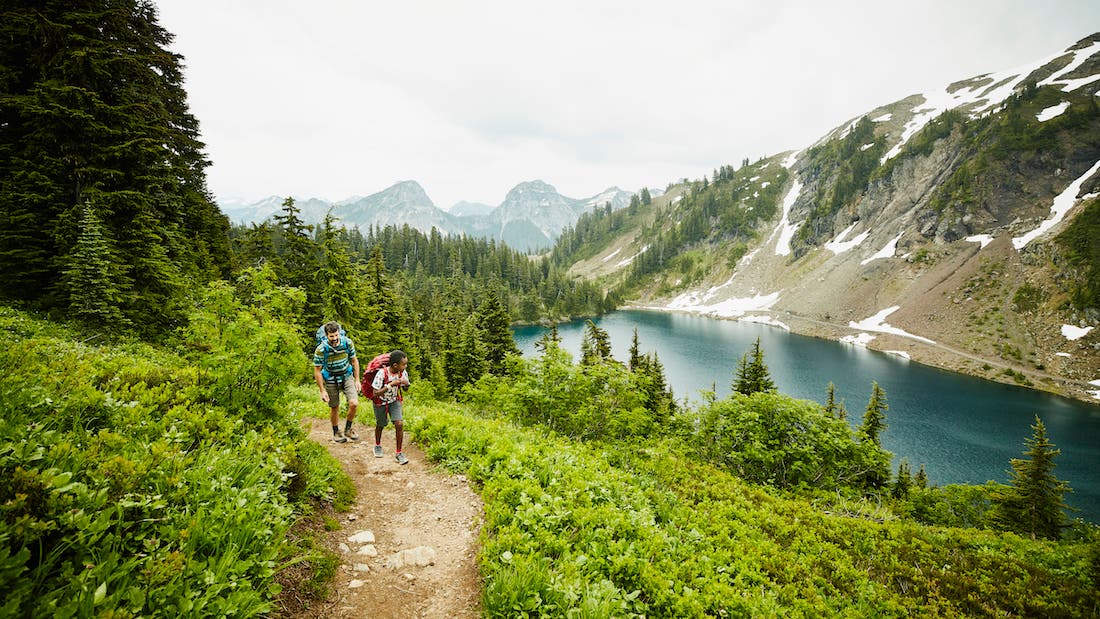
Get Fit for Your First 100-Mile Backpacking Trip
Here’s how to prep your body for linking big days.

(Photo: Jordan Siemens via Getty Images)
You’ve scored the vacation time to take that two-week trip of your dreams. Only problem? You’ve never hiked triple-digit miles in one go.
The Expert: Marcus Shapiro is a fitness trainer and founder of Fit For Trips. He’s crafted over a thousand training programs for backpackers, targeted at unique itineraries in over 30 countries.
The Big Four
When it comes to training for long hikes, there are four exercises that are most effective: walking far, walking inclines, walking stairs, and walking lunges. Here’s why each one is important.
Walking Far
This one might seem obvious, but before you hit the trail, you need to increase durability in your feet, ankles, knees, and hips. It’s conventional wisdom to think of exercise as challenging your heart, lungs, and muscles. But walking far is not intended to be aerobically challenging: The goal is to get in maximum steps per session. Be mindful of how you increase distance from week to week. Overdo it, and you’ll risk developing plantar fasciitis, tendonitis around the knee joint, or inflammation around the hip joint.
ADVERTISEMENT
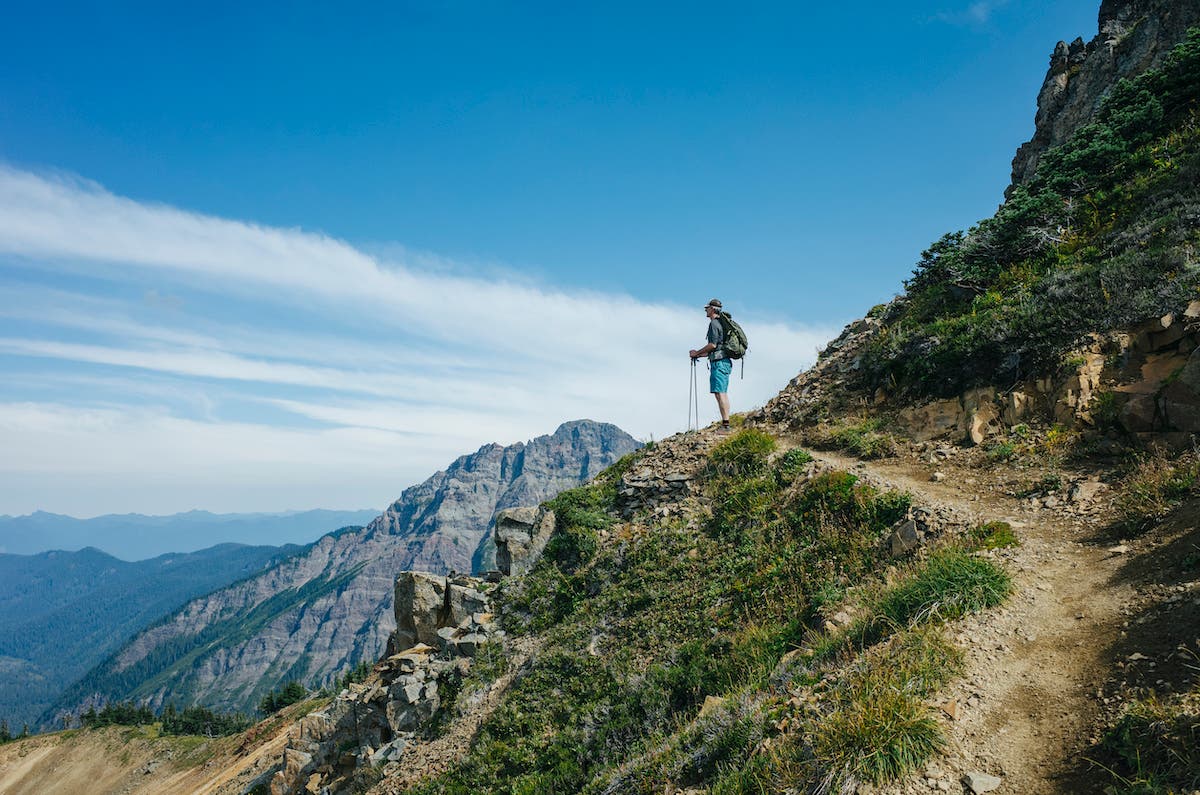
Walking Inclines
Training on a tilted treadmill will lengthen and strengthen your Achilles tendons, calves, and plantar fasciae so you can crush elevation on the trail without pain. Seek out hills or use a treadmill: Exclusively training on flat terrain won’t prepare your lower legs for inclines on the trail. Treadmill training does not provide the same stresses as an actual hill, but it does allow you to maintain a steady incline for long durations.
Walking Stairs
You can develop strength and endurance indoors to tolerate challenging ascents and descents. Repetitive movement builds the self-assurance, surefootedness, and stability to go downhill safely, while ascending stairs allows you to gain elevation at a fast rate, which is great for training when paired with incline walking.
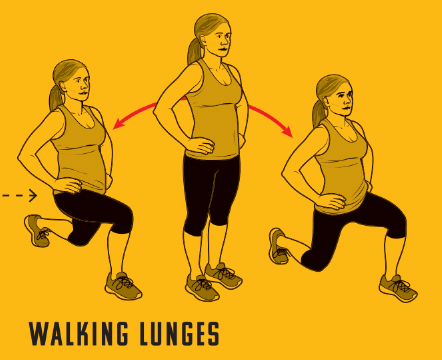
Walking Lunges
This exercise develops strength in muscles that cross the knee and hip joints and assures that you can step up onto high rocks and ledges. It also engages your glutes, which provide assistance to your quads while you step up, and builds strength through a full range of motion in your hips and knees to reduce the chance of leg and low-back injuries.
ADVERTISEMENT
Tips For Success
- First rule of thumb: Do no harm. Getting hurt is not cool. Dial back intensity, distance, or pack weight when you feel unusual or persistent pain.
- Address any nagging injuries before and certainly during your training. If you need, go see a physical therapist. A PT’s responsibility is to decrease pain and restore function.
- Use hiking poles during every short and long hike to limit the stress on your joints. Training with poles is especially important if you’ll use them on your hike.
- Any form of exercise poses a risk of injury. This is an aggressive program that requires you to be mindful so you can avoid developing inflammation in joints, muscles, or tendons. Address lingering pain immediately by visiting an orthopedic physician.
- In most cases, you can continue to train if inflammation occurs.
- Swimming is a good option if you are unable to perform weight-bearing activities due to foot, ankle, knee, or hip issues. Train your core and upper body if you are nursing inflammation in your lower body. Ask your orthopedist or PT how to continue to train if you are managing injuries.
Test Your Fitness With These Base-Building Goals
Stairs: 60 minutes up and down at a steady pace, minimal rest
Hike: 10 miles with a full pack
Treadmill: 3 miles at a 12% incline with 1/2 pack weight (base your pack weight on the load you will carry on your backpacking trip), or ascending hill repeats with 1/2 pack weight in 1 hour
Walking Lunges: Three sets of 30 paces holding 10-pound dumbbells
ADVERTISEMENT
How To Build Your Base
This training plan follows two phases: the Base Phase and the Peak Phase. The latter is designed to prepare you for a 100-mile backpacking trip, but may be stressful on the tendons and muscles of hikers without strong base fitness. The Base Phase will get your body up to speed for the Peak Phase by developing durability.
Not sure where to begin? The following exercises will help you determine whether you should spend time building your base or if you are ready to jump directly into the Peak workouts. If you can accomplish each Base-Building Goal (see below) in one week without experiencing soreness, move on to the Peak plan. Otherwise, follow the weekly routine of the Base Phase until you can perform them without soreness. Most hikers will need to focus on building a base level of fitness for at least eight weeks before ramping up the intensity.
ADVERTISEMENT
Cross-reference the workout plan below with these drills.
Incline Treadmill With No Pack
Over 5 minutes, gradually work up to a 5% incline and walk a total of 2 miles at a moderate pace. Increase 1% incline and/or 5% to 10% distance each week.
Incline Treadmill With Weighted Pack
Wearing a weighted pack, gradually work up to a 5% incline over 10 minutes. Walk a total of 2 miles. Start with a 10-pound pack, and increase incline by 1% and/or your distances by 5% to 10%. Increase pack weight by 10% each week.
Short Walk Or Hike With a Heavy Pack
Walk 2 to 4 miles with a 15-pound pack. The goal is to build up to the weight you’ll carry on your trip, then increase by 10% each week while keeping distance consistent.
ADVERTISEMENT
Walk Stairs
Start by walking up and down stairs for 15 to 30 minutes. You need to see how your knees and Achilles tolerate the rigor, so be mindful of discomfort. Always take single stairs descending, but you may take single or double stairs ascending. Increase by 5 minutes each week.
Ascending Hill Repeats
Briskly walk or jog uphill (the longer and steeper the better). Walk at a normal pace downhill. Move continuously for 15 to 30 minutes, keeping track of laps so you get a baseline for how many you can accomplish. Increase by five minutes each week.
Long Hike With Weighted Pack
As you get closer to your departure date, focus on your pack-carrying chops and you will start to feel strong and confident. Start with a 10- to 15-pound pack. Increase weight by 10% or by 5 pounds weekly if you want to be more aggressive.
ADVERTISEMENT
Walking Lunges
Start by performing walking lunges with bodyweight. You can injure your knees and hips if you add weight too early. When you’re ready to up the difficulty, use 2- to 2.5-pound dumbbells. Increase by 2 to 2.5 pounds every two to four weeks.

Squat Jumps
Perform bodyweight squats, adding a jump, and repeat 10 times for one to two sets. Initially, drop your hips quickly and rise up with speed—don’t actually jump off the ground. Increase the height of the jump over time as well as how quickly you explode back up. Work up to five sets total. If you’re prone to knee problems, eliminate this exercise.
Active Recovery
Walk at an easy pace for a short distance, bike, or perform any cardio at a very light intensity. You should not feel any muscle burn, heavy breathing, or a high heart rate.
ADVERTISEMENT
Core
Perform 10 to 15 minutes of various core exercises such as planks, crunches, leg raises, or mountain climbers. Do each exercise for 15 seconds to one minute, resting 30 seconds between each as needed. Repeat exercises up to three times.
Easy Walking
This is essentially directed active recovery. The idea is to promote healing over moderate distances. Sitting idle is not effective; movement is the best way to recover.
Base-Building Program
Alternate Week A and Week B until you can accomplish the base-building goals above. Increase your intensity each week; you can jump ahead if it’s too easy. Some weeks you may feel the need to recover instead of increasing difficulty. On recovery weeks, cut work, intensity (i.e., pack weight, incline), and volume (i.e., distance, time) in half. Then you can ramp up the following week.
ADVERTISEMENT
Week A
Monday: Incline treadmill with no pack weight
Tuesday: Short walk or hike (2 to 4 mi) with a heavy pack + walking lunges + squat jumps
Wednesday: Active recovery + core
Thursday: Walk stairs
Friday: Active recovery + core
Saturday: Long hike with weighted pack
Sunday: Active recovery
ADVERTISEMENT
Week B
Monday: Incline treadmill with weighted pack
Tuesday: Short walk or hike with a heavy pack + walking lunges + optional squat jumps
Wednesday: Active recovery + core
Thursday: Ascending hill repeats
Friday: Active recovery + core
Saturday: Long hike with weighted pack
Sunday: Active recovery
ADVERTISEMENT
Peak Program
Week 1
Monday: Incline treadmill with 1/2 weighted pack + walking lunges + squat jumps
Tuesday: 5-mile walk or hike with a heavy pack
Wednesday: Active recovery + core
Thursday: Walk stairs 45 min
Friday: Active recovery + core
Saturday: 5-mile hike with weighted pack
Sunday: 7-mile hike with weighted pack
ADVERTISEMENT
Week 2
Monday: Incline treadmill with 1/2 weighted pack + walking lunges + squat jumps
Tuesday: 5-mile walk or hike with a heavy pack
Wednesday: Active recovery + core
Thursday: Walk stairs 45 min
Friday: Active recovery + core
Saturday: 5-mile hike with weighted pack
Sunday: 7-mile hike with weighted pack
ADVERTISEMENT
Week 3
Monday: Incline treadmill with 1/2 weighted pack + walking lunges + squat jumps
Tuesday: Active recovery
Wednesday: Active recovery + core
Thursday: Ascending hill repeats 1 hr
Friday: Active recovery
Saturday: Walk stairs 1 hr
Sunday: 10-mile hike with weighted pack
ADVERTISEMENT
Week 4
Monday: Active recovery + core
Tuesday: 5-mile walk or hike with a heavy pack + walking lunges + squat jumps
Wednesday: Active recovery + core
Thursday: Active recovery
Friday: Walk stairs 1 hr
Saturday: 15-mile hike with weighted pack
Sunday: 10-mile hike with weighted pack
ADVERTISEMENT
Week 5
Monday: Active recovery + core
Tuesday: 5-mile walk or hike with a heavy pack + walking lunges + squat jumps
Wednesday: Active recovery + core
Thursday: Ascending hill repeats 1 hr (Optional; make sure you feel recovered for Friday and Saturday training)
Friday: Active recovery
Saturday: Walk stairs 2 hrs
Sunday: 12-mile hike with weighted pack
ADVERTISEMENT
Week 6
Monday: Active recovery + core
Tuesday: Active recovery
Wednesday: Active recovery + core
Thursday: Active recovery
Friday: 15-mile hike with weighted pack
Saturday: 10-mile hike with weighted pack
Sunday: 12-mile hike with weighted pack
ADVERTISEMENT
Week 7
Monday: Active recovery
Tuesday: Active recovery + core
Wednesday: Active recovery
Thursday: Active recovery
Friday: 15-mile hike with weighted pack
Saturday: 10-mile hike with weighted pack
Sunday: 12-mile hike with weighted pack
ADVERTISEMENT
Week 8
Monday: Easy walk (no muscle burn)
Tuesday: Easy walk (no muscle burn)
Wednesday: Easy walk (no muscle burn)
Thursday: 1- to 2-mile walk or hike with a pack
Friday: Depart
Saturday: Begin your best backpacking trip ever.
ADVERTISEMENT
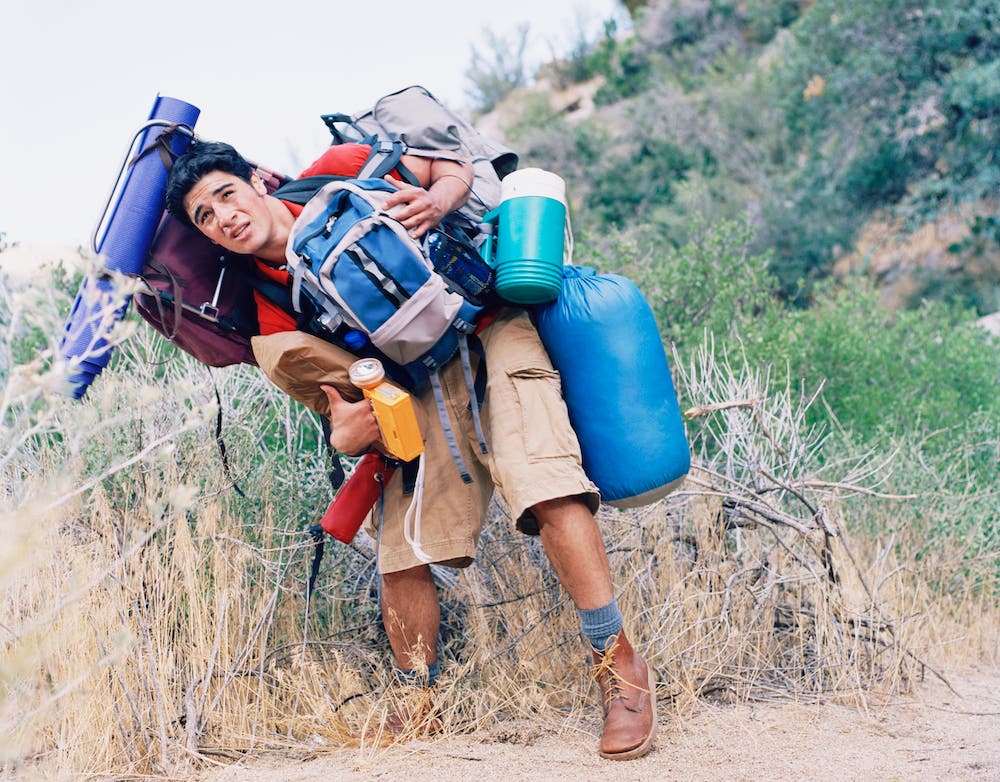
Three Keys To Load Management
By Peter Moore
These pack-management tips from Ellen Dohen, a hiking coach with REI’s flagship store in Denver, will make your pack feel feather-light.
Get Your Pack From Ground To Back
Sure, it’s tempting to yank the shoulder strap of a pack on the ground. But those things are for securing your load, not lifting it, says Dohen. Dohen’s strategy: Flip your pack upside down (toplid on the ground) with the backpanel facing away from you. Rest the pack against your knees. Now bend over, slide both hands down the panel, and grab the top loop, which is engineered to lift heavy loads. Brace your abs and back and stand up, pulling the loop toward your shoulders as you go. Bend a knee and rest the pack on your thigh, then slide your dominant arm through a shoulder strap and rotate the pack around to your back. Slide in the other arm. Cinch the hipbelt so it hugs your hip bones, and go!
ADVERTISEMENT
Don’t Tie Your Shoes With A Heavy Pack On
Bend over fully loaded, and you may never stand up again. Simply reverse the above procedure, tie your shoe, then hoist the pack again.
Avoid Plunging Off A Precipice
With a backpack on, you’re a top-heavy turtle at risk of flipping. That can be a problem if you have to skitter along a narrow trail on the verge of a 1,000-foot drop. Dohen advises you make like a crab and go sideways, with the weighty pack facing in the direction it’s safer to fall, i.e., away from the precipice and toward the comfort of the slope behind you.