Make a Paracord Survival Bracelet

'You will need a small shackle and at least 10ft of paracord. In this example we used 12ft of cord for a size 6 (6 inch) bracelet.'
Step 1
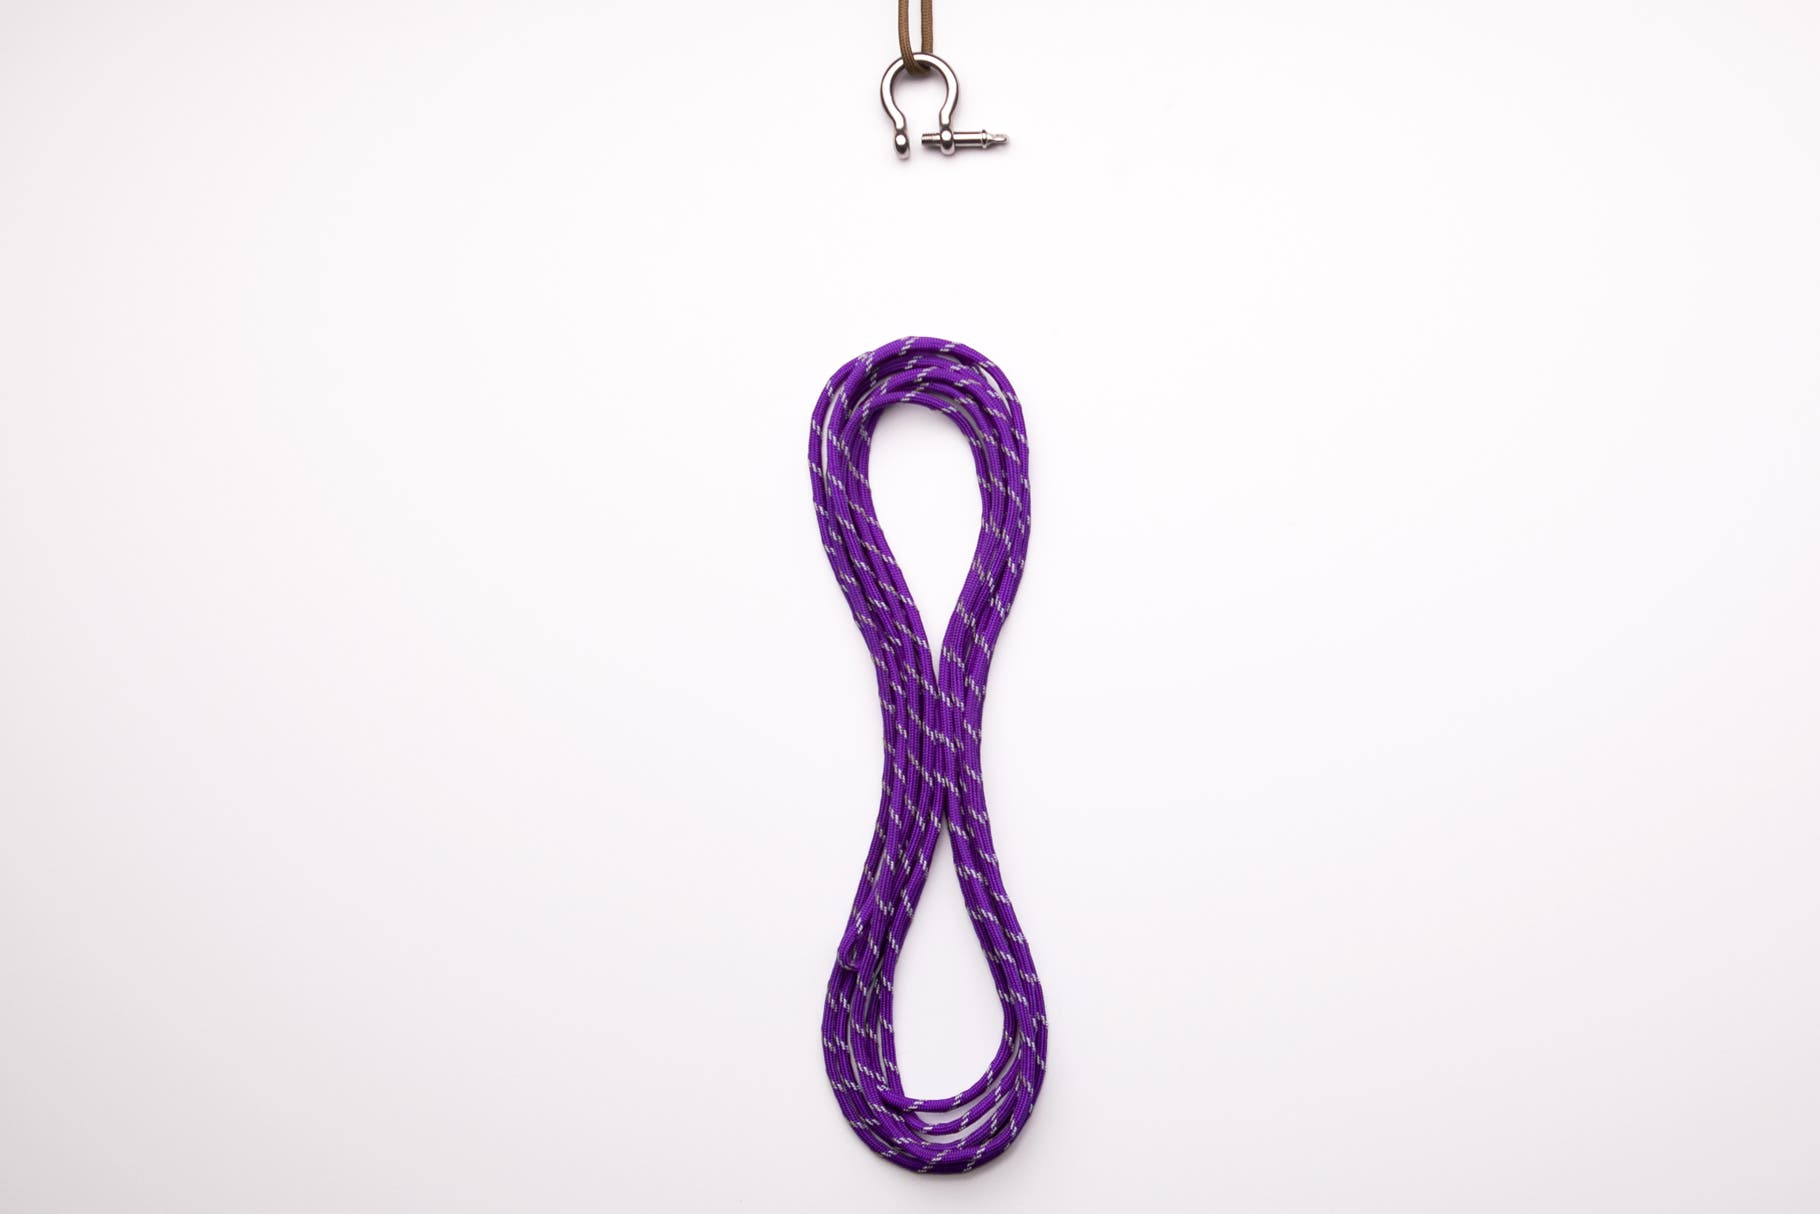
You will need a small shackle and at least 10ft of paracord. In this example we used 12ft of cord for a size 6 (6 inch) bracelet.
Step 2
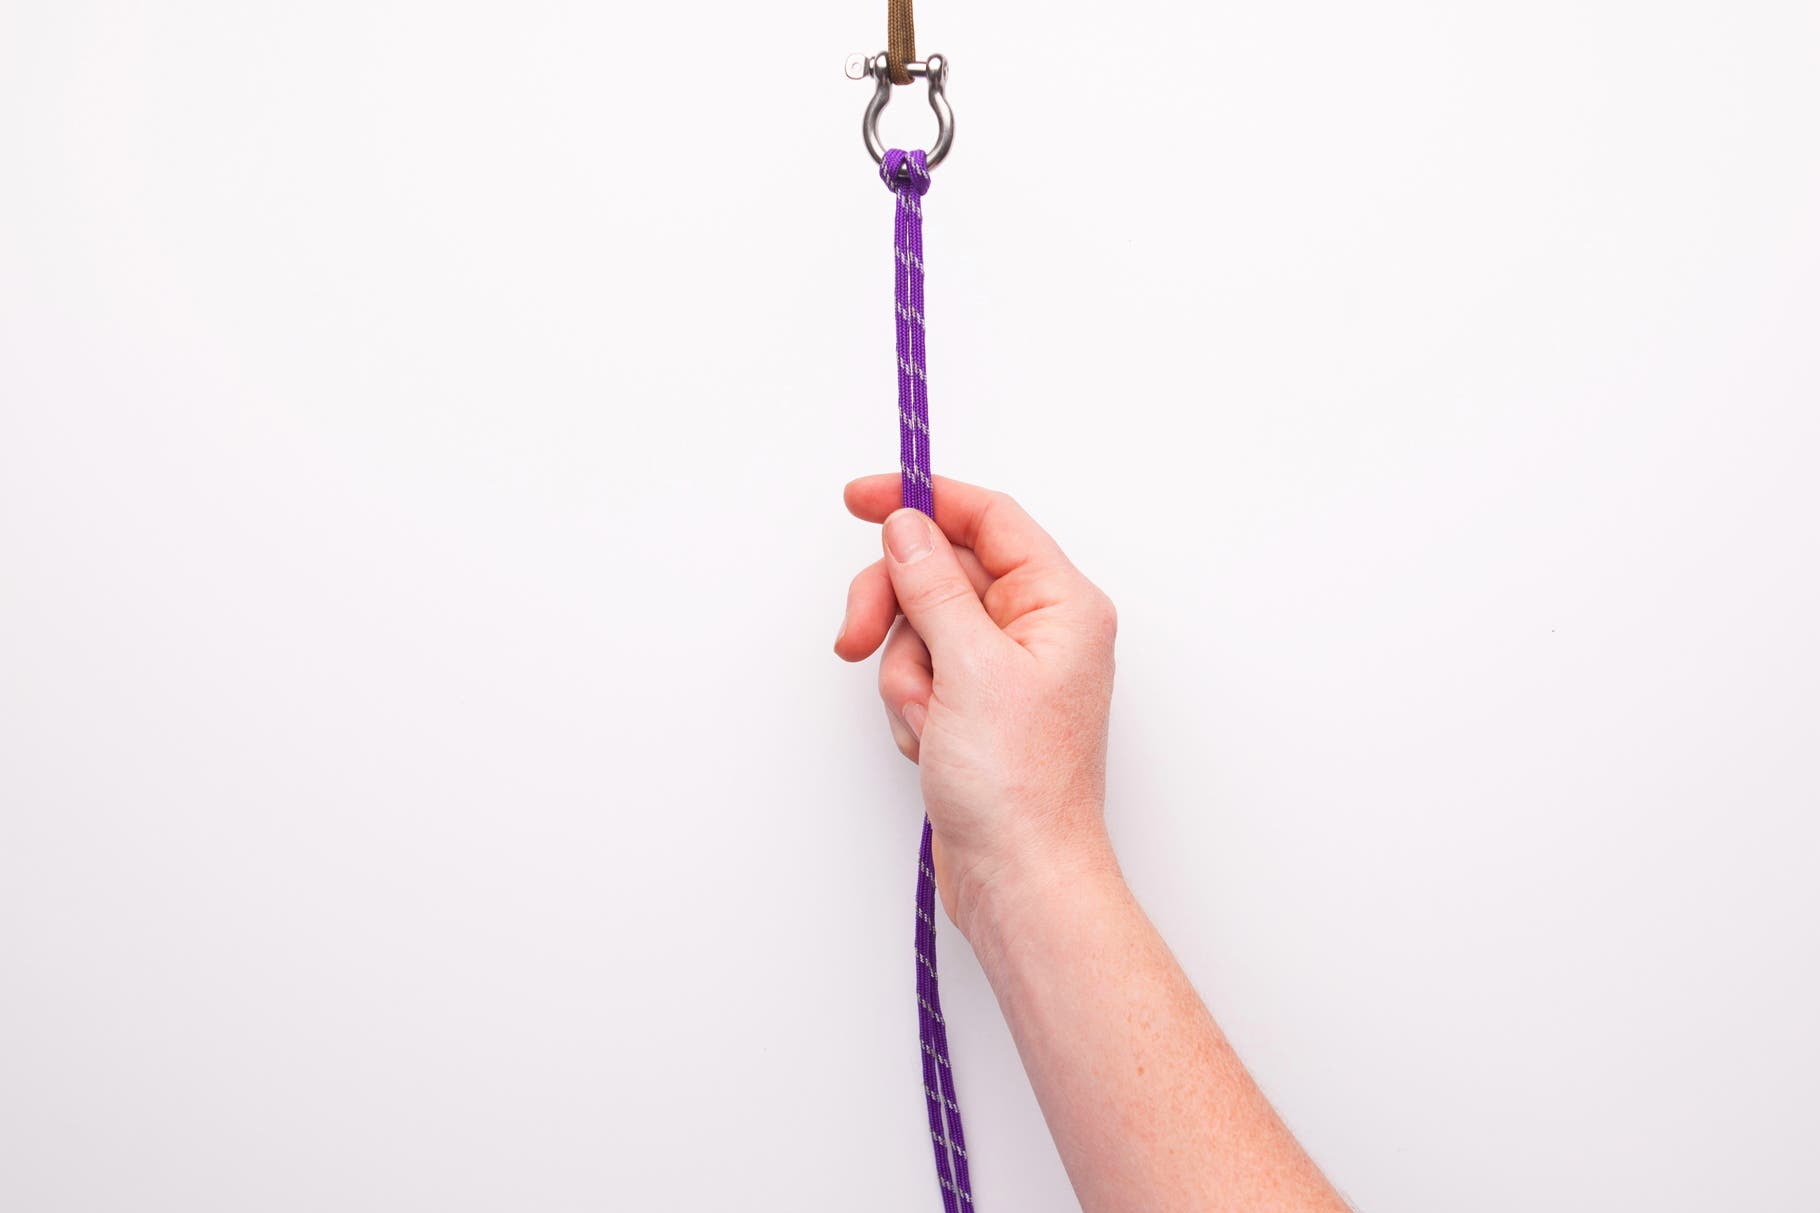
Find the middle point of the cord and fold it evenly in half. Begin by bringing the cord behind and through the shackle. Thread the two ends of the cord through the loop you have just made, creating a girth hitch.
Step 3
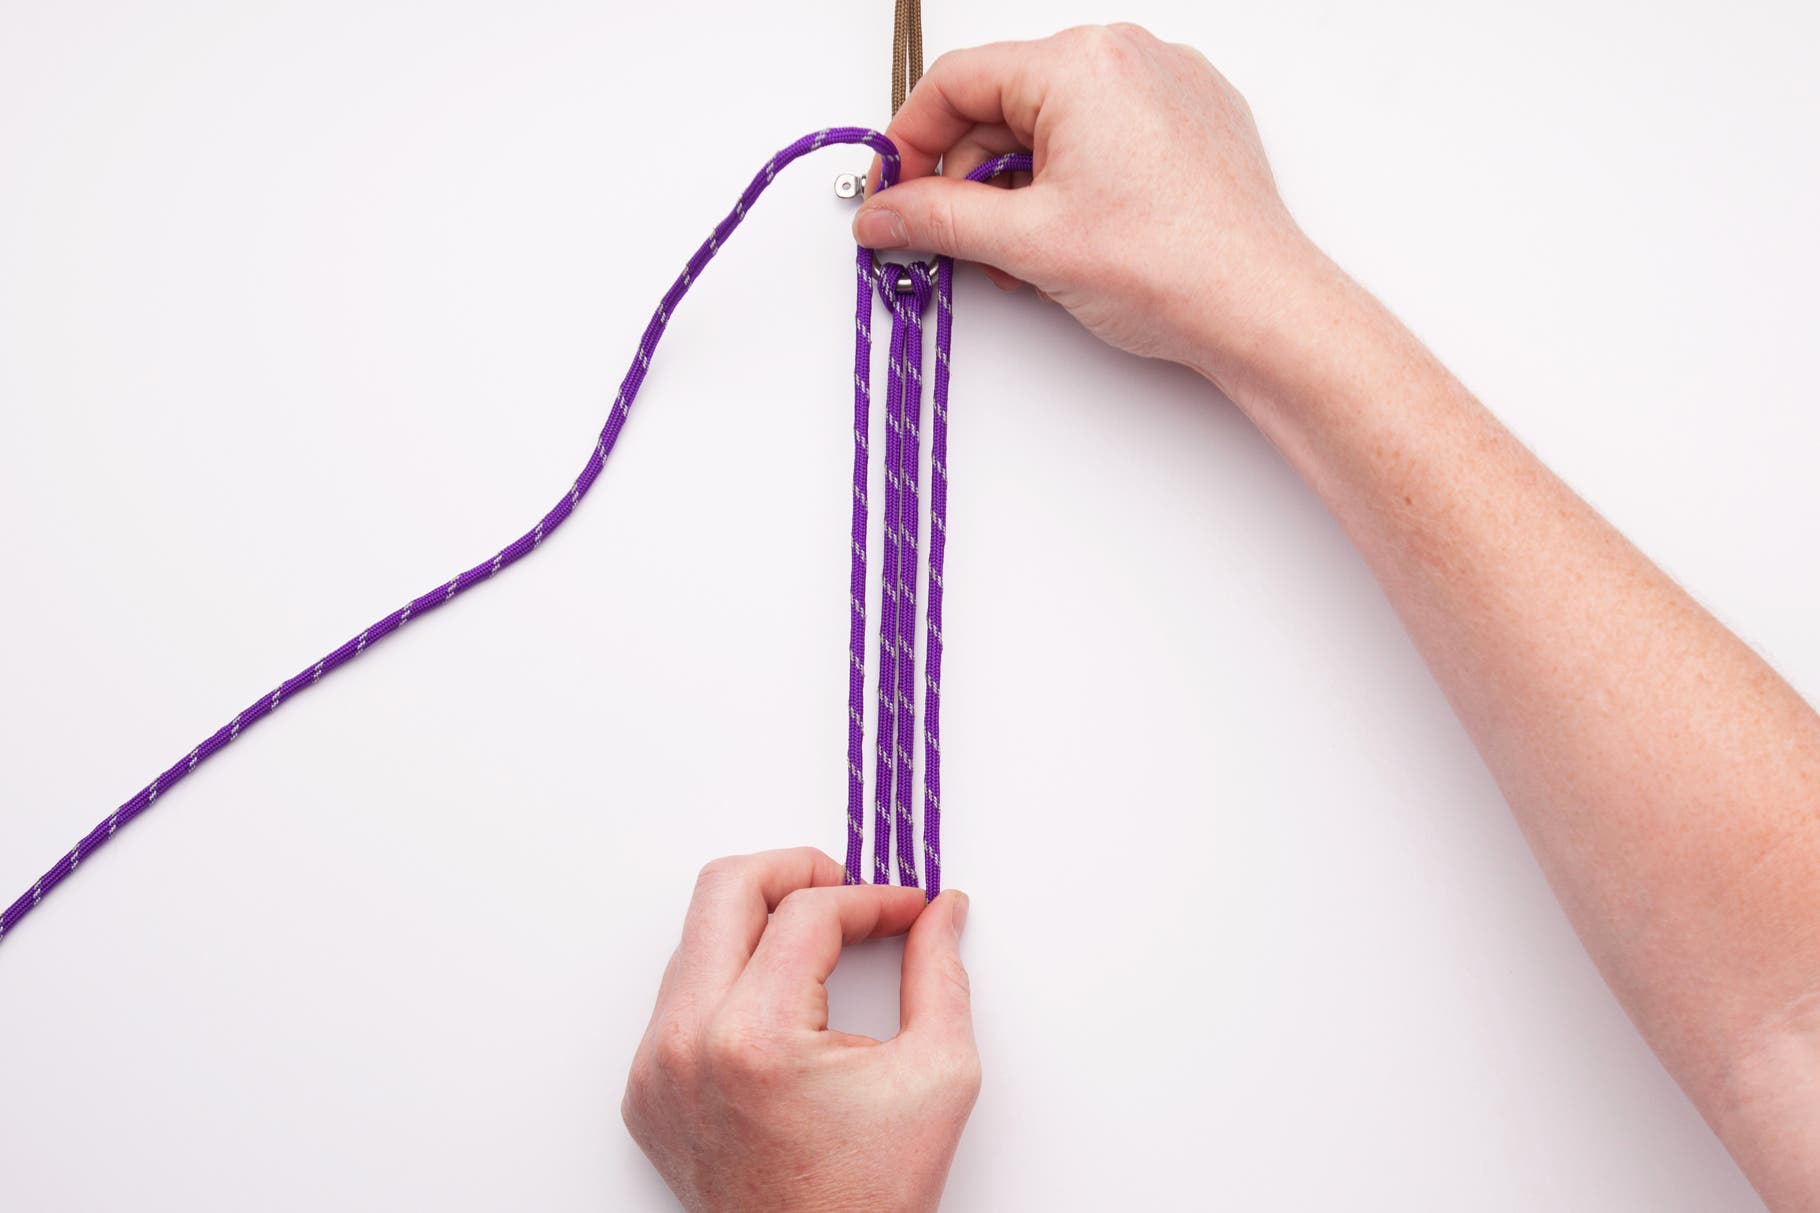
Measure how many inches long you want the bracelet to be. (In this case for a woman we measured six inches) Then proceed to fold the cord at that mark. Separate each long string and fold it back up beside its corresponding short string.
Step 4
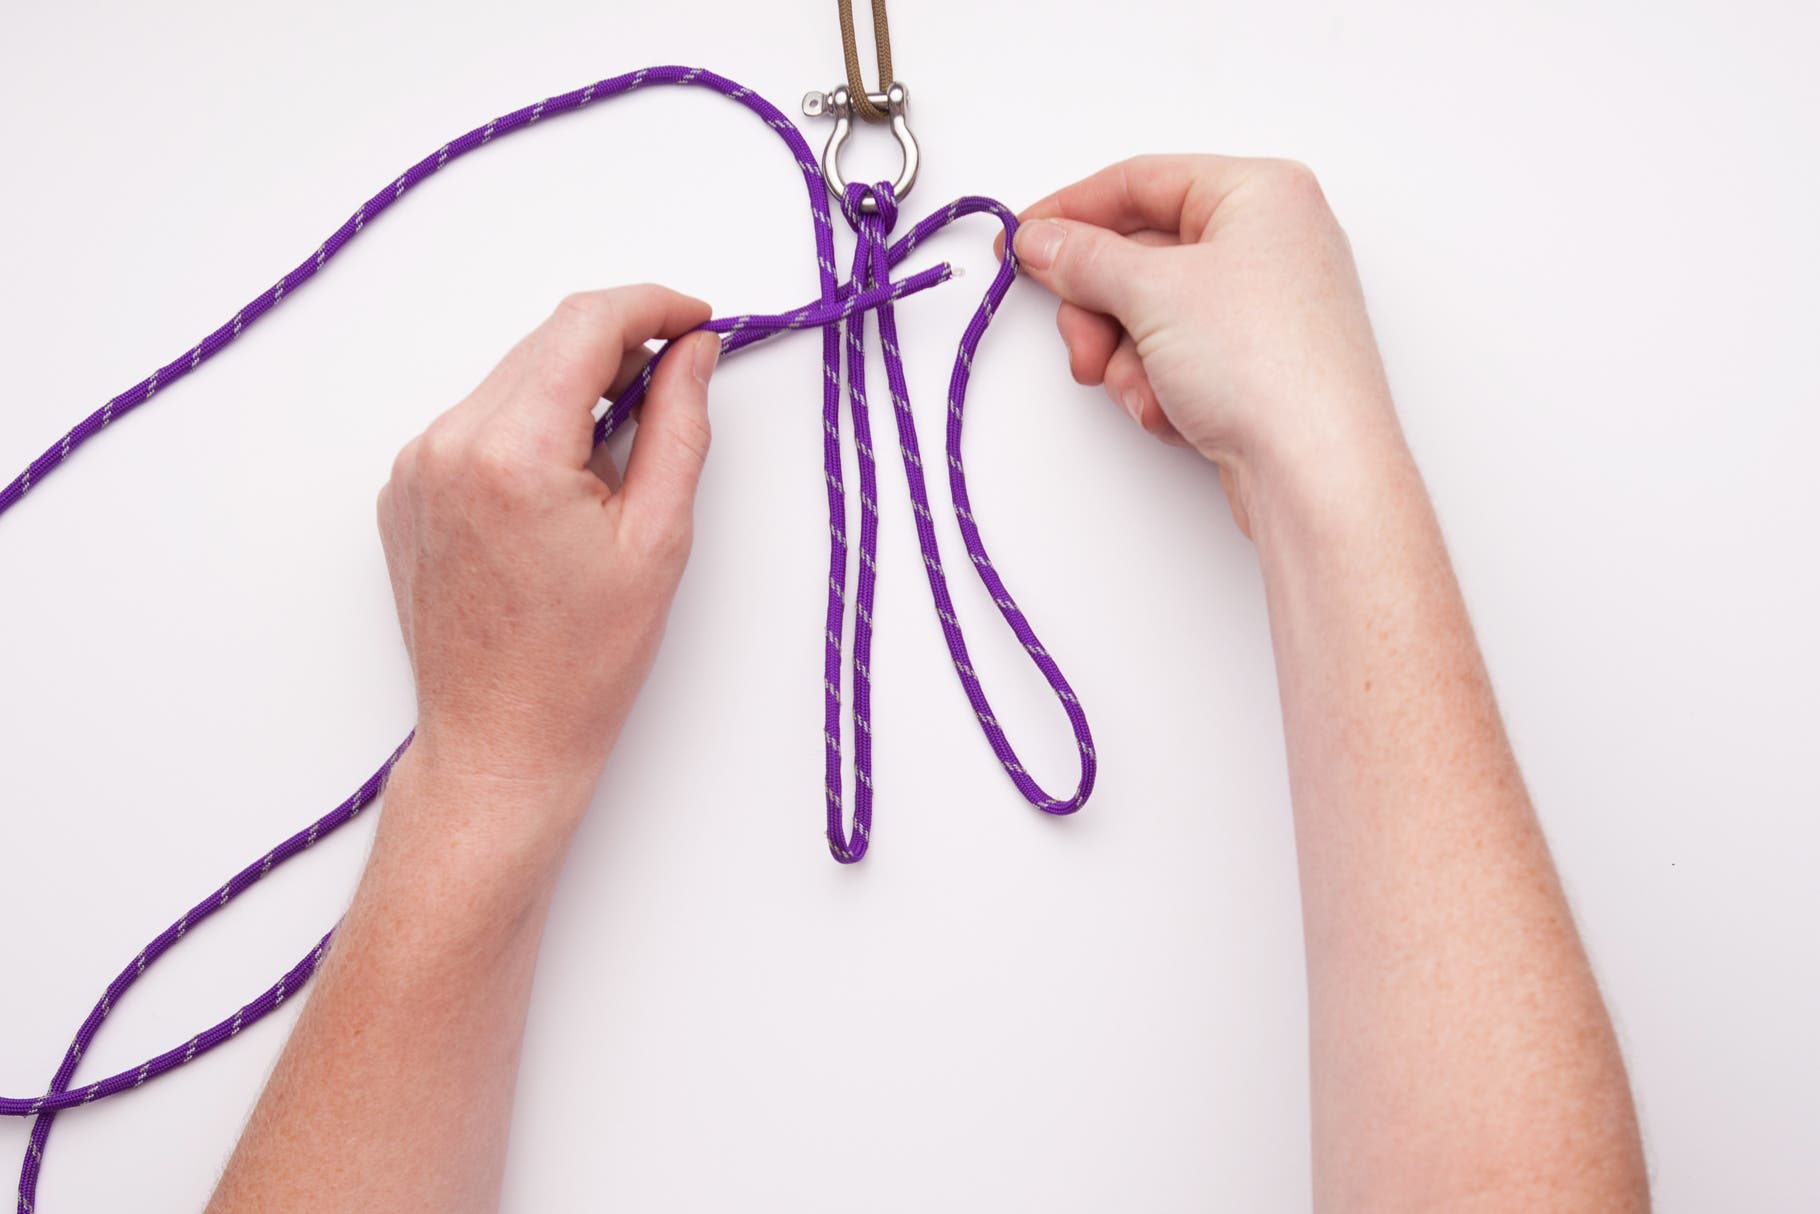
The first two knots are the base of the bracelet. Begin by bringing the longer cord from the right and wrapping it behind all of the other cords, leaving a small loop at the start. Take the end of that same cord and thread it through the loop.
Step 5
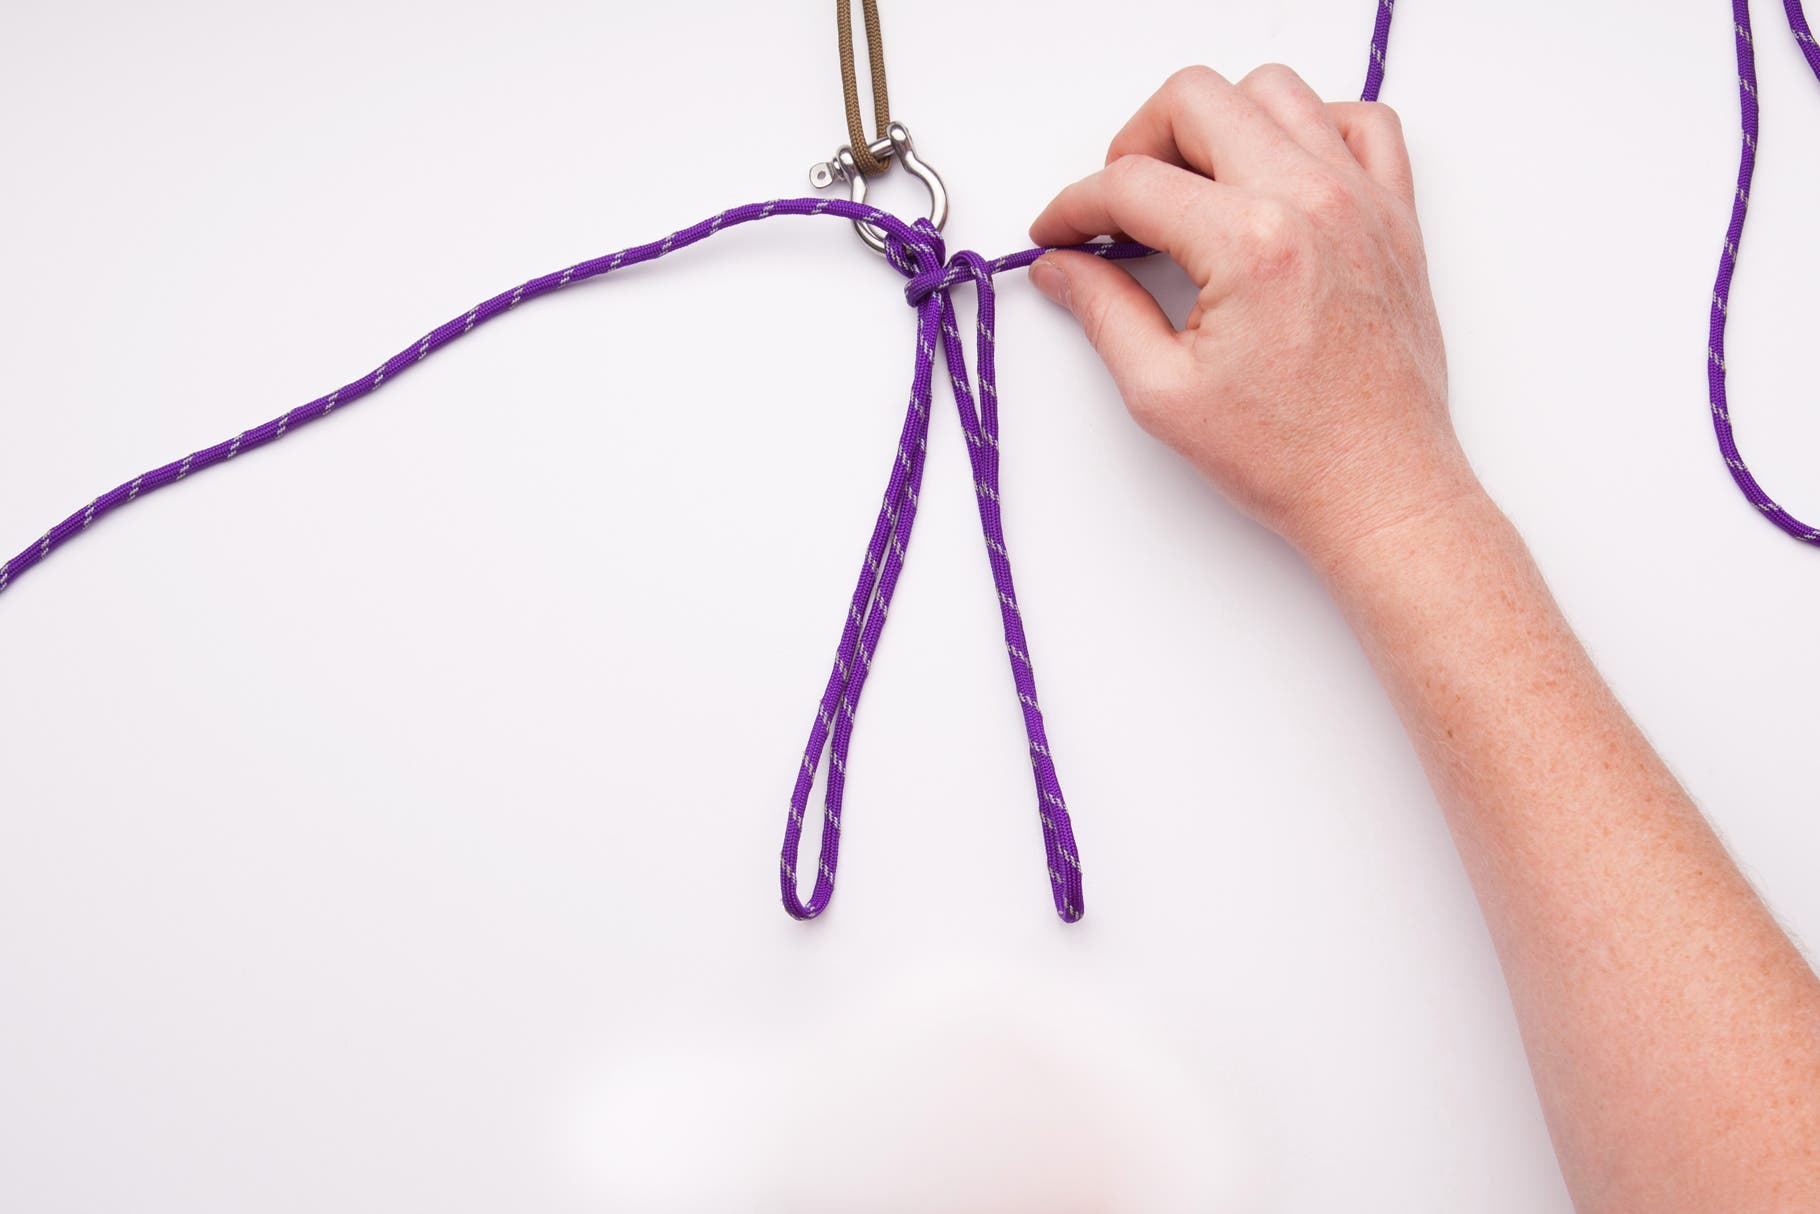
Pull that cord snug against the rest.
Step 6
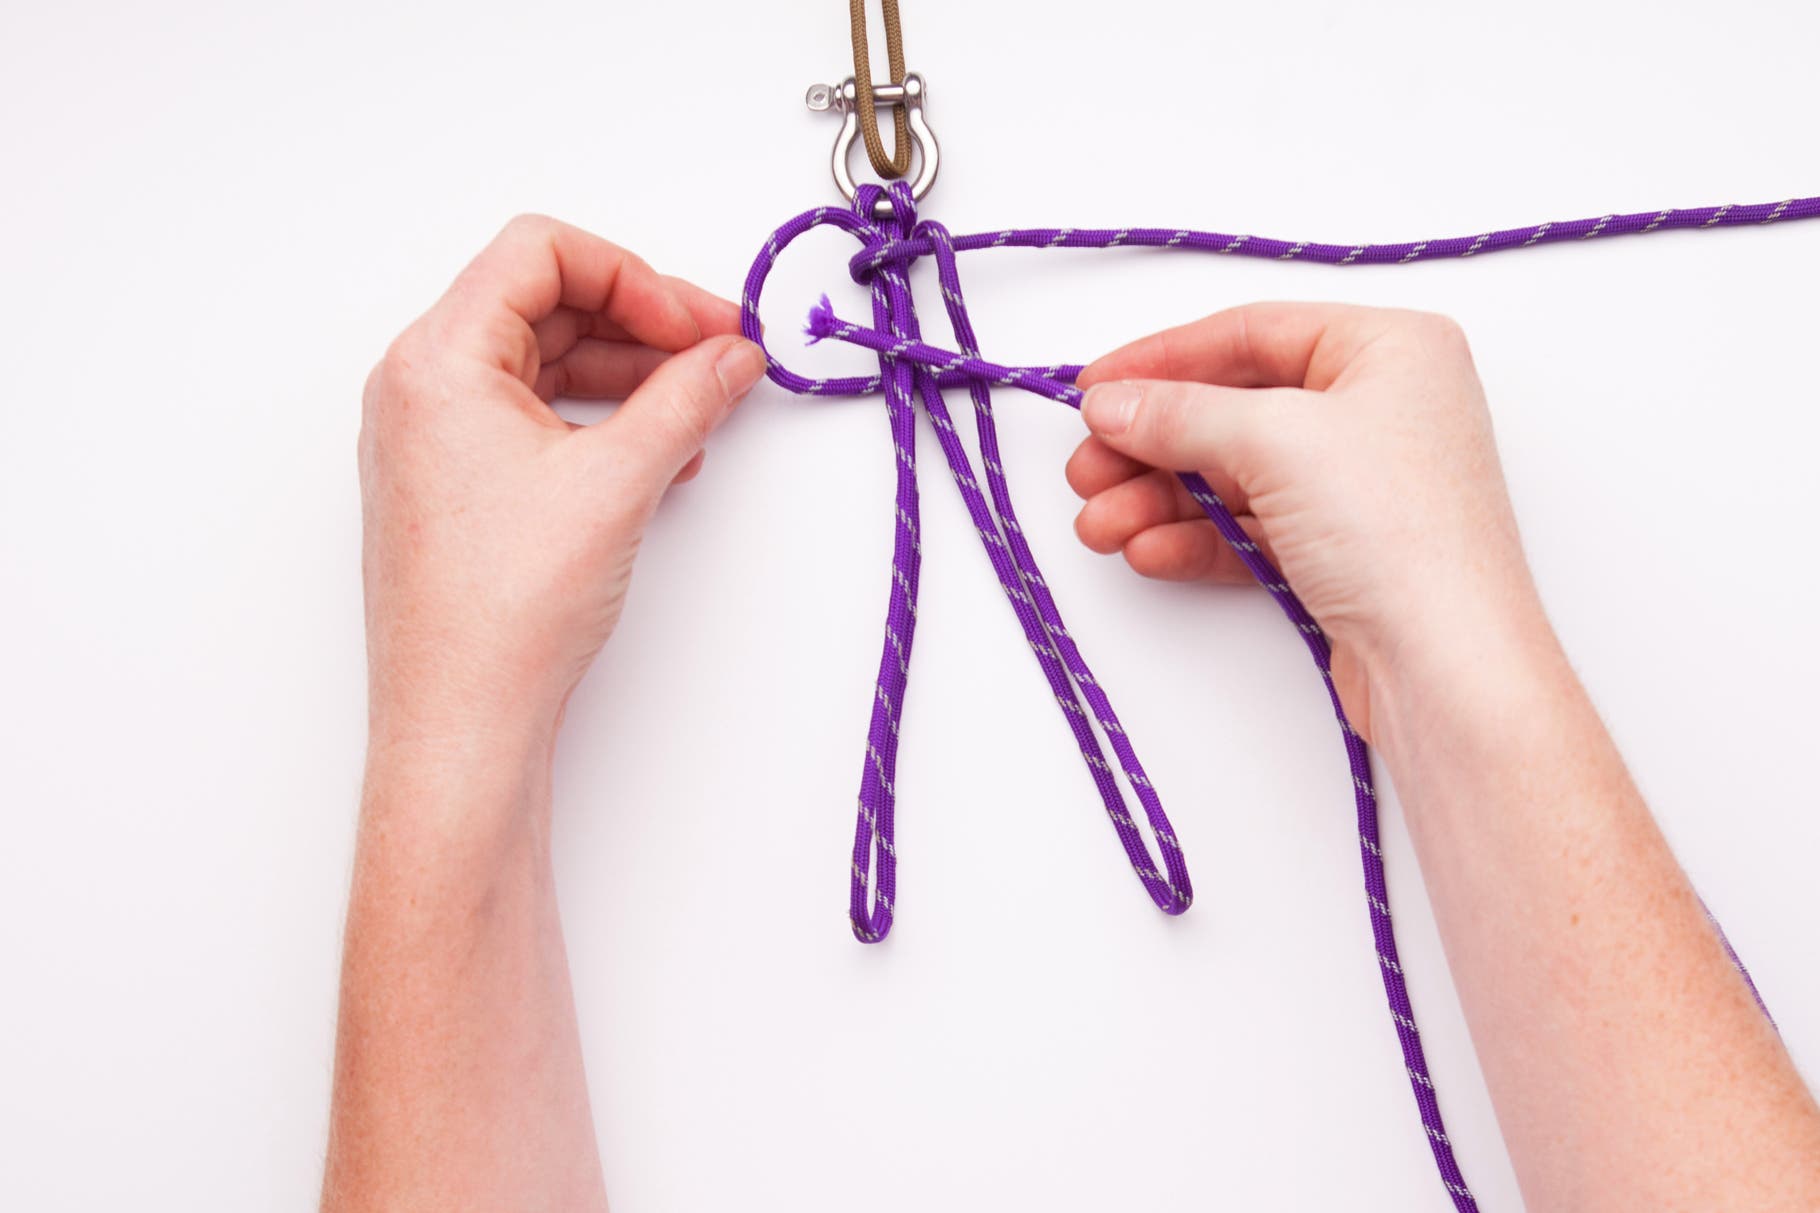
Repeat the process with the left cord.
Step 7
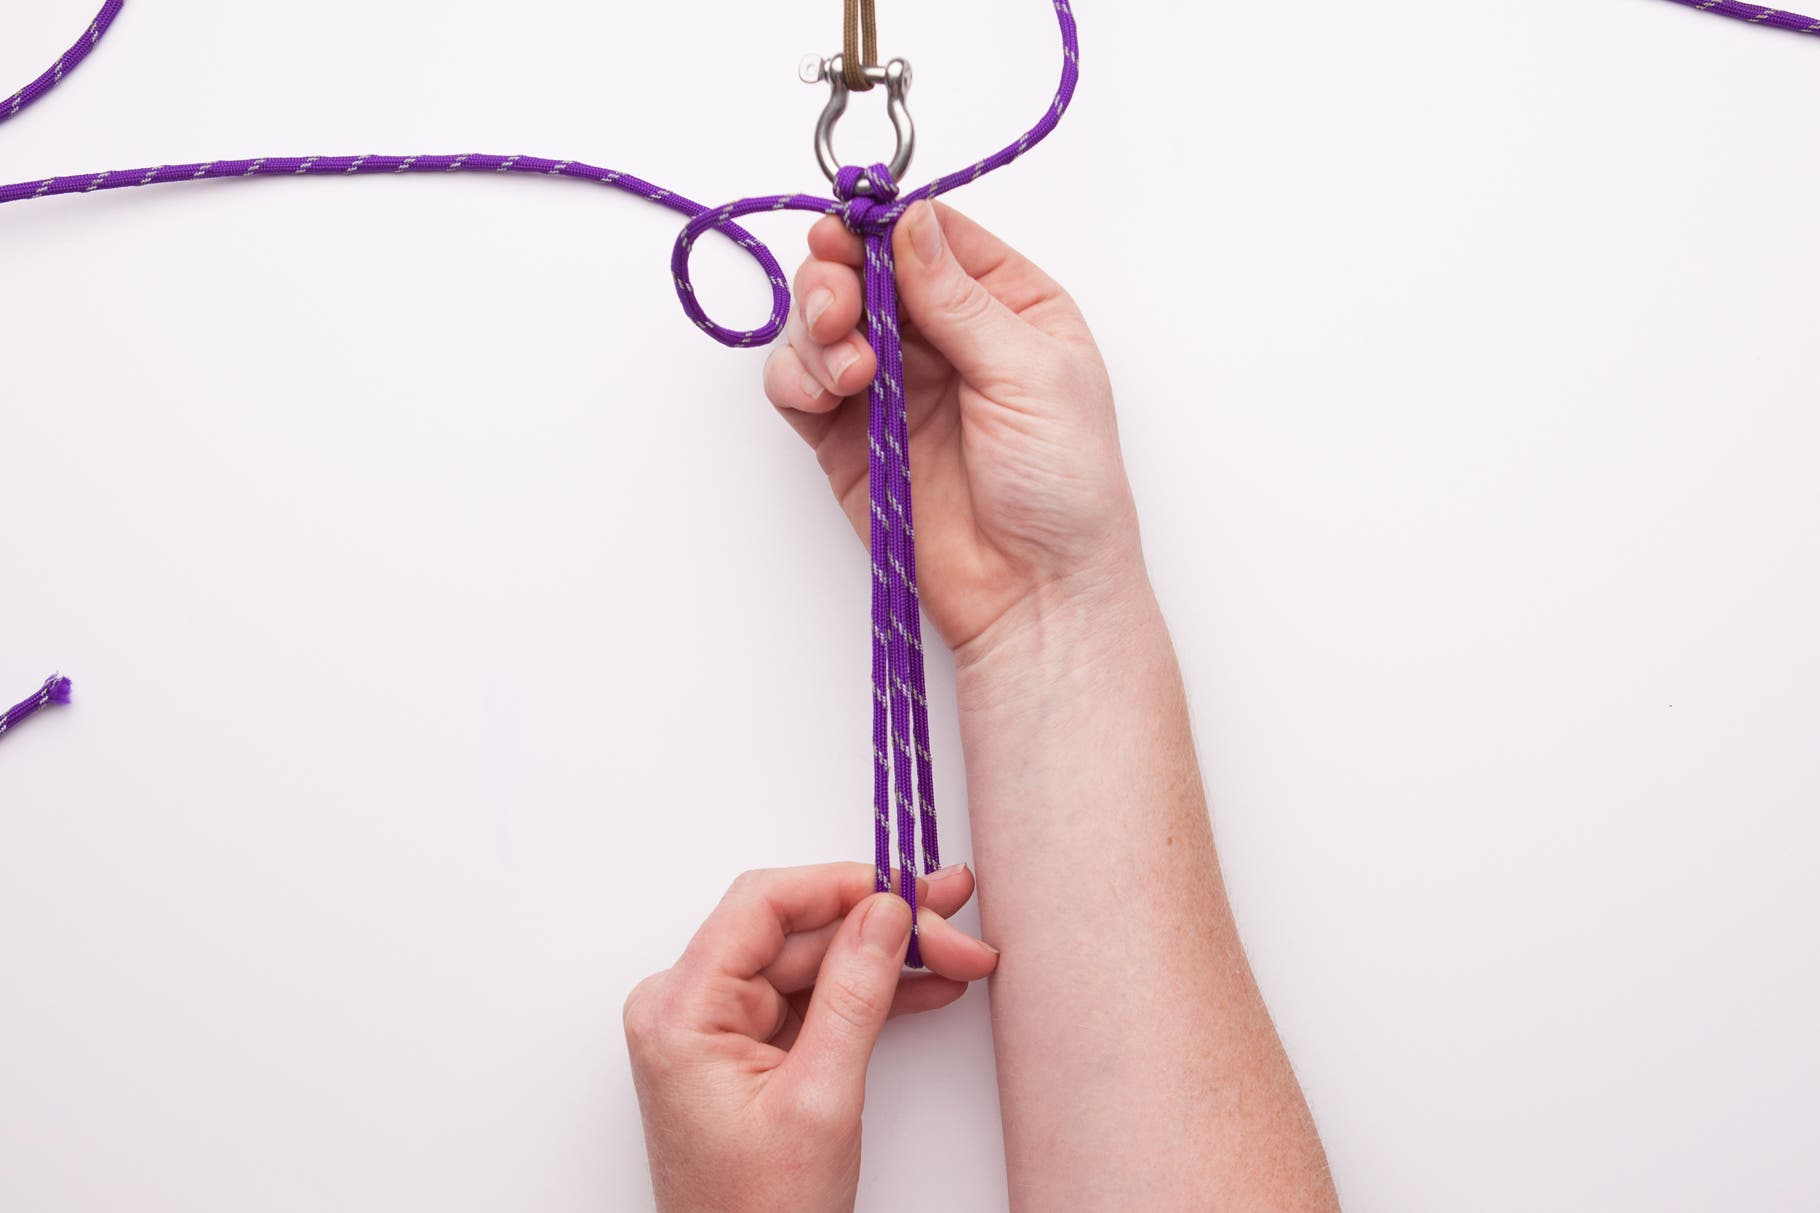
Pull both long cords tight. Push up the knots up toward the shackle.
Step 8

Now that you have a solid base you can begin the repetitive knotting process. Grab the long cord on the right, wrap it in front of the middle cords and around the back, leaving a small loop. Thread the end of that same cord through the loop from the back.
Step 9
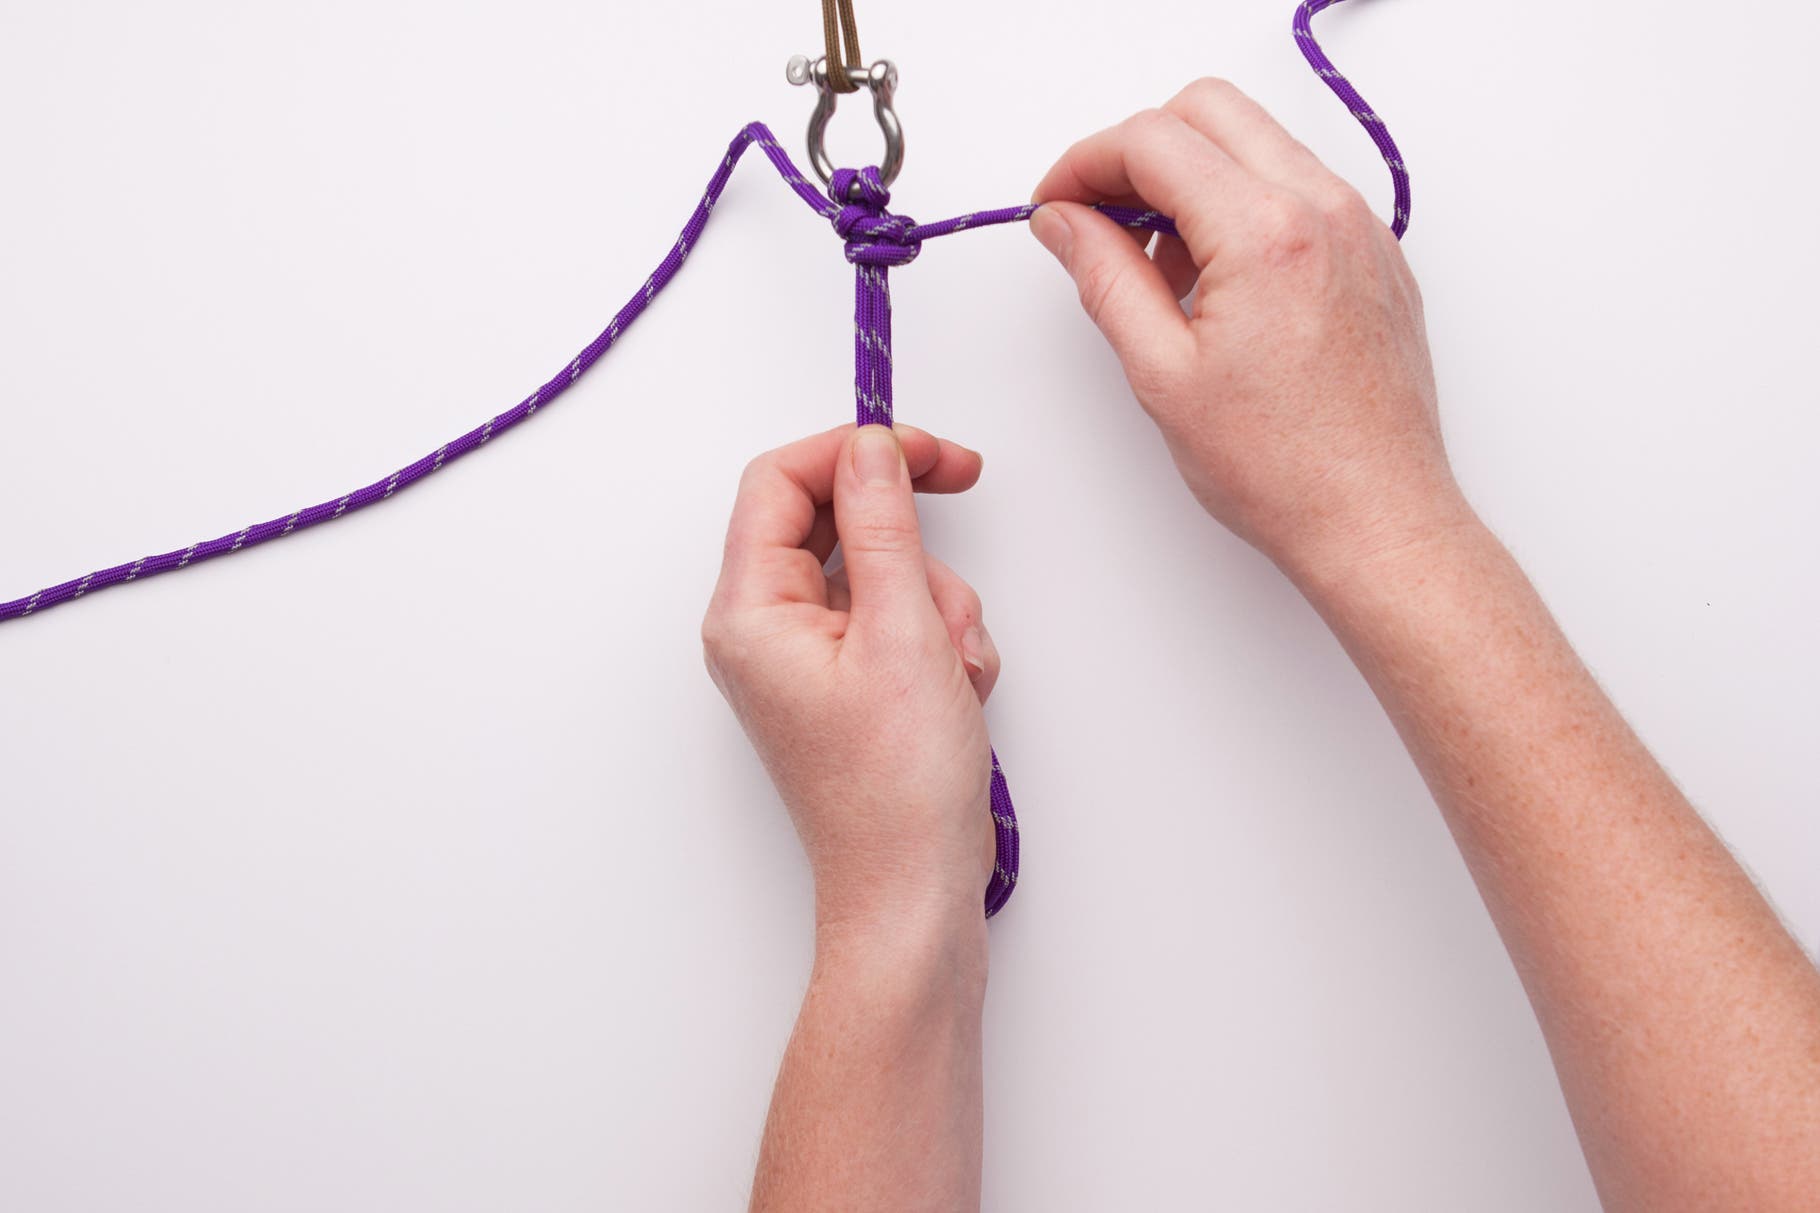
Pull that string tight and push the knot upward to tighten it. Continue to push up on each knot to insure a tightly strung bracelet.
Step 10
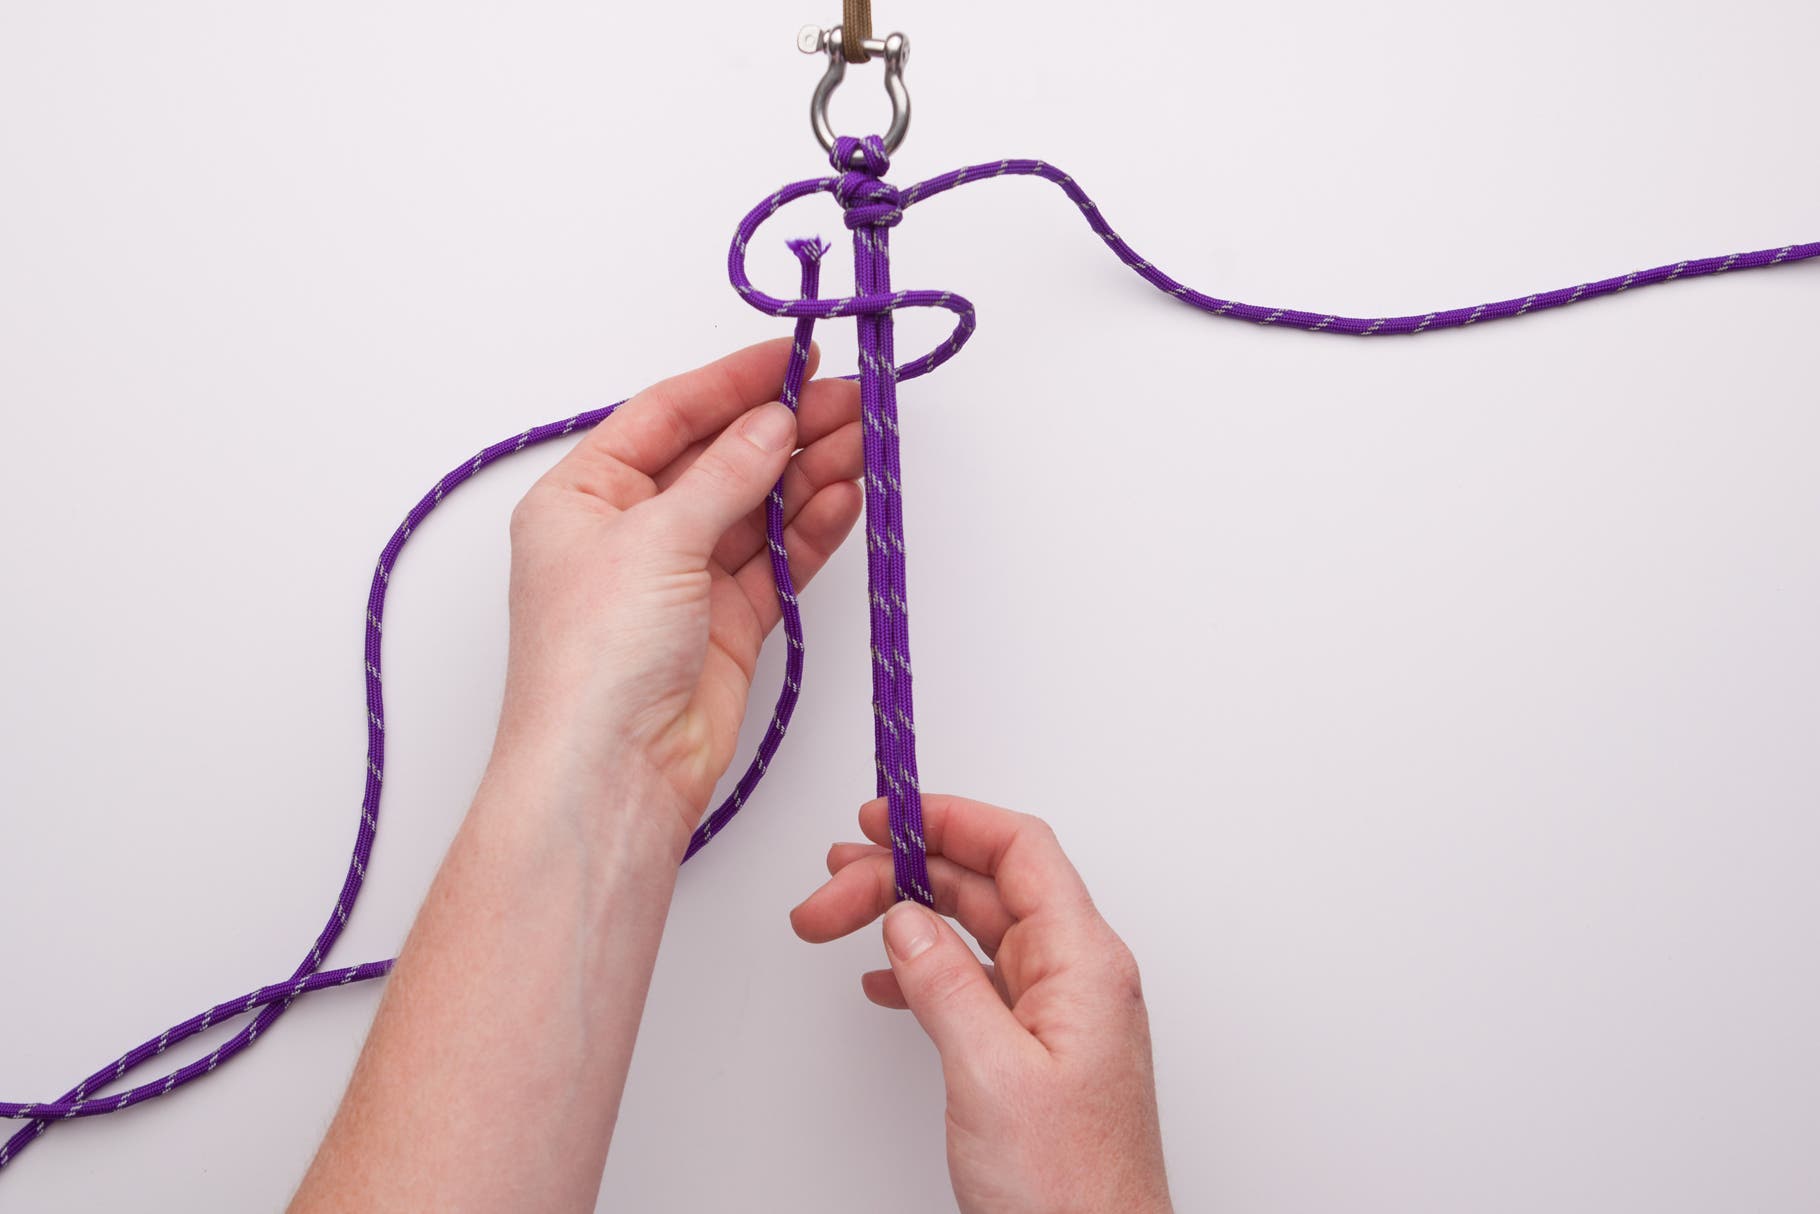
Repeat on the left side, going over the front and up through the loop from the back.
Step 11
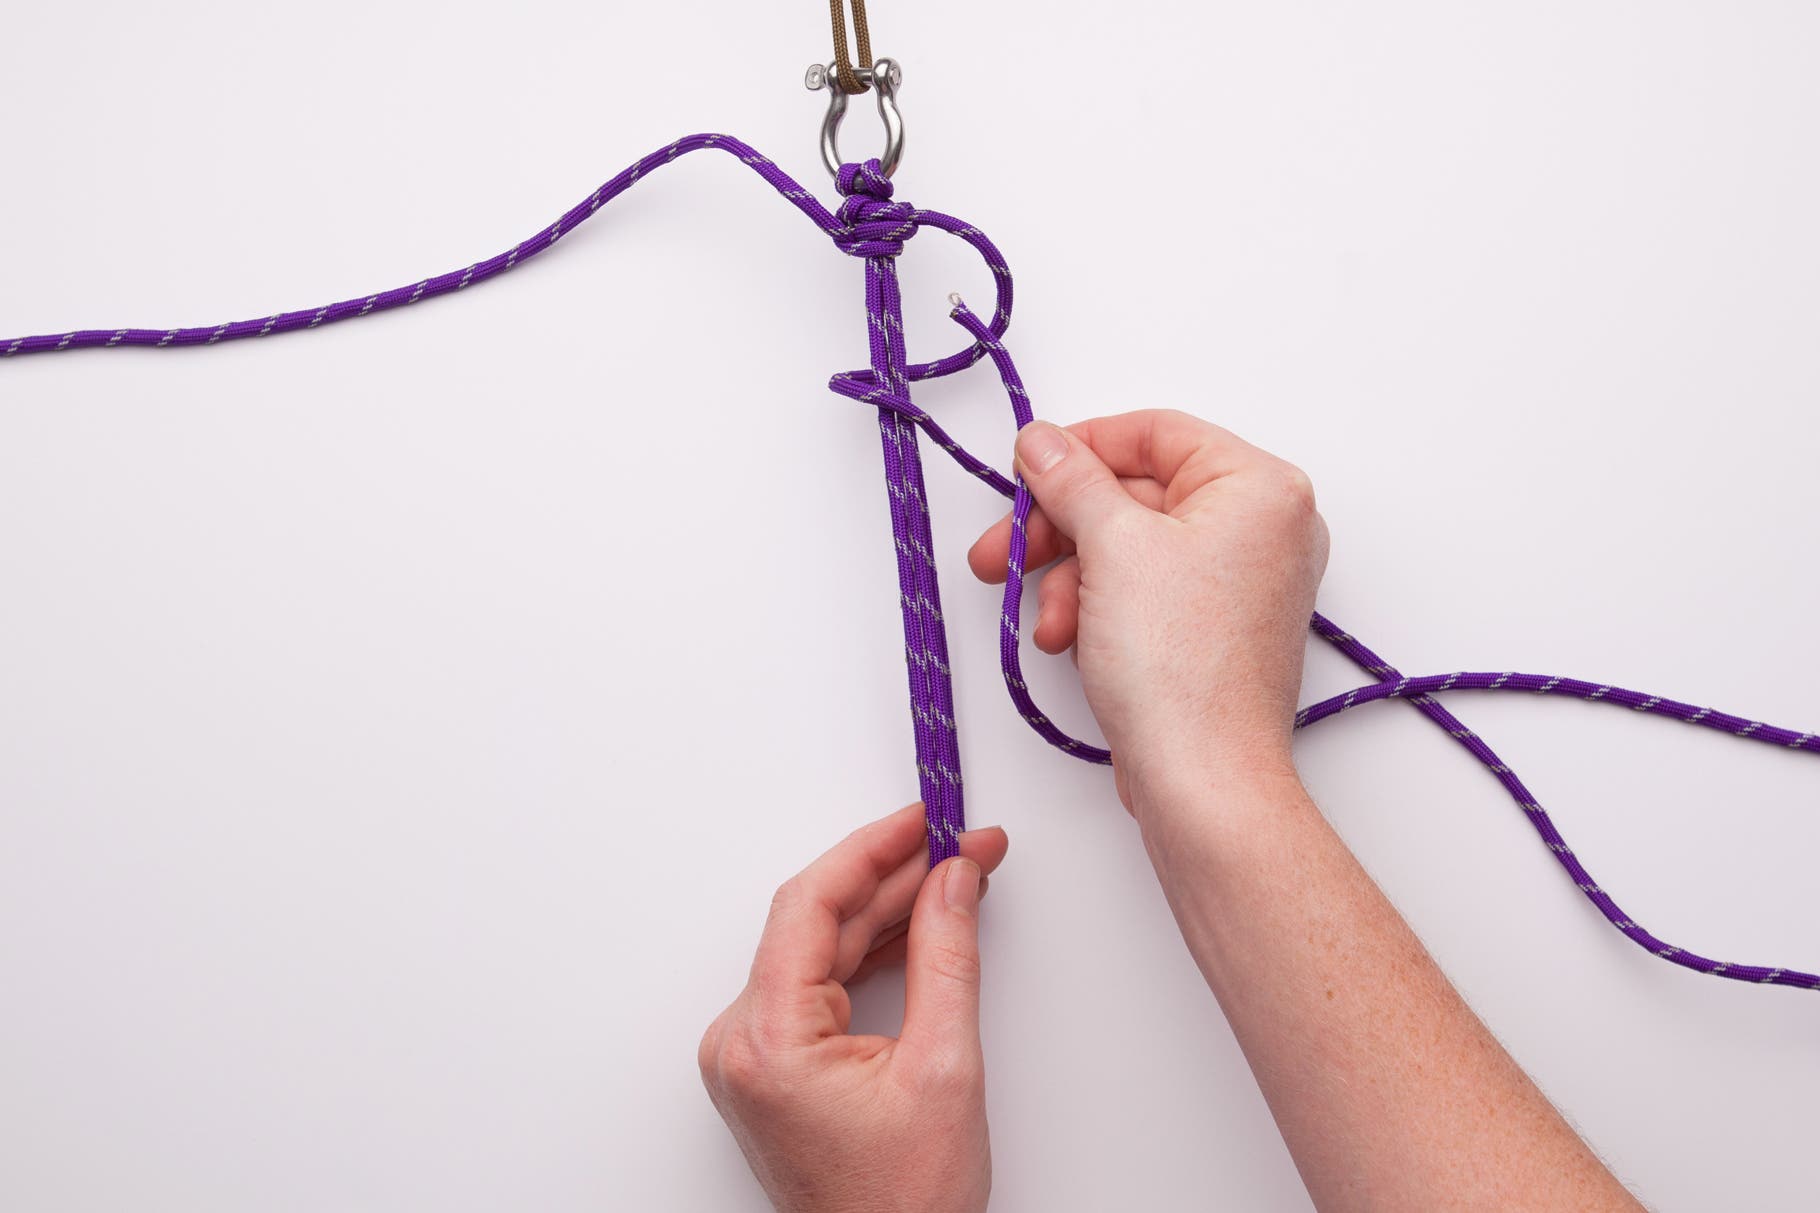
Now go back to the right string. This time wrap it behind the middle cords and around to the front, leaving a small loop. Thread that string though the loop from front to back. Again pull the strings as tight as possible.
Step 12
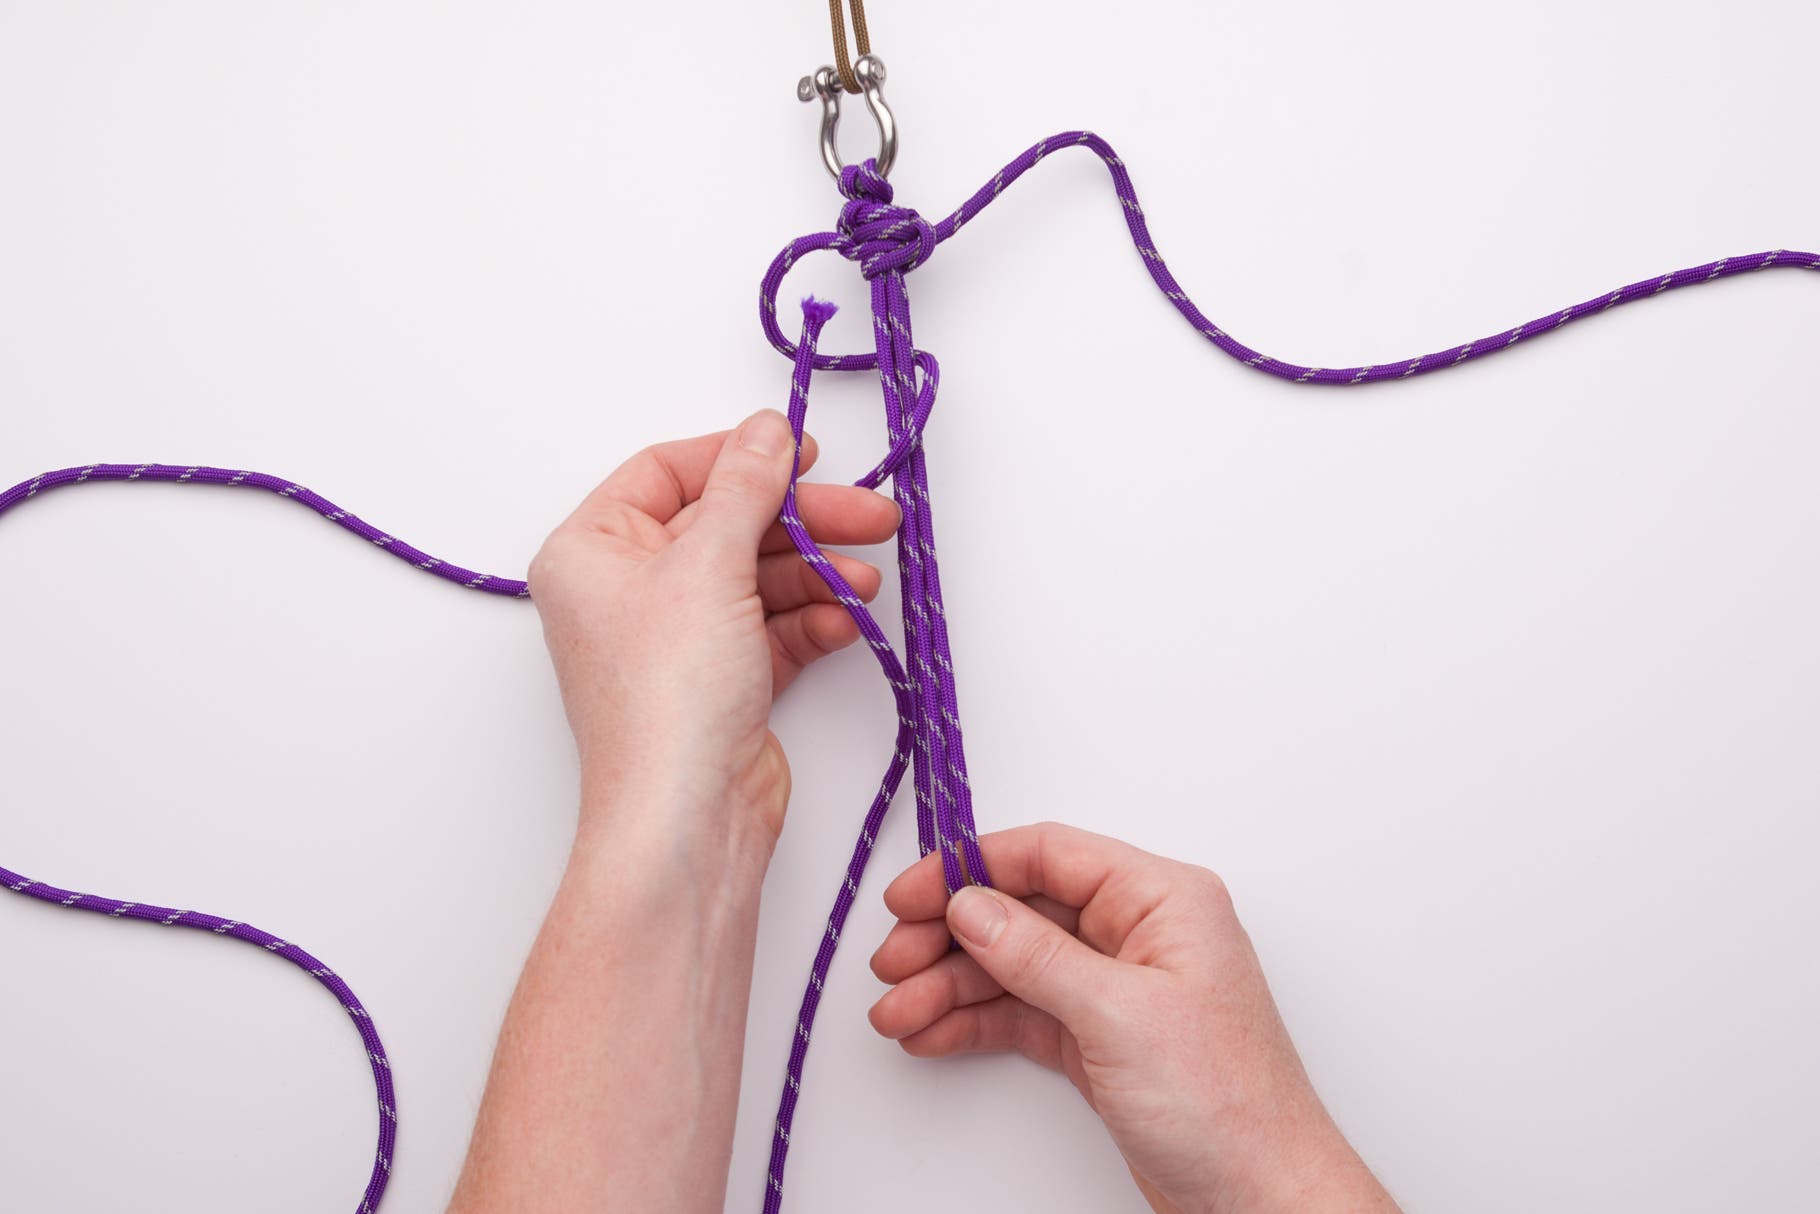
Repeat on the left side, remembering to go behind the middle cords, over the front, and through the loop from front to back. Pull it tight and slide it up.
Step 13

Continue to repeat steps 8-12, Keep it tight!
Step 14
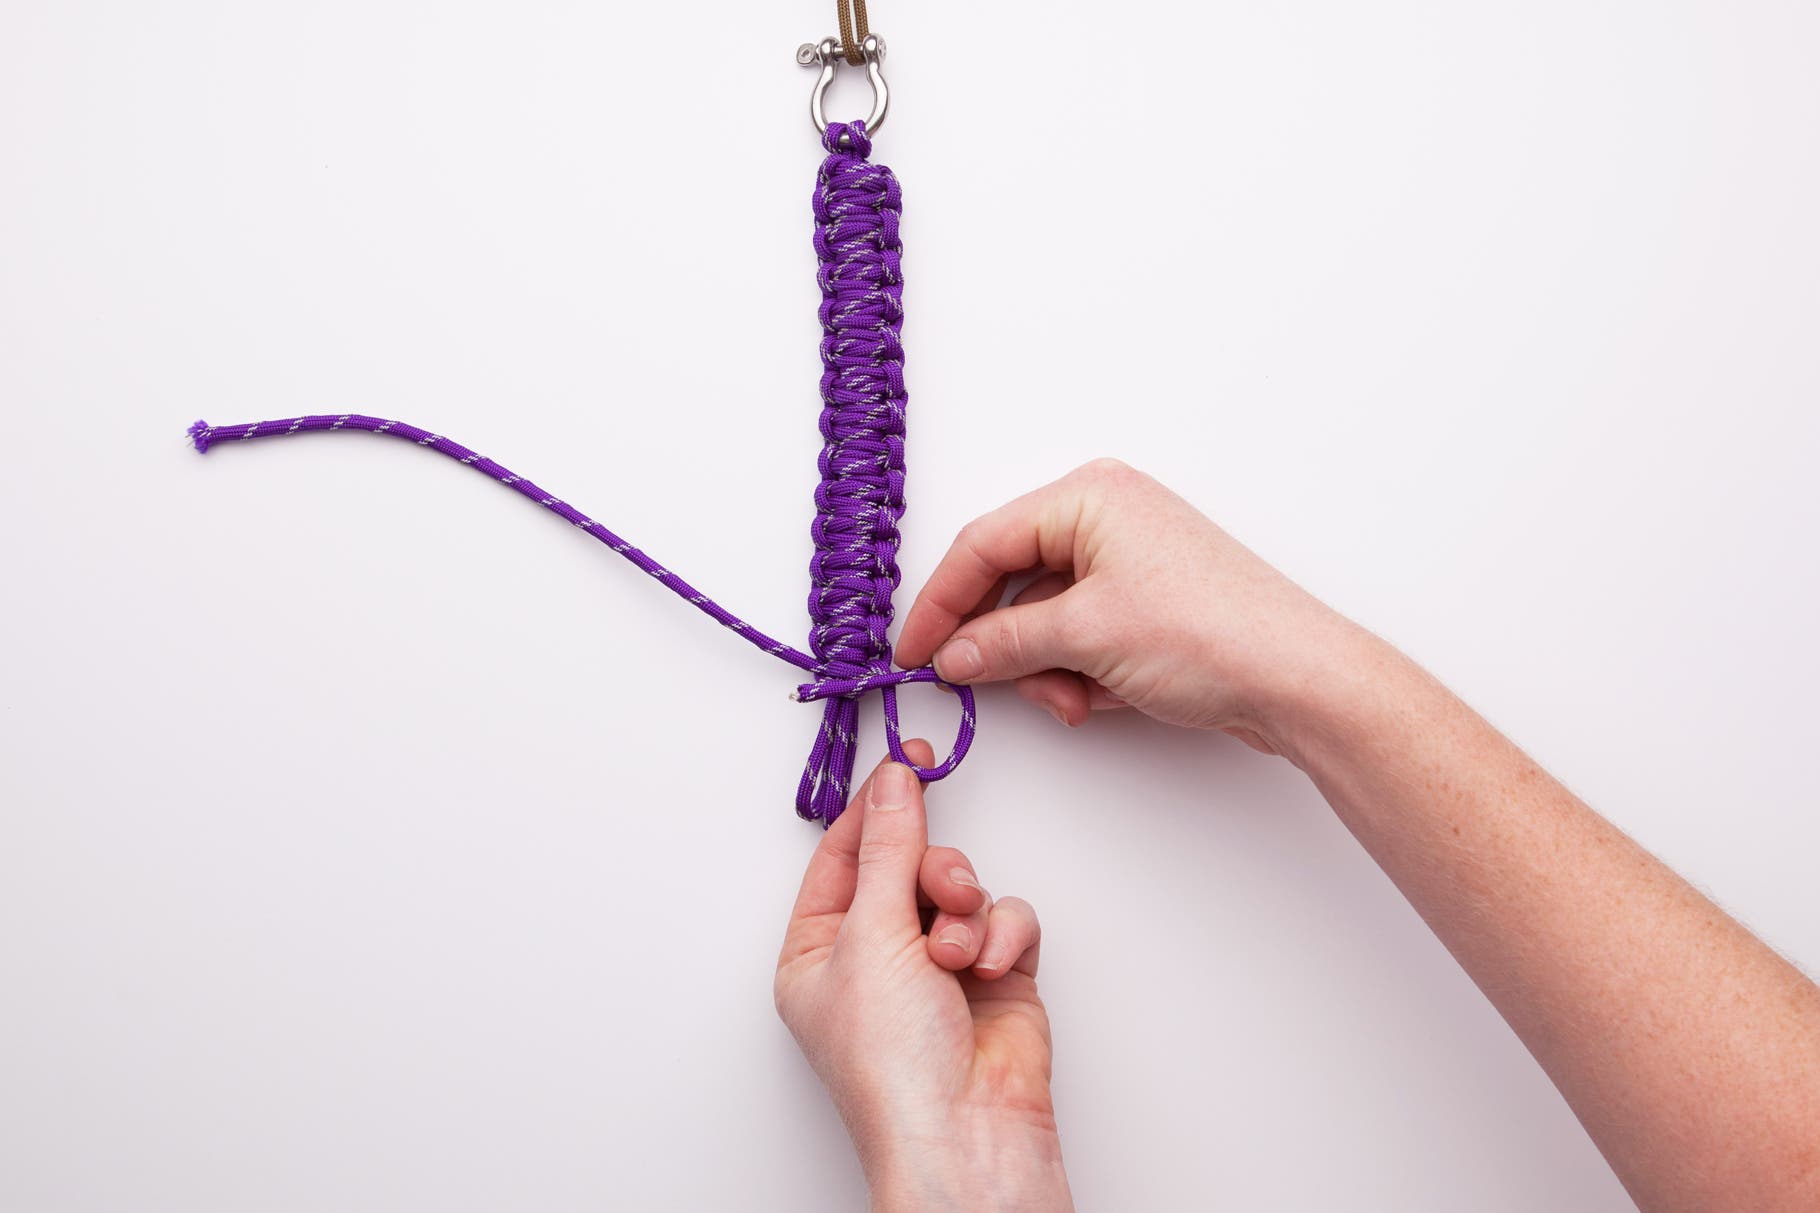
Knot until you have a little less than an inch of the middle cords showing. Now you will make the final knots to end the bracelet. To do this start by taking the right string and folding it in front of itself. Slide a bite of that string through itself creating a slipknot.
Step 15
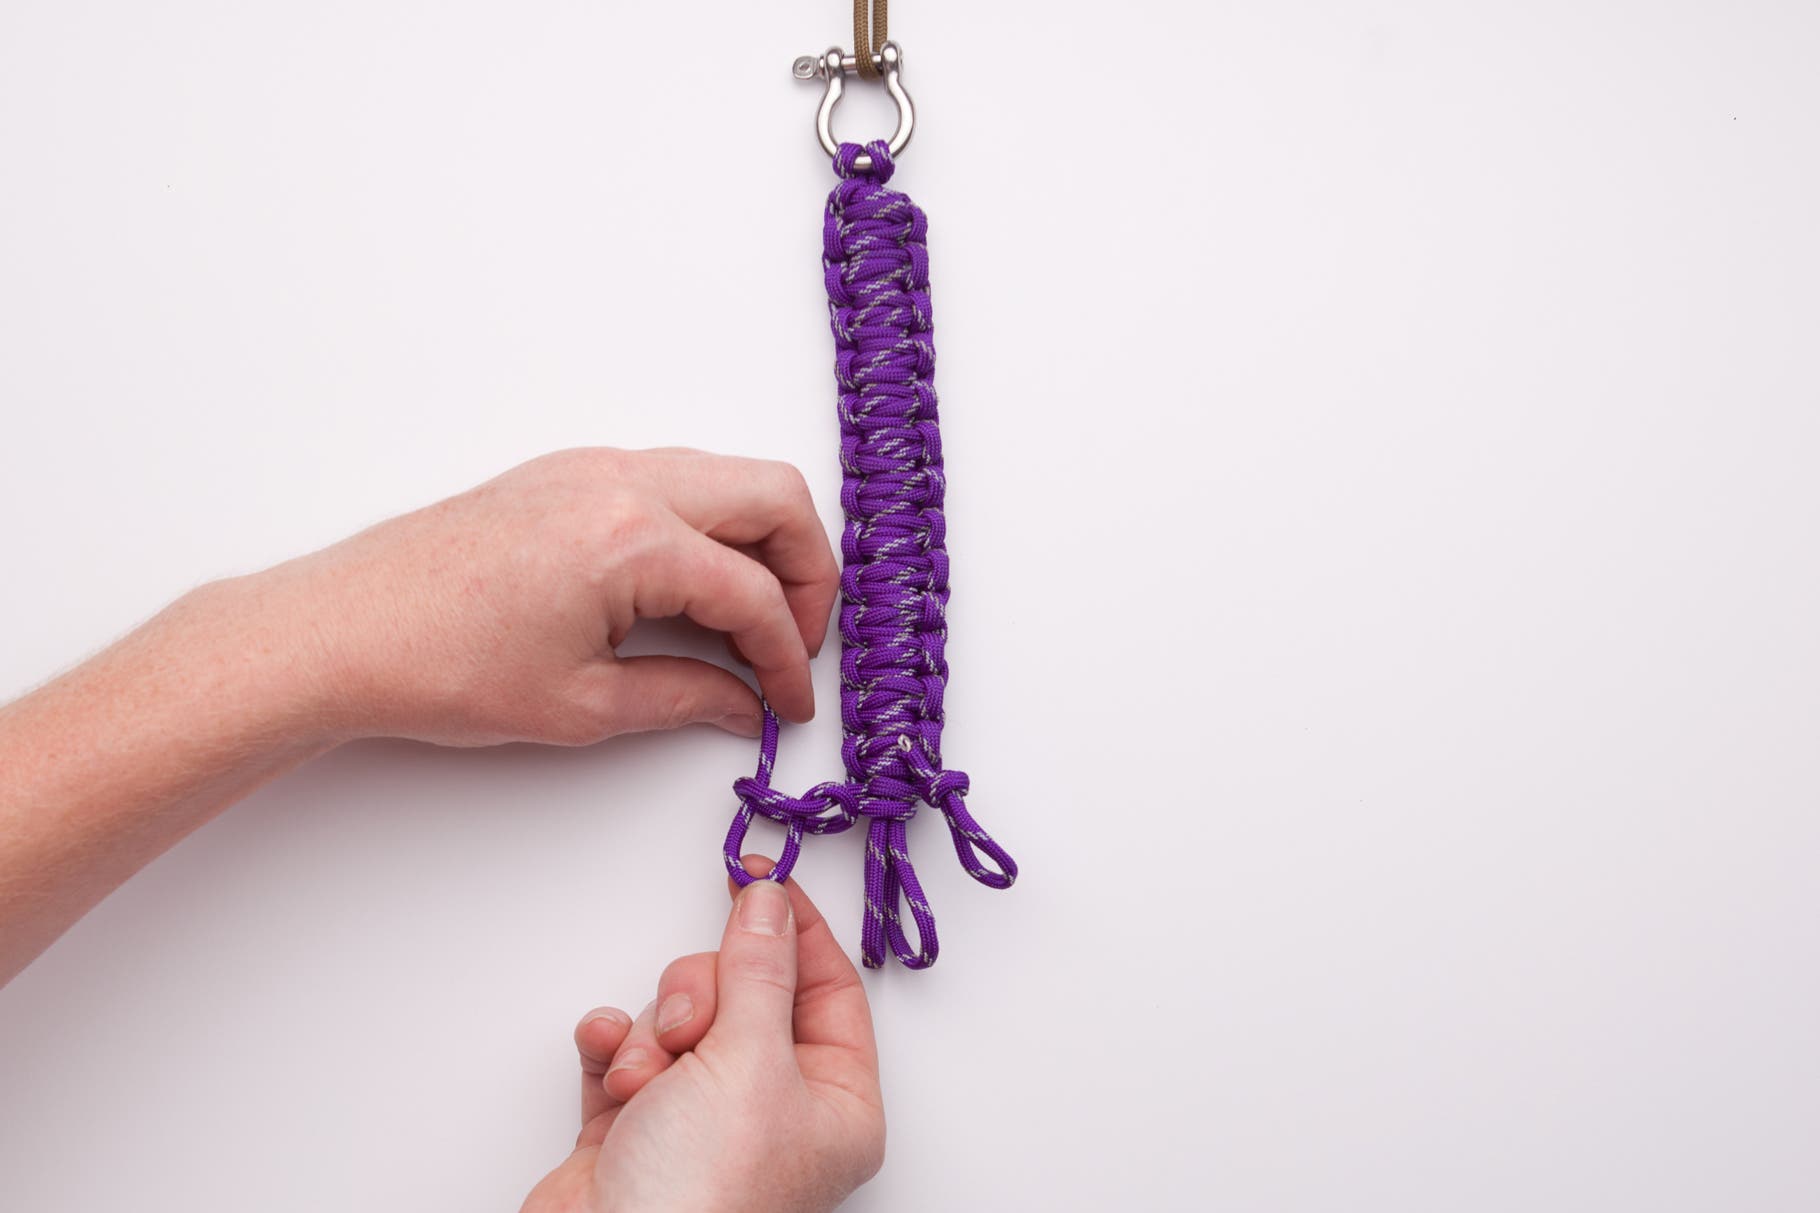
Repeat step 14 on the left side.
Step 16
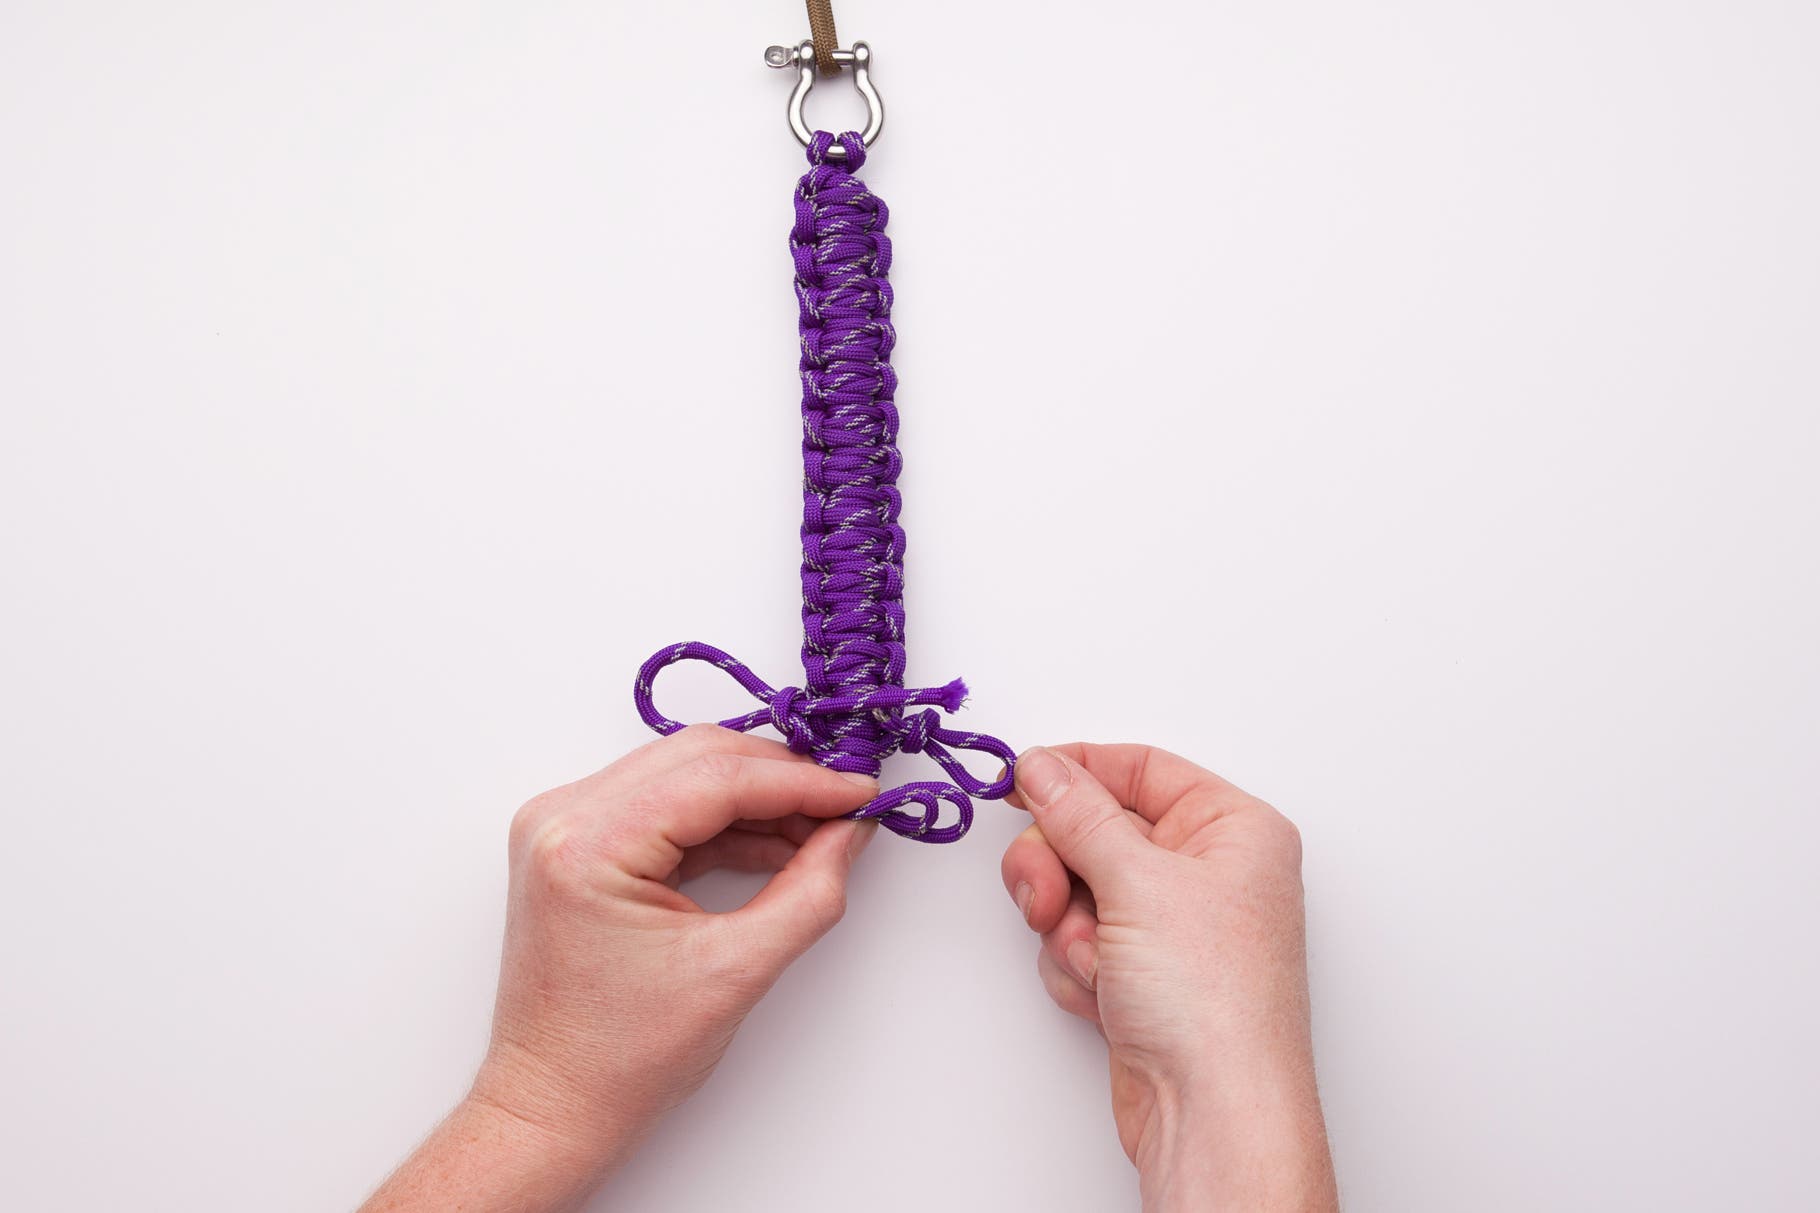
Now that you have a slipknot on each side, thread the two middle cords through the right slipknot.
Step 17
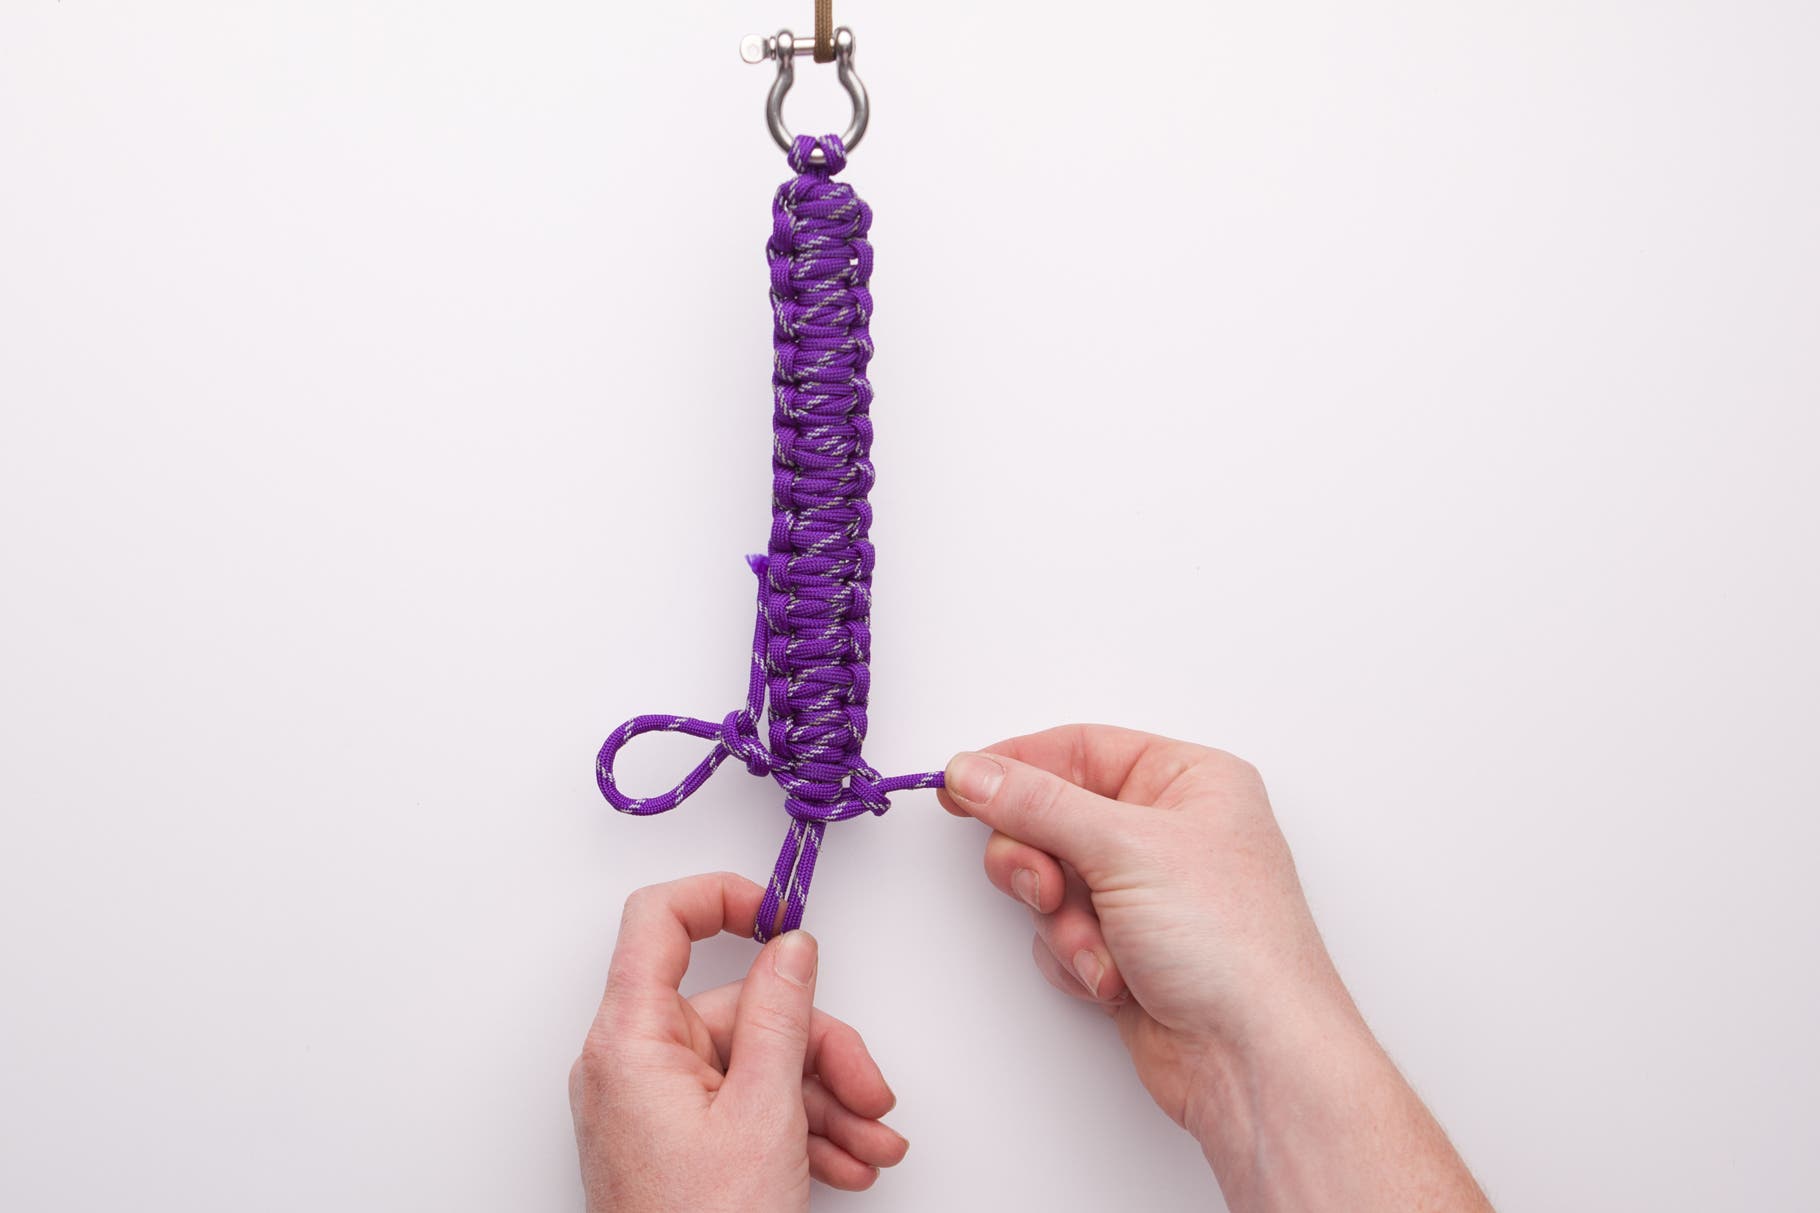
Pull the end string tight. Now, thread those middle loops through the left loop and again tighten the end string.
Step 18

Push up on all of the knots, synching them down. Unhook the shackle from anchored point. Cut the excess string from the ends and burn them to keep them from fraying.
Step 19
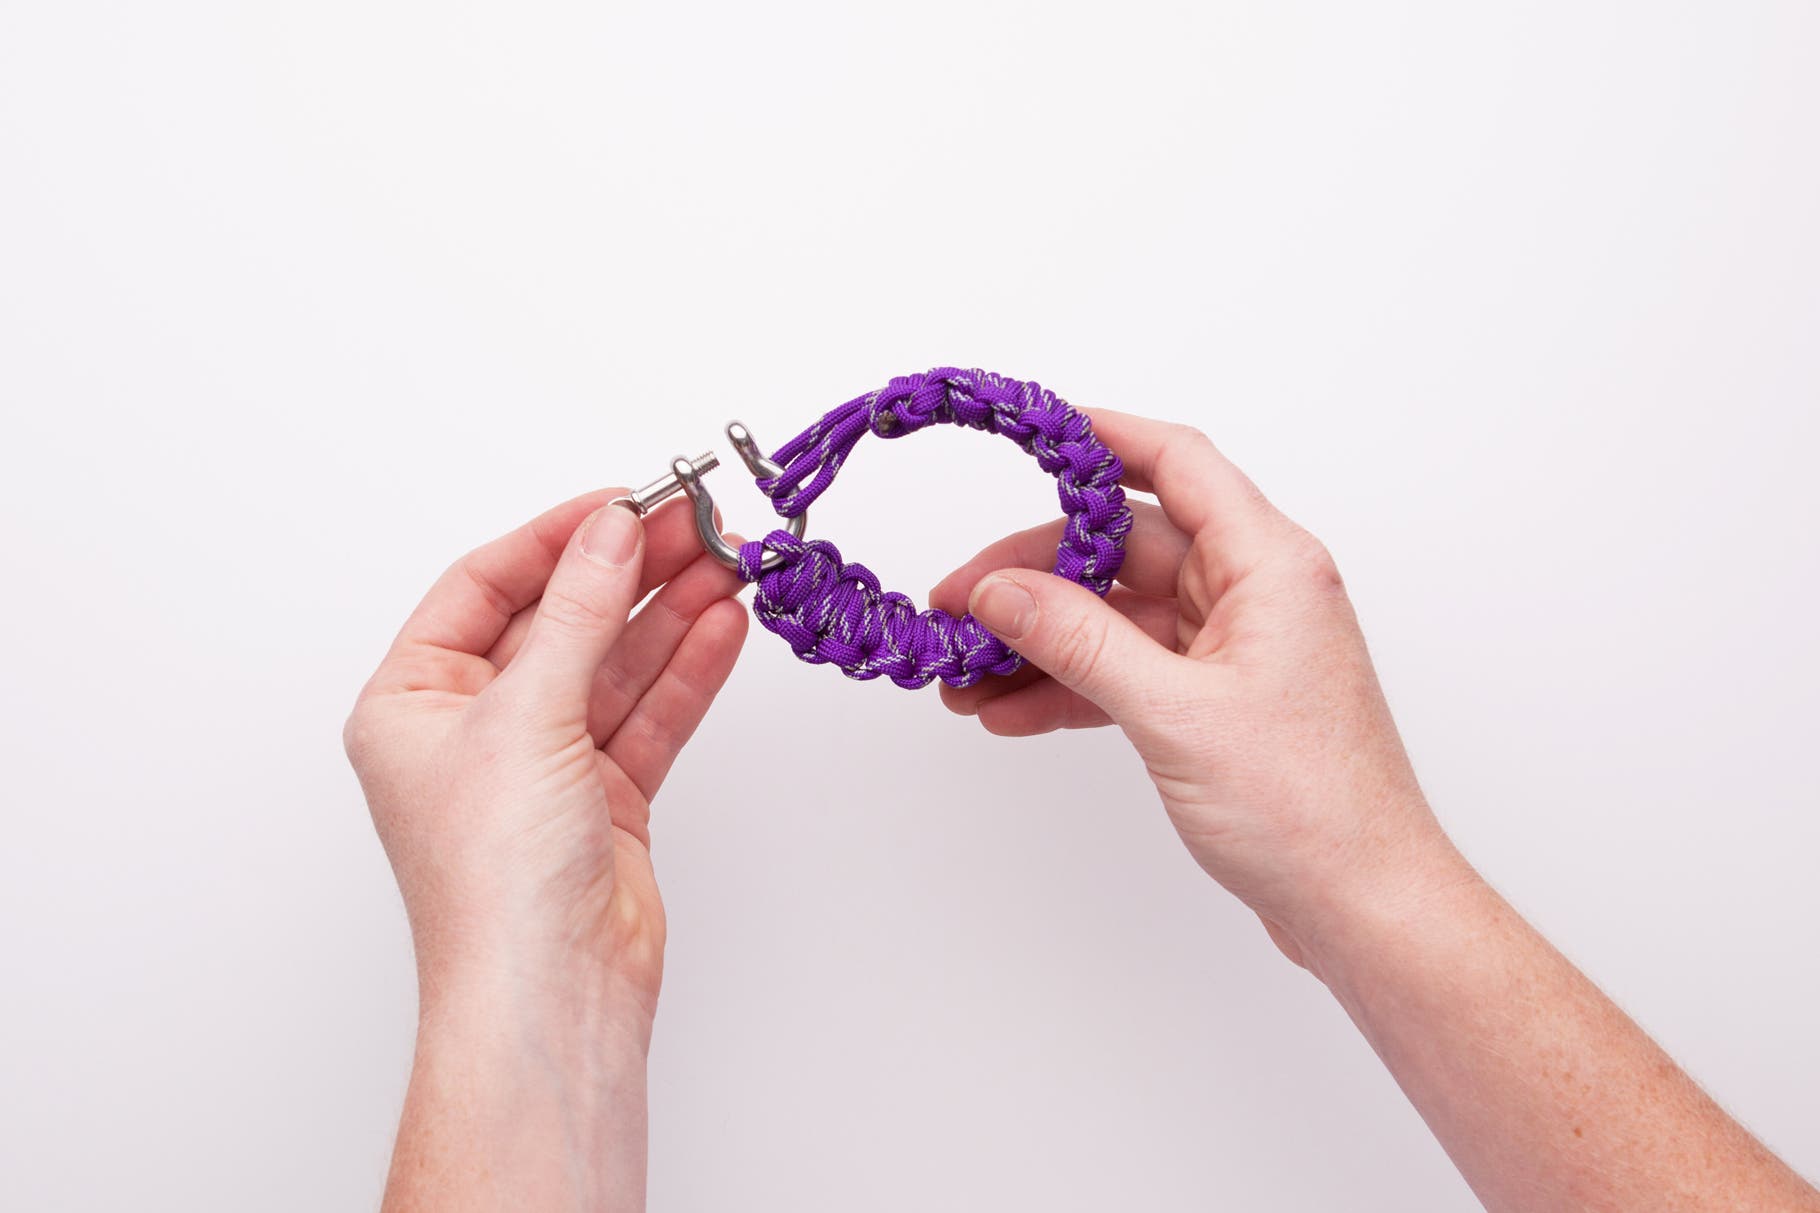
Slip the remaining loops through the shackle. Now you have a completed paracord survival bracelet.
Step 20
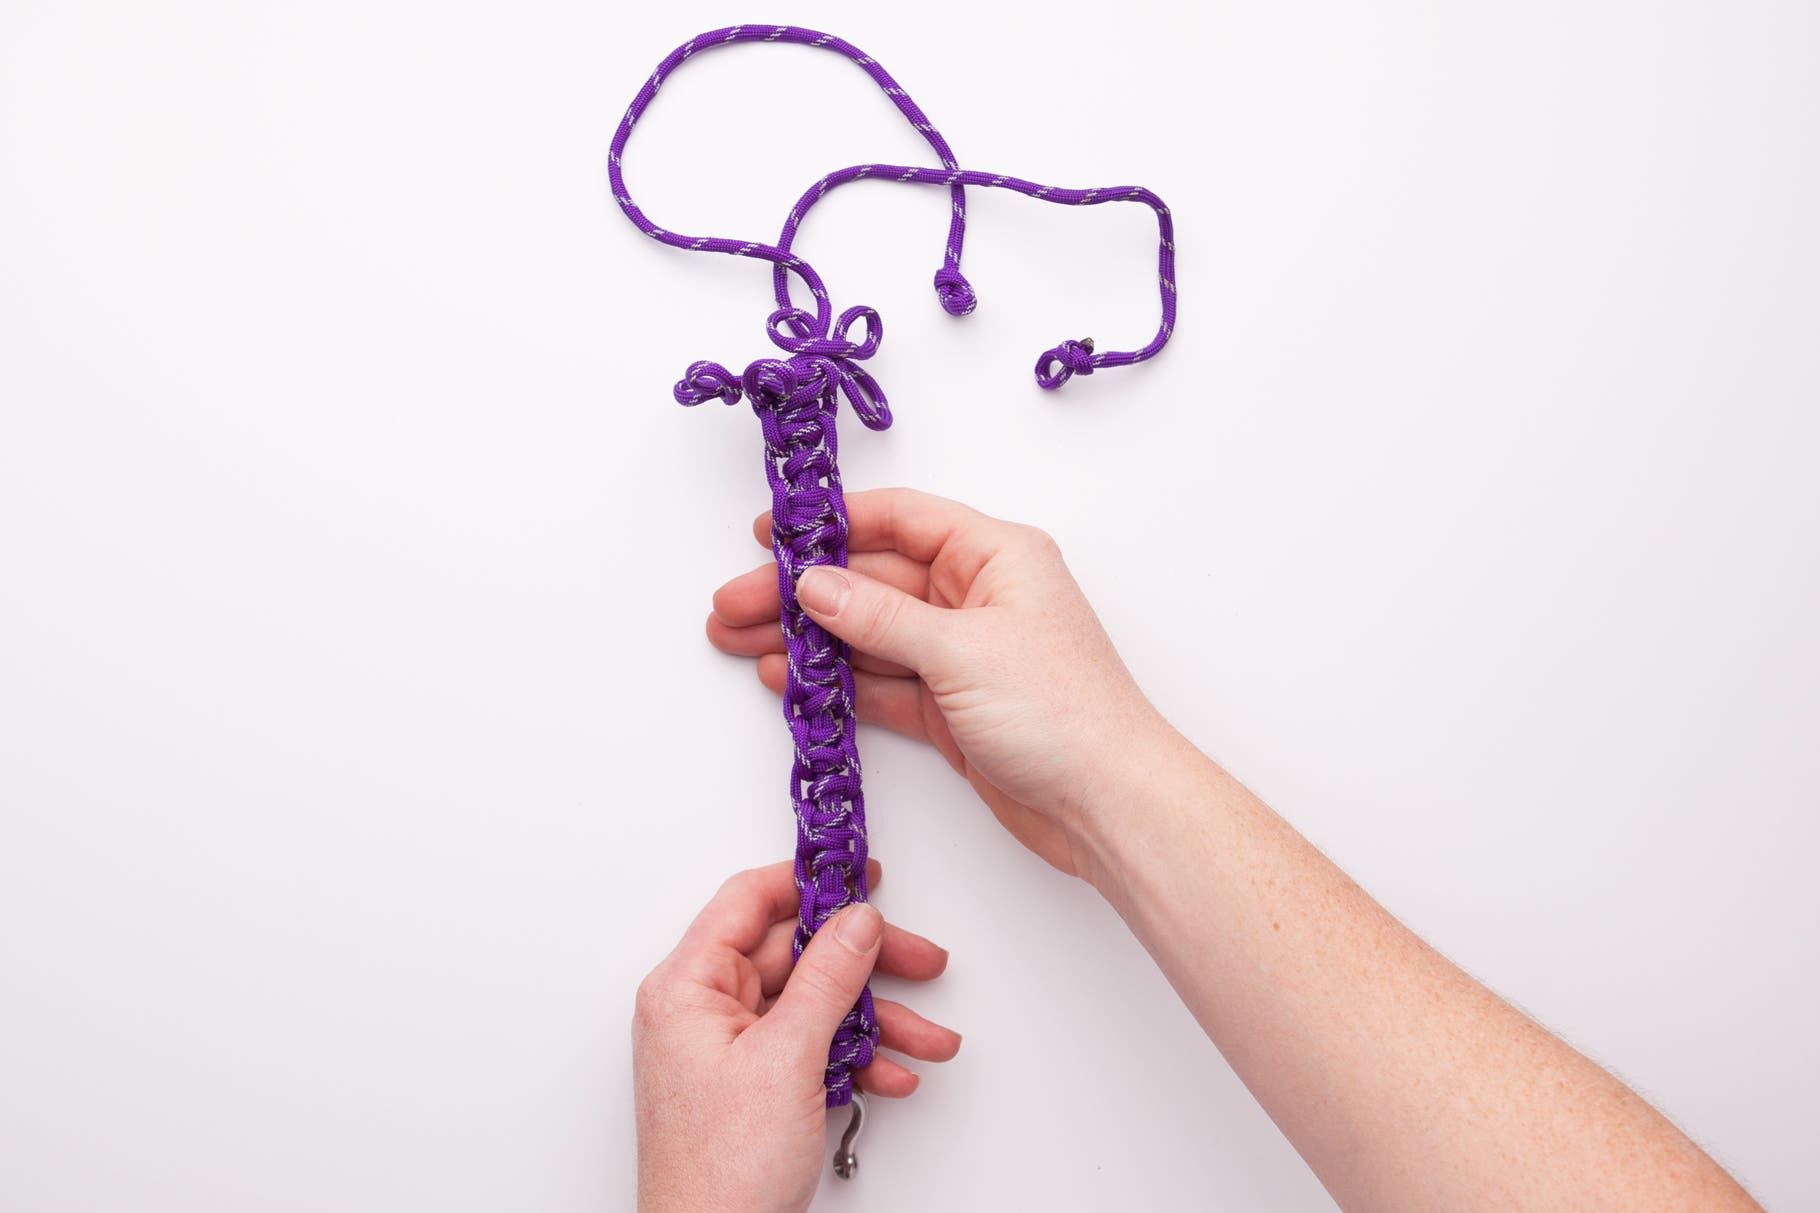
The best part about the specific knotting of this paracord bracelet is the quick-release method. To release the knots push them away from the shackle. Continue to loosen the knots as much as possible.
Step 21
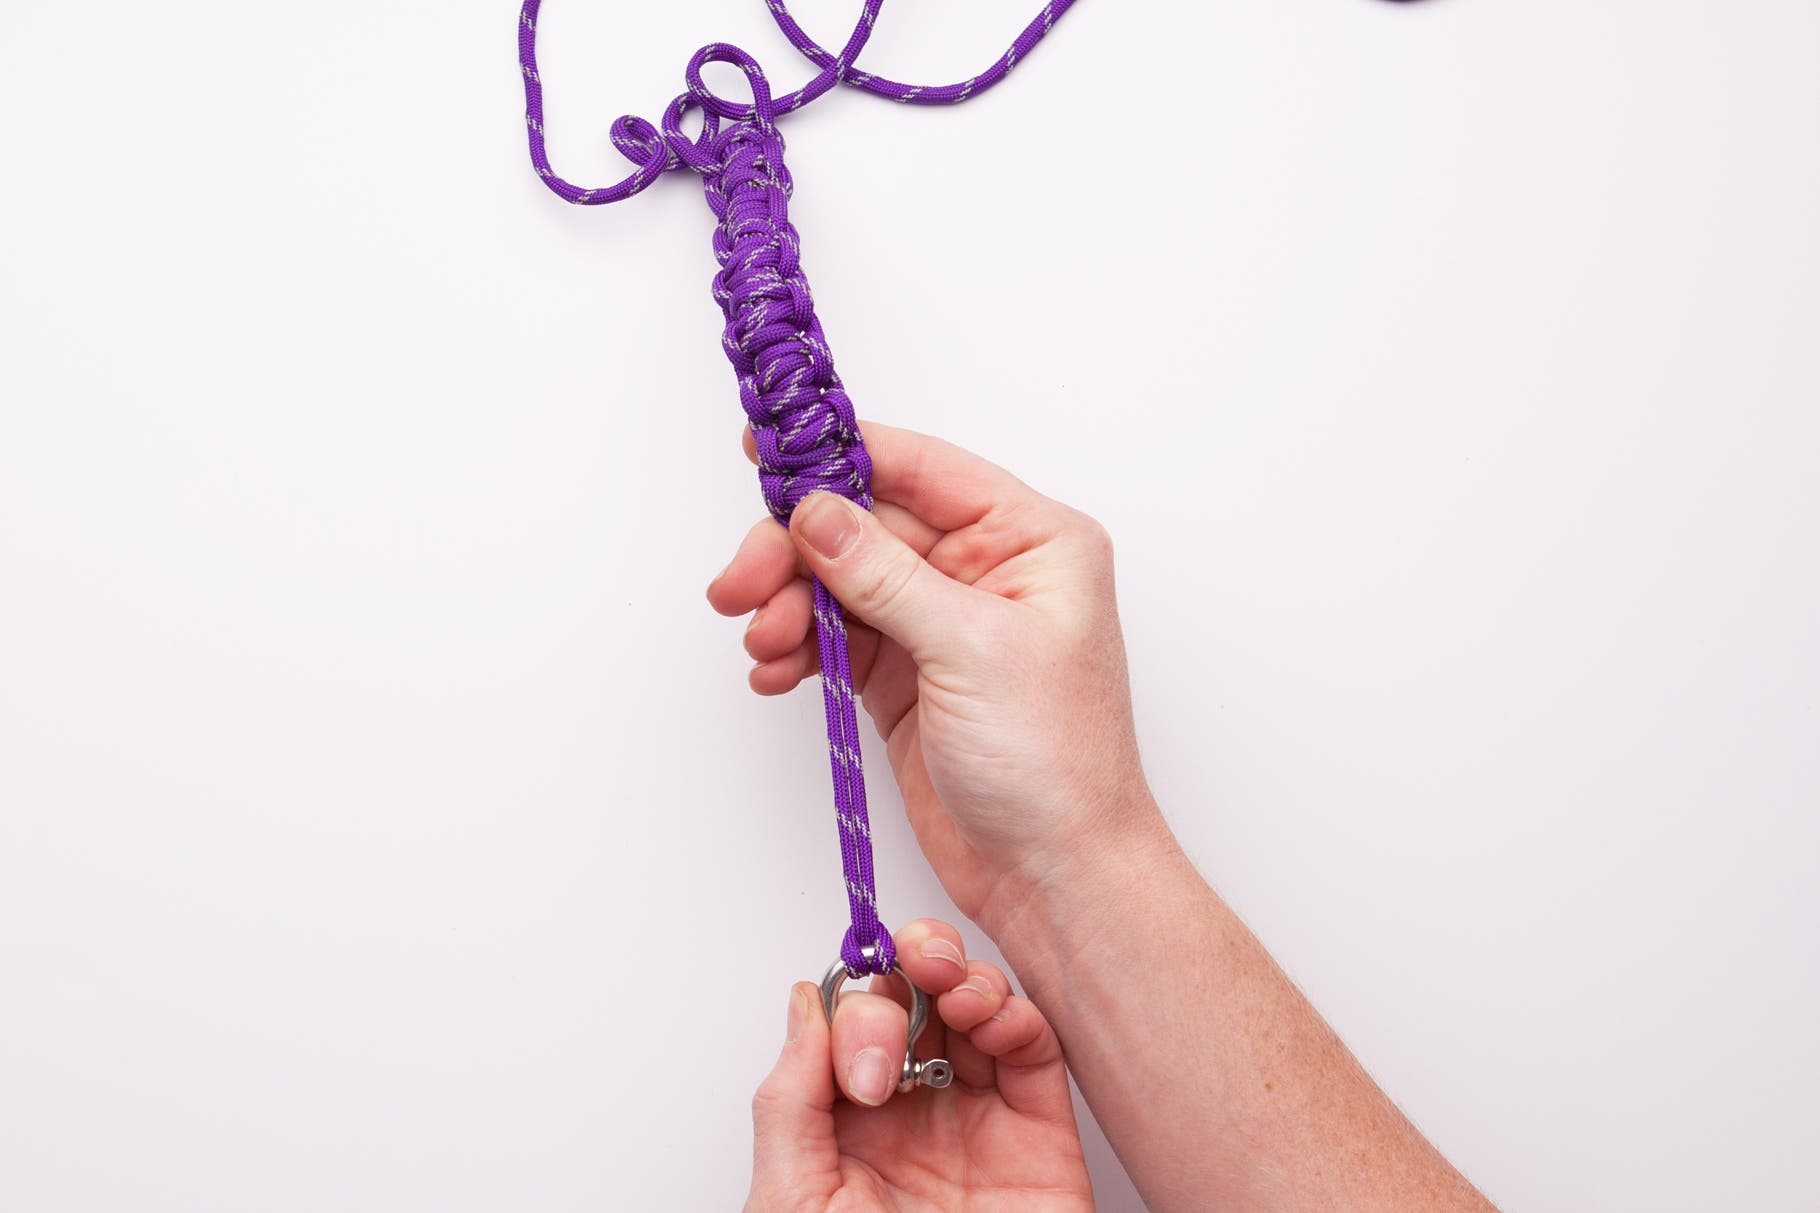
When the middle two cords start to appear again near the shackle, you can grab them at that end and push the rest of the knots off on the middle cords. Once you have undone the shackle you again have a length of paracord ready to help with any survival needs.