Published September 26, 2013 07:59PM
In Hot Water: Boil Water in Anything
A survival guide for backpackers who are desperate for clean water.
'(Photo by Bligh Gillies)'
You’re lost and dehydrated when you stumble across salvation: a muck-rimmed pool. The problem? You need to zap the water free of microbial gremlins before you can drink it or use it to clean wounds, but all you have is an empty water bottle—or worse, nothing at all. Here’s your solution.
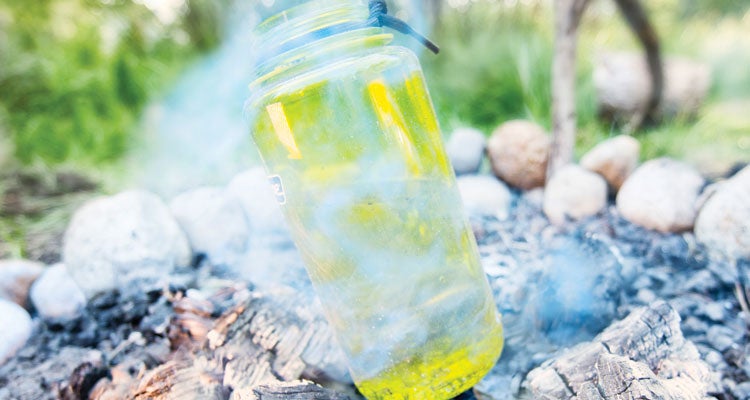
BOILING IN A BOTTLE
Boil water in a plastic bottle using just a stick, a shoelace, and a hot fire.
Prep the Fire Let the flames settle into red-hot coals. (You can boil a bottle over flames, but it’ll deform—often making it single-use.) Using a stick as a poker, create a 3-inch, bowl-like depression in the coals—wide enough to surround your bottle without risk of contact, and deep enough to evenly distribute heat around the bottle.
Prep the Bottle(1) Fill your vessel with water (if the water is gunky, strain it through a T-shirt or bandana first) and remove the cap (otherwise, built-up pressure could cause a scalding overflow when you unscrew it). (2) Loop a shoelace under the lip of the bottle and tie it tight with an overhand knot. (3) Fasten the other end of the shoelace to a 2- to 3-foot-long stick. (4) Carefully lower the bottle into the depression, keeping it suspended just a few inches from the coals. (Tip: Use a Y-shaped stick to make a natural tripod.) The bottle may deform slightly, but it shouldn’t blacken. Water boiled this way will have a faint plastic aftertaste, and there is considerable debate about the long-term danger posed by leeched chemicals. Not in dispute? The peril of dehydration.
Results We boiled 2 cups of water in 10-16 minutes.
Other containers Works
Soft-plastic bottle Y
ADVERTISEMENT
Lexan bottle Y
Glass bottle Y
Hydration bladder N
HOT ROCKS
Can’t find a plastic (or glass or metal) bottle? You can still boil in almost any vessel that holds water—even your hat—using this technique.
Prep the Container You can use almost anything that holds liquid. In a pinch, even a tarp will do. Dig a shallow hole (4 inches deep) near your fire and line the depression with a 10-inch square piece of tarp. Weight the tarp (edges and center) with small stones (these will also create a protective layer that keeps the tarp from melting). No tarp, but got trees? Make a vessel from bark. (1) Peel off a sheet of the outer bark (a Leave No Trace no-no, but this is survival) of a birch or willow and cut it into a 10-inch-diameter circle. Tip:Soak the bark to make it more pliable. (2) Make a cup out of the bark by folding it in half twice; once it’s quartered, spread the top so it resembles a pointy water-cooler cup. (3) Pin it shut by slitting open a small branch at the end and using it like a clothespin. This origami technique will also work with a waterproof map.
Prep the Stones Gather a handful of egg-size stones (basalt and quartzites work best) and put them in the fire. (Safety note: Don’t collect stones from riverbeds, as these rocks often contain some water and can explode when heated.) Leave them in the coals for 10 minutes (they’ll start to turn pale), then gather them using a split, thumb-width stick as tongs. Drop the hot rocks into the water-filled vessel one at a time. When hissing stops, replace the cool rocks with hot ones until the water boils.
Results Slowly but surely, we boiled 2 cups of water in about 10 minutes.
Can’t make a fire? Drink up anyway. Most waterborne illnesses don’t onset for a few days.