Life-or-Death Decisions - Lost

'(Illustration by Supercorn)'

(Illustration by Supercorn)

(Illustration by Supercorn)
LOST |
INJURED |
CAUGHT IN A STORM
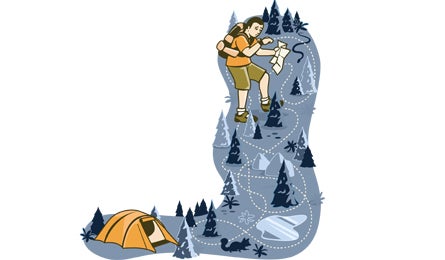
Your watch reads 4:30 p.m. when you get the unsettling feeling that you’re not where you should be. A few hours ago, you struck out solo to explore a route in your favorite wilderness–but now the terrain doesn’t match the map, and the trail has vanished. How did you get here? How can you get out? Staying found starts at home.
Packing/Planning/Starting Out | Hiking/When You Think vs. Know You’re Lost/Using Topo & GPS | Spending a Night Out | Getting Rescued
1. Packing
WRONG: Stash some water and an energy bar in your pack, then hit the trail. You’re only going to be gone for a few hours.
RIGHT: “When you’re packing, ask yourself, ‘Do I have enough gear that I could spend the night out if I had to?'” advises Christopher Van Tilburg, author of Mountain Rescue Doctor and a veteran SAR physician. Know and carry the 10 Essentials: map (make it waterproof), compass and/or GPS, headlamp, food, water, extra clothes, first-aid kit, matches, firestarter, and raingear. Also pack a basic survival kit containing an emergency blanket or a large plastic garbage bag for shelter, an extra firestarter (flint and waterproof matches and/or butane lighter), a signal mirror, and an 8-by-8-inch square of heavy-duty aluminum foil for making a cup or cookpot.
2. Planning
WRONG: Test your brand-new navigation skills on a tricky route–alone. Many hikers who find themselves in trouble got there by overestimating their abilities.
RIGHT: Know your limits and plan trips that feature mileage, elevation gain, and terrain that you can handle. Set out with a map and compass or GPS and a good description of your route. Before you go, determine a safety bearing: a direction guaranteed to lead you back to civilization should you lose your way.
3. Leaving the trailhead
WRONG: Head out for an impromptu dayhike without informing anyone of your plans. It’s just a five-miler–what could go wrong?
RIGHT: Always leave your itinerary with friends, family, or rangers when you go into the backcountry. Include your intended route, expected return, and what time they should initiate a rescue if they haven’t heard from you. Even on a routine dayhike, at least tell someone where you’re going.
LOST |
INJURED |
CAUGHT IN A STORM
Packing/Planning/Starting Out | Hiking/When You Think vs. Know You’re Lost/Using Topo & GPS | Spending a Night Out | Getting Rescued
4. Hiking the trail
WRONG: Daydream as you hike, paying little attention to your map or the terrain. Todd Brown, North Carolina’s SAR coordinator, reports that he’s seen an increasing number of lost hikers who zone out on the trail, assuming their GPS units or cell phones will guide them back.
RIGHT: Orient yourself with prominent landmarks as you go. Verify your location on the map. Take a mental note of bridges, boulders, and trail junctions, and turn around often to study the trail from another angle, so you’ll recognize it if you have to backtrack.
5. When you suspect you’re lost
WRONG: Continue to hike, even though you believe you might be off track. Maybe you’ll find the trail if you keep going.
RIGHT: Stop as soon as you think you might be off course. Be alert for clues, such as the trail suddenly becoming faint or not reaching landmarks you expect to pass. Stay calm and try to match the surrounding features to your topo, triangulate your position with a compass, or use your GPS to locate yourself on a map.
How to Read a Topo Map
Match what you see in the field to what you see on the map by knowing how to recognize these key features.
>> A. Peak
>> B. Pass/saddle
>> C. Cliff
>> D. Ridge
>> E. Cirque
>> F. Valley
How to find yourself with GPS
(1) Match your GPS to your map’s datum.
(2) Mark a waypoint and view its coordinates.
(3) Match the coordinates to the grid lines on your map. If using UTM, the first coordinate refers to how far right you are from the left side of the map. The second matches how far up you are from the bottom. You are where the lines intersect.

6. When you know you’re lost
WRONG: Freak out. “When you’re lost, fear and panic set in,” notes Denali National Park Superintendent Paul Anderson. “If people don’t have a plan, they’re liable to react very irrationally. Some people run. Some huddle and cry.”
RIGHT: Sit down, take a deep breath, and assess the situation calmly. Find a sheltered spot and have something to eat and drink, then take an inventory of the gear you have, the weather, and how far off track you think you are. Mentally retrace your steps to the last place you knew your location–can you pinpoint where you made a wrong turn?
7. Making the call
WRONG: Bushwhack across unfamiliar terrain in a panicked attempt to regain the trail. “The mistake we see over and over is, instead of making a decision to stay put or find the trail, lost hikers try to find a new route home,” says Van Tilburg.
RIGHT: Stay where you are if you’re unsure of your location, night is falling, or bad weather is approaching. “You don’t want to make the situation worse,” says Anderson. Moving without purpose wastes energy and exposes you to other risks, such as slipping down a slope or twisting an ankle. Backtrack only if you’re confident you can find the spot where you were last on a trail, and strike out cross-country only if you can see your destination and you won’t run into impassable terrain on the way.
LOST |
INJURED |
CAUGHT IN A STORM
Packing/Planning/Starting Out | Hiking/When You Think vs. Know You’re Lost/Using Topo & GPS | Spending a Night Out | Getting Rescued
8. Spending a night out
WRONG: Obsess over how to get “unlost,” wander around without a plan, and ignore your core temperature. Being lost doesn’t kill you; exposure does.
RIGHT: Put on a hat and extra layers, then build a fire and a shelter. Keeping yourself warm and dry is your top priority, followed by collecting water. Don’t worry about food just yet–the vast majority of lost hikers are found within 12 hours, says Anderson.
How to improvise a sleeping bag
Use this method when you don’t have the materials or the time to construct a more elaborate shelter. Make a bed out of evergreen boughs, dry leaves, and/or pine needles. Put on all extra clothing. Poke a hole in a large garbage bag for your head and put it on like a shirt, stuffing it with dry leaves for extra insulation. Lie down and put your feet in your empty pack.

How to build a lean-to shelter
Use branches and evergreen boughs to build the wall; prop it up with sticks or lean it against a rock. Lay dry leaves or pine needles underneath for insulation from the cold ground. A tarp, emergency blanket, or garbage bag tied between two trees can also be rigged to form the wall.
LOST |
INJURED |
CAUGHT IN A STORM
Packing/Planning/Starting Out | Hiking/When You Think vs. Know You’re Lost/Using Topo & GPS | Spending a Night Out | Getting Rescued
9. Getting Rescued
WRONG: Stay hidden in dense foliage and don’t signal.
RIGHT: Find an open spot and make yourself obvious: Lay bright clothing on the ground and build a smoky fire using green branches and leaves. Blow your whistle and signal your location with a mirror or another reflective surface, like a watch face, stove windscreen, compass mirror, GPS screen, or headlamp.
How to use a signal mirror
Grasp the mirror by its edges (1). Holding it near your face, aim the glass toward the sun while looking through the sighting hole. Move the mirror until you see a glowing ball (“fireball”) on the reflective mesh on the mirror’s back (2). Find your target in the sighting hole while keeping track of the fireball. Adjust the mirror until the fireball appears on top of your target (3). Tilt mirror slightly to flash (4).

How to signal with any reflective object
Hold the reflective surface near your face with one hand. Stretch your other arm (the “sighting arm”) toward your target. Aim the reflection onto your outstretched hand. Move your sighting arm and the reflective surface together to focus the rays on your target.
