Published November 4, 2009 01:13PM
Winter Camping: Camp & Trail Skills
Learn how to choose between a tent and a snow cave. Plus the best ways to travel in the snow.
'november 09 winter camping illo 200x170'
Tent or Snow Cave? | Trail Snow Skills
TENT OR SNOW CAVE?
Answer these questions to determine your ideal winter shelter.

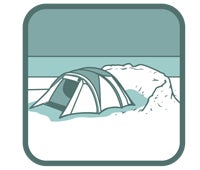
Tent
The shelter of choice for short trips, thin snow, and claustrophobes
Follow these steps to ensure a comfortable night:
Stomp down a platform two feet wider than your tent with skis or snowshoes, or pat it down with a shovel. “Wait an hour before pitching the tent to let the snow solidify,” says Kereszti. That keeps ruts from forming when you sleep and kneel on the snow.
Stake it out with skis (if breaking camp the next morning), or use snow anchors to secure guylines. Fierer packs 2-by-2-foot fabric squares that he fills with snow, attaches to the lines, and buries at least six inches deep. Also useful: trekking poles, ice axes, and sticks. All are lighter and more effective than snow stakes. Let the snow harden around the anchors, then tighten the guylines.

Build a wind-blocking wall out of snow blocks or a pile of snow. Leave a three-foot gap between it and your tent so blowing snow collects in that space rather than on the fabric.

Shovel snow from your tent during big storms to prevent collapse. “Be proactive,” advises Fierer. “When you see snow piling halfway up your tent, you’ve waited too long.”
ADVERTISEMENT
Store sharp equipment (ice axes, snowshoes, and poles) away from the tent, in one central location, says Fierer. “That way, if they get buried in snow overnight, you’ll know where to dig and can recover them all more easily.”
Close all zippers before taking down your tent, and stuff the rainfly and body separately–measures that make it easier to pitch the tent next time. “When you unroll everything at once, the wind can easily blow part of your tent away,” says Fierer.
Snow Cave
A simple, 90-minute plan for a cozy, bombproof shelter
When basecamping for a few days, nothing beats a snow cave if you don’t mind tight quarters: It’s warmer than a tent and more customizable, since you can sculpt its dimensions to suit your needs–right down to carving shelves and tables.

Prep the foundation: Select a snow drift (look on the lee side of boulders and downed trees) and probe it from the top and the sides to make sure it’s at least 6 feet deep and free of hidden rocks and small trees. If the snow is soft, stomp on and around it with skis or snowshoes to consolidate it before you start digging.

Dig from the downhill side of the drift so you don’t have to throw snow uphill, and create a 3-by-3-foot doorway as close to the ground as possible. Tunnel one foot into the mound, then angle the hole up to create a heat trap (a low door traps warm air inside the cave). Pile excavated snow on top of the mound.
Probe the snow from the inside to gauge the thickness of the ceiling (one to two feet is ideal). Before digging, shove two-foot sticks into the mound: You’ll know the roof’s thickness when you hit them from inside.
Mark the hollow area you’re creating with branches or rocks to avoid stepping on the roof. Using ski poles, punch four to six vent holes into the ceiling.
Smooth the inside with your hands to create a steep-walled dome. This will encourage condensation to trickle down the walls instead of dripping from the ceiling. Cut shelves and seats as desired.
Keep a shovel inside for digging out, and mark the entrance clearly.
Tent or Snow Cave? | Trail Snow Skills
ADVERTISEMENT
SNOW TRAVEL
The safest and most efficient techniques for conquering common terrain obstacles.
Steep climbs
Packed snow “Switchbacking is usually the most energy-efficient method,” says Kereszti. Choose an uphill angle that lets you climb easily: If you can’t maintain a conversation, your approach is too steep. Where the slope angle or terrain make switchbacking impractical, bootpack up instead: Kick your toe into the hill to create a solid platform beneath the ball of your foot, then step up.

Soft snow Kick the toes of your snowshoes into the slope to create a solid platform. Pause a moment to let the snow set beneath your foot, then step up. Deep powder might require an extra stomp or two.
Steep descents
Packed snow Extend one leg downhill and hold it stiff as you plunge your heel into the snow, creating a platform to rest your weight on.
Soft snow Lock your knees and land as solidly on your snowshoe’s heel crampons as possible to avoid skidding downhill.
Sidehills
When traversing an untracked slope, soften (or roll) your ankles to let all of the snowshoe’s teeth bite into the snow–not just the ones on the uphill edge–and shorten your uphill trekking pole. On packed snow or ice, you may need to use crampons and point your toes slightly downhill for the best traction; in these situations, carry your ice axe in your uphill, arrest-ready position.
Ice
Consider the previous weeks’ temperatures (if you don’t know, ask rangers or local outfitters). A cold snap could mean the ice you encounter is safe to cross; warming trends might signal dangerously thin ice.
Don’t cross near lakes’ outlets or inlets, or near tributary streams, where the current creates thinner ice. Avoid embedded objects, like logs and rocks, which can radiate the sun’s warmth and weaken the ice around them.
Tap ice to gauge how solid it is, and listen for a hollow sound, which indicates thin ice.
Keep your skis or snowshoes on to distribute your weight. Spread your group out as well, leaving plenty of space between hikers: Should one person fall in, he’ll have others on solid ice to help. (Don’t get too close–instead, throw a rope or line and pull him out.)
Fire, Guaranteed
A five-step guide to a low-impact winter blaze
“Even when conditions don’t require it, I generally build a fire,” says NOLS’s Marco Johnson. Campfires leave little trace when constructed atop snow-covered ground–but they require a few special techniques to keep the flames from melting the snow and sinking out of sight.
ADVERTISEMENT
Pack a base Use a trash can lid or metal cookie tray as a base under the fire.
Dig a seat The fire will gradually melt the snow under and around the pan, so shovel an area around the fire to sit and stand on. Otherwise, you risk falling into the fire.
Gather dead wood Strip small twigs and branches to use for kindling, and break large ones into foot-long pieces.
Build small to large Put tinder on the base (firestarter, birch bark, or twigs splashed with cooking fuel) and lean a few tiny pieces of kindling against it. Light it with a lighter or waterproof match, and as the flames grow, slowly add larger pieces of wood, leaving plenty of space for air to circulate.
Burn it all Don’t leave charred wood behind, and scatter ashes far from camp.
Cold Comfort
Full Winter Camping Guide