Updated December 4, 2024 02:56AM
Scramble Safely With the Hip Belay
Add security on steep terrain with the simple hip belay.
'march 2010 skills scramble 200x170'
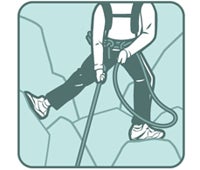
How-to Slideshow: Basic Hip Belay

While ascending a class 3 summit, you and your partner encounter a stretch of particularly sketchy terrain: exposed, steep, and rocky. The route is stable—your partner’s nerves, not so much. Turn back? Not if you packed a rope and know how to perform a hip belay. Requiring only a coil of rope, this old-school technique provides added security on nontechnical peaks, gentle snow slopes, moderate canyoneering trips, or any terrain where technical climbing methods are unnecessary. “When moving in the mountains, speed and efficiency are key, and the hip belay allows a team to do just that—it’s lightning-fast and stable,” says Jackson, Wyoming-based Exum Mountain guide Cara Liberatore. Here’s how to do it:
Tie in
Using one end of a single climbing rope, tie the
easy-to-adjust bowline knot snugly around your waist; have the climber do the same. For added security, tie backup overhand knots right next to the bowlines at both ends. Use a 30-meter length of rope for alpine scrambling; a 12-meter rope is usually sufficient for shorter downclimbs while canyoneering.

Brace position
To belay your partner, you’ve got to be comfortable ascending without protection. Scramble up ahead and find a solid terrain feature, such as a large, live tree or a boulder that’s too big to fit your arms around. Test the feature for stability before committing. Sit down and brace at least one straightened leg (both, if possible) against the feature; this is your brace leg.

Hand position
Position the rope so that your brake hand is opposite your brace leg (for example, if your brace is your right leg, use your left hand to brake). If both legs are equally braced, either hand can brake. Your other hand is your guide hand. Pull up any slack between you and your partner, then flip the rope over your head so that it rests below your backpack.
Belay method
Use the traditional slip-slap-slide method to belay: As your partner climbs, remove the slack by pulling the rope back around your body with both hands. Slip your guide hand back up and use it to pinch (“slap”) the two strands of rope together in front of you. Then slide your brake hand back toward your body without ever taking it off of the rope. Drop the brake strand from the guide hand and repeat.

Stop a fall
While using the hip belay, always keep a tight leash on your partner—you should feel his weight on the rope at all times. If he falls, immediately bring your brake hand down and across your body, wrapping the rope farther around your core. The friction of the rope against your body stops the fall.
Practice
Perform the hip belay on low-angle terrain with an experienced partner or guide until you become comfortable with the technique. And be aware of the hip belay’s limitations: If the belayer weighs significantly less than the climber, the terrain increases to 5th class, or no natural brace features exist, you’ll need more advanced belaying skills to proceed.
