Prof. Hike: The Ex-Pyromaniac's Guide to Fire

'Everyone can light a fire...and everyone should know how to. (JS)'
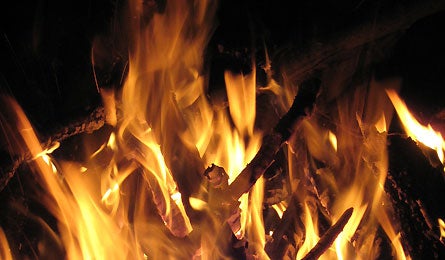
This January, 49 out of 50 states were covered by snow (we’ll mail you some, Orlando). A week ago Denver kids waited for school buses on a minus-10°F morning. And you’ve probably scrapped enough ice from your windshield to create five dozen slushies. Face it—we’re stuck in the icy core of winter. At times like this, I like to imagine the perfect campfire. It would be a blaze hot enough to make my eyeballs sizzle, and fierce enough to create its own roaring wind. That’s the fire for this time of year.
Some people believe fire-building is an innate skill—like rolling your tongue or being double-jointed. Hogwash. Every Boy Scout I’ve ever met could ignite an inferno in less than two minutes. How did they learn? From other Boy Scouts. That means you can learn, too. Of course, Scouts like to augment their campfires with gasoline, aerosol sprays, and shotgun shells—accelerants that aren’t always available to backpackers, and shouldn’t be given to any kids wearing neckerchiefs, either.
Fortunately, Backpacker.com is awash with excellent tips on lighting fires the old-fashioned way with kindling, a firestarter (a highly flammable trigger that burns long enough to ignite the rest of your fuel), and matches or a lighter. So instead of rediscovering fire, this post will warm up the existing advice by highlighting the most important elements.
1. Start at home
There are several simple firestarters that you can prepare from household waste products. A potent one will maintain a strong flame in wet, windy, and cold conditions—exactly the times when you need a fire the most.
Backpacker.com has several great articles on making firestarters using dryer lint,sawdust, petroleum jelly, and cardboard egg cartons among other common household items. Additional trail-tested suggestions are posted in the forums.
My addition is to explain how to melt old candles using the double-boiler method. Instead of throwing out useless, stubby candles, drop them in a metal or Pyrex glass container (something you won’t be eating out of anytime soon), and plop it in a stove pot filled with two to three inches of boiling water. Once the candles melt, pour the runny wax into an egg carton, metal mold, or whatever forms the base of your firestarter. Using this method plus cardboard tubes, saw dust, and three months’ of dryer lint, Prof. Hike’s wife turned last December’s Hanukkah candles into this year’s batch of firestarters.
2. Prepare for ignition
Just like a rocket launch sequence begins before the countdown reaches zero, lighting a fire requires pre-ignition groundwork. If you want a fire to last for several hours, gather as much dead wood as you can. Then go back and get three times as much. Collect wood during daylight when it’s easier and safer to stumble around the underbrush. And when foraging, remember to look up as well as down. Dead branches snagged in trees are often drier than wood already lying on the ground. For a long-lasting fire, gather thick, dense logs and stumps the width of your arm or greater. But to ignite a blaze, you’ll need kindling—small, finger-width sticks of dry wood. To see how kindling works, watch Backpacker editor Shannon Davis’s video about lighting a one-match fire. Plus, did you notice how Shannon blew on the fire (3:50) to get it raging? A common mistake by novices is to smother the ignition source with too much kindling. This prevents air (and the essential fire ingredient oxygen) from fueling the blaze, and often results in a smoky squib. To keep the air flowing, leave gaps in the kindling pile, ignite the firestarter at its lowest point, and blow gently on the fire if necessary.
3. Stove-lighting tips
While campfires are great for creating ambiance or preventing hypothermia, we rarely use them to cook dinner. A combination of burn restrictions and convenience has let stoves conquer the backcountry kitchen. (But if you’re searching for flame-licked meals, check out these recipes for crescent rolls,trout, and steak). As a result, knowing how to use your stove in all conditions might be more useful than the intricacies of bonfire building.
First, Backpacker’s Camp Stove Shopping Guide explains how different stoves (canister, white-gas, and alcohol) can match your camping needs. No matter which stove you choose, always pack a cigarette lighter even if your stove has a built-in igniter. You never know when that piezoelectric thingy will go on the fritz.
Second, read this Gear School article by Kristin Hostetter on how to use and maintain white-gas stoves. These stoves work better in cold weather (under 40°F) than canister stoves like the JetBoil.However, if you rely on a canister stove to brew your coffee, you can improve its chilly-morning performance by warming the fuel in your sleeping bag overnight, and in your coat’s inner pocket prior to use. Kristin also suggests taping a chemical hand warmer to the side of a canister.
Finally, you can accessorize your stove by building a stabilizing platform and a ventilated windscreen. Just remember that windscreens should only be used with white-gas stoves containing a separate burner and fuel bottle. Placing a solid screen around a canister stove can overheat its components and lead to a spectacular explosion. Or so a Boy Scout told me.
What are your fire-starting tactics that work every time? Post a comment or send an email (no flames, please) to profhike@backpacker.com.
—Jason Stevenon
Jason Stevenson is the author of The Complete Idiot’s Guide to Backpacking and Hiking
