How To Build A Backcountry Knee Splint

'Sit the patient down and support their knee with a stuff bag or clothing. Use R.I.C.E. (Rest, Ice, Compression, and Elevation) to minimize the…'
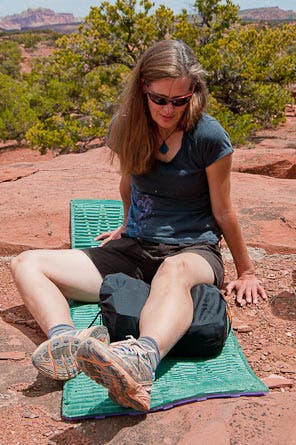
Sit the patient down and support their knee with a stuff bag or clothing. Use R.I.C.E. (Rest, Ice, Compression, and Elevation) to minimize the swelling that occurs immediately after an injury. Ibuprofen can also help reduce swelling.
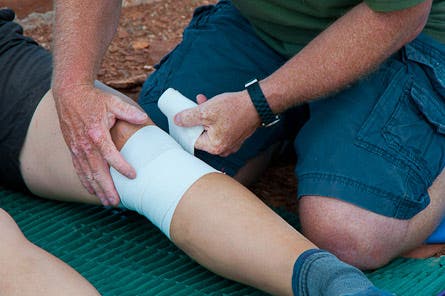
Wrap the knee with an Ace Bandage or Coban Self-Adhering Wrap to support the injury and compress.
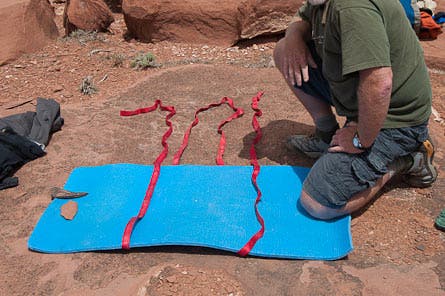
Take a foam or self-inflating pad and lay it out as shown, rigging it with tent cord, rope or climbing web.
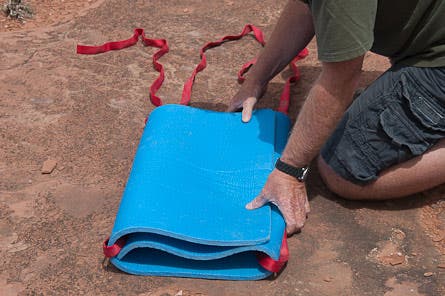
Fold the pad until it’s just wide enough to wrap 3/4ths or more around the patient’s leg and thigh.
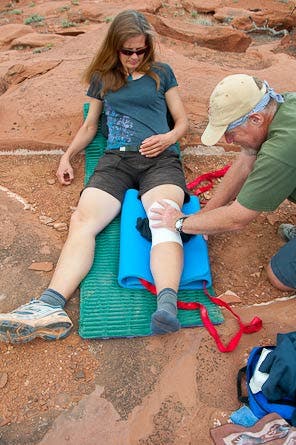
Slide the pad underneath the injured leg, positioning it as high against the crotch as comfortable. Maintain a comfortable leg bend by padding behind the knee with spare clothing.
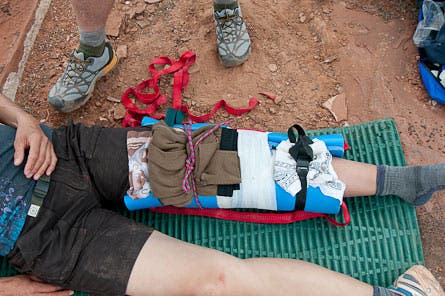
Strap the splint around the patient’s leg using tent cord, bandages, bandanas or belts. Fill in gaps between leg and splint, and pad all bindings, using spare clothing or with anything that’s handy. Compress the leg firmly and immobilize the knee.
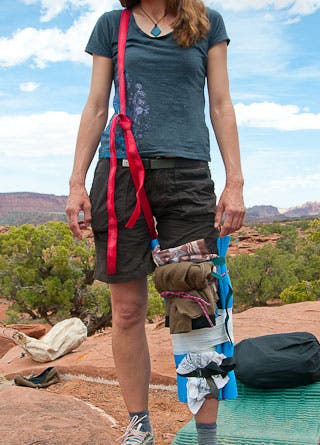
Tie the splint’s cord or webbing over the patient’s far shoulder as shown, placing the knot in a comfortable, easy to adjust position. Use this sling to keep the splint from sliding down.
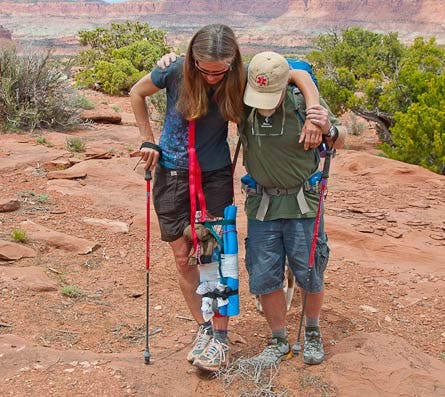
Self-evacuate if the patient can bear any weight. You can assist by supporting their injured side, and having them use a stick or trekking pole on the far hand. Reposition and tighten the splint as needed.
Upgrade your skills with our online Wilderness First Aid Basics class! Learn to conquer common problems and handle emergencies with grace. Start it instantly, complete it at your own pace, access it forever. Sign up now!
Photos by Jennifer Howe / howephoto.us