Updated July 10, 2025 12:43PM
How to Shoot Better Adventure Photos
Great photography is more accessible than ever, thanks to affordable camera tech. But you still need the know-how to use it. Pro adventure photographer Adam Barker offers these pointers for getting started.
'Photo by Adam Barker'
You know your equipment backwards and forwards. You always scout your locations, and you have the sunset and sunrise times for your local trails memorized. Now, take your photos to the next level with these tips from professional adventure photographer Adam Barker.
Eager to improve your photography skills? Join BACKPACKER’s Outdoor Photography online course.
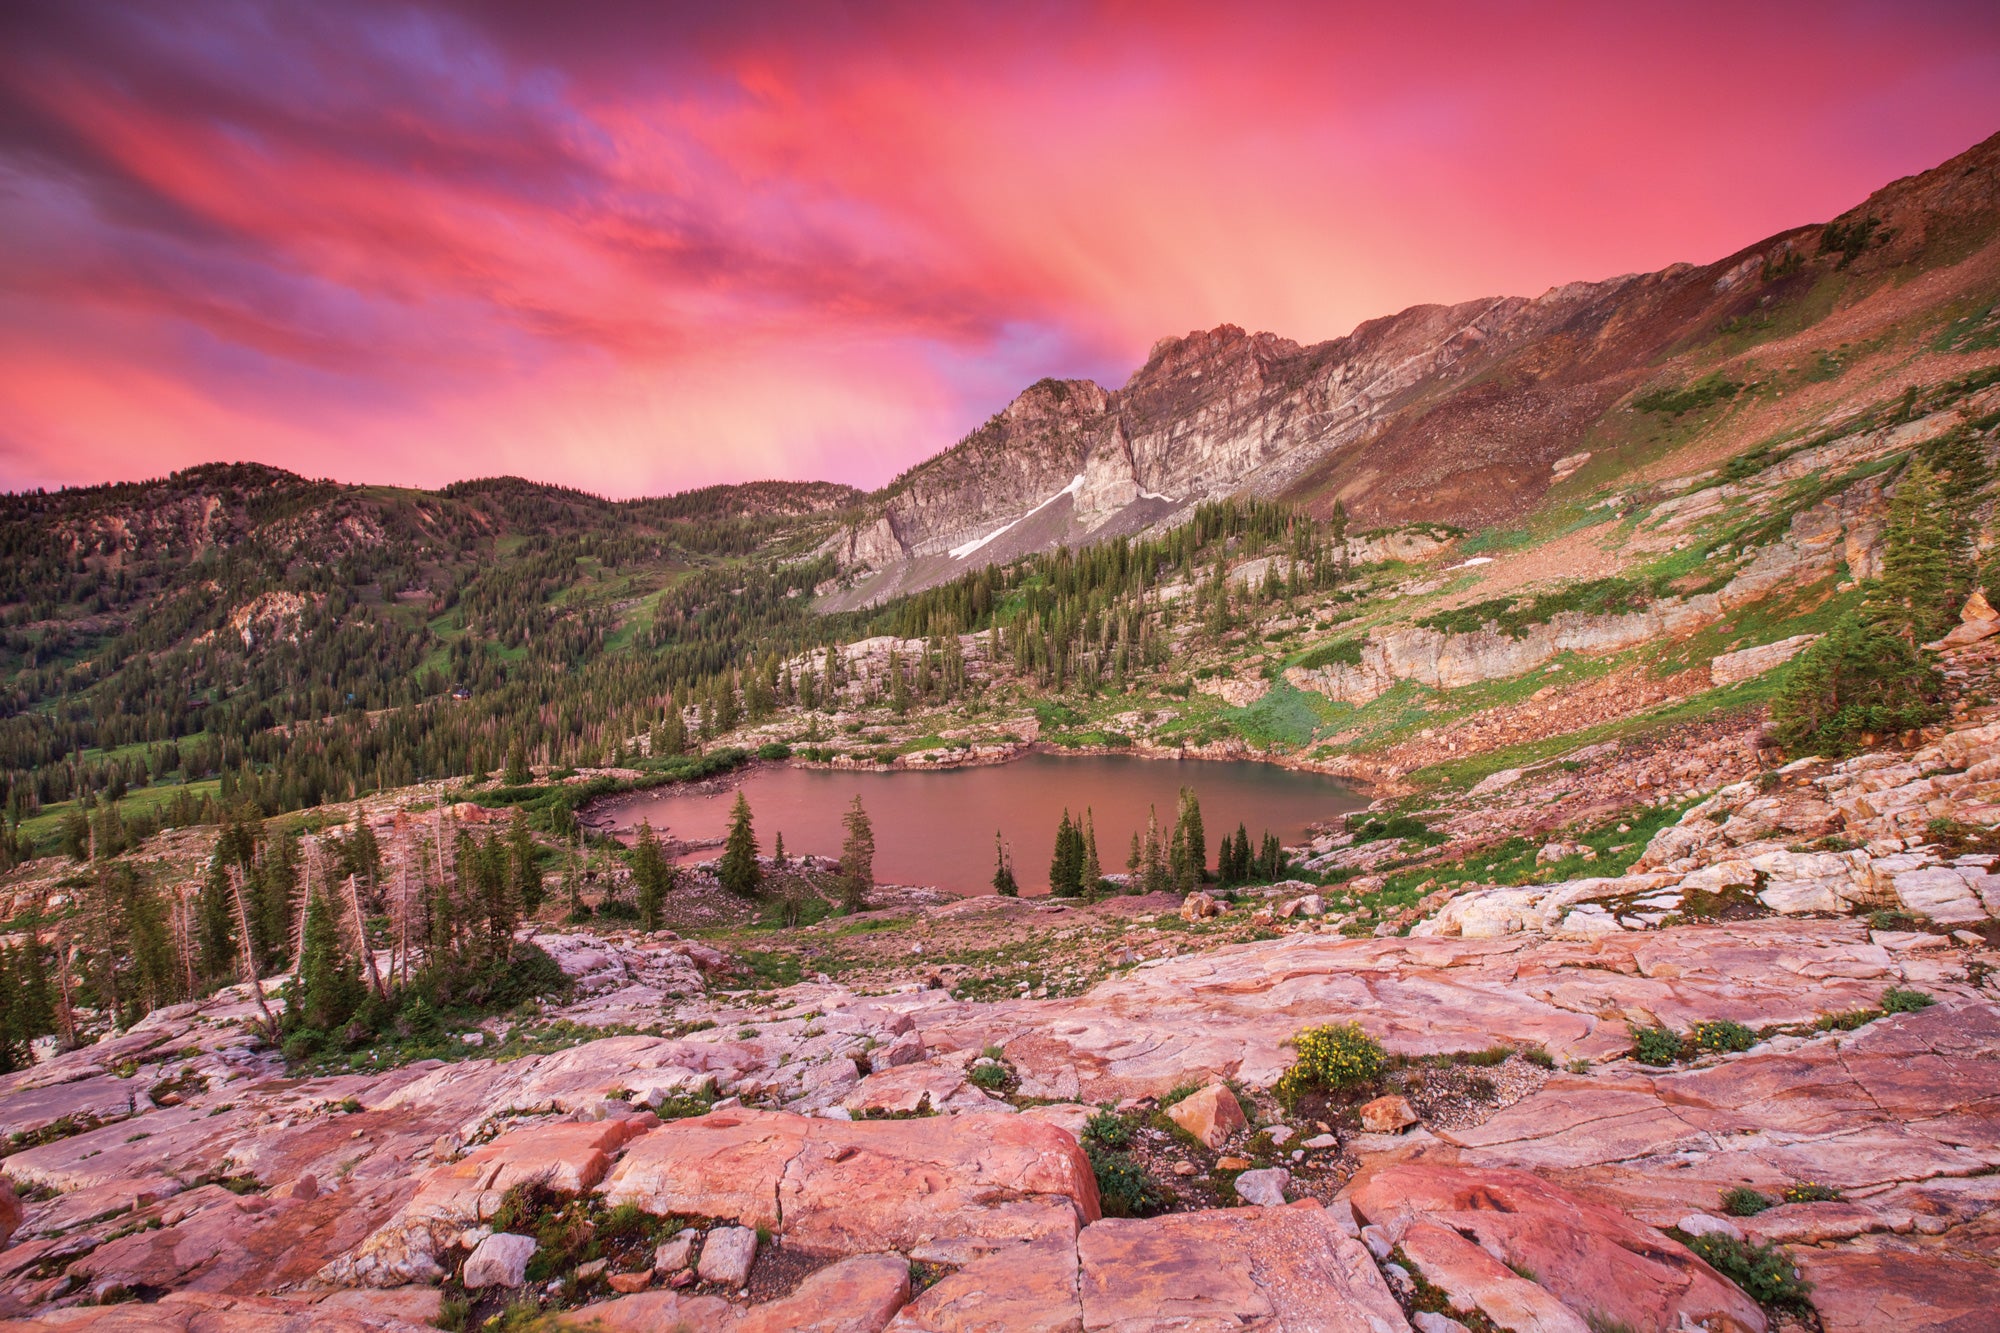
Set the alarm.

Outdoors, the difference between a good photo and a great photo can be just seconds—so get up early and stay out late. The photos above were shot 17 minutes apart.
Dial in your kit.

Read your camera’s manual (really), and learn how to manipulate aperture, shutter speed, and ISO. Shooting landscapes? Pack a tripod (you’ll have more flexibility with shutter speed) and a graduated neutral density filter (we like LEE filters; $110), which you can hold over your lens to expose correctly for both the sky and the ground. Using a filter is faster and easier than HDR processing in post, and it gives you a better idea of your final image while you’re in the field.
ADVERTISEMENT
Nail the composition.

Experiment with new perspectives—for example, get low to include more sky. Keep in mind the rule of thirds: A photo composed of one-third sky, or with a subject one-third of the way from the edge of the frame, is typically more interesting than a perfectly centered shot. Also strive for balance: Think of the photo’s centerline as the tipping point of a seesaw, and darkness as weight. Purple mountain majesty on the left side? Include a dark-colored tree or subject on the right.
Create depth.

“One of the biggest challenges of photography is figuring out how to show a three-dimensional place on a two-dimensional medium,” Barker says. Layers of contrast, color, texture, and tone help to draw the eye into the image and create the illusion of an immersive scene (see below). Conversely, if everything in your image is equally distant, the end result will come out looking flat.
Learn to edit.
Capturing a scene in the field is only half the job. “That’s like making cookie batter and never putting it in the oven,” Barker says. Your eyes pick up detail and range of light differently than your camera—adjust exposure and color in a post-processing program to make up the difference.
ADVERTISEMENT
Find a mentor.
Pick three or four photographers whose work you admire. Follow them on Instagram and study how they create their images.
Low on inspiration? Start with these: @kaminskiphotography @rebornbyadventure @christinhealey @adambarkerphotography
Master the Tools of the Trade
Harness the light by using the right combination of aperture, shutter speed, and ISO.
Aperture dictates how much light enters the camera. Underexposed? If shutter speed is already set to prevent motion blur, decrease the f-stop (the number describing the aperture setting). This will widen the ring to let in more light. Aperture also affects depth of field, or how much of the image is in focus. The smaller the aperture, the greater the depth of field.
Increase shutter speed to decrease the amount of light reaching your camera’s sensor (a good option when your photo’s underexposed, but the f-stop is set), or to decrease blur in an action shot. Slow shutter speed to soften moving clouds or water (use a tripod), or to let in light without sacrificing a larger depth of field.
ADVERTISEMENT
Turning up ISO doesn’t admit more light, but it can brighten an image by increasing the camera’s sensitivity. Increase ISO to avoid underexposure, but only when you can’t adjust shutter speed or aperture—a high ISO can make photos look grainy.
5 Steps for Perfect Post-Processing
1. Import your photo into a processing program. Barker likes Lightroom ($10 per month) because it’s powerful and beginner-friendly, but you can make these adjustments using Photoshop or free apps like Snapseed (caveat: free programs provide far fewer tools).
2. Manipulate exposure using the toolbar in the develop module. In photos with expansive horizons where you’ve exposed for the sky (see above for an example), bring up the shadows to lighten the foreground, and bring down the highlights to keep the image from looking washed out. Silhouette? Try darkening the shadows. (Tip: Shooting in RAW format will capture more image data with a higher dynamic range, giving you more to work with.)
3. Add definition by moving the contrast and clarity bars forward by about 10 each.
ADVERTISEMENT
4. Pick up muted colors, like in a soft sunrise or sunset, by increasing vibrance by 10 or so. Boost overall color with the saturation slider, but use a light touch, especially in portraits—overdoing it will turn faces red.
5. Export your photo. Set the resolution to 300 DPI for print quality or 72 for digital.