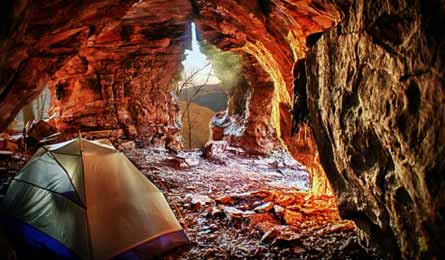
First Night Out: Packing and Planning

'Smart Start to Packing and Planning (Photo by Ben Sapp)'
Planning and Packing
Gear up
You’ll need to make a few equipment upgrades to go from dayhiking to backpacking, including an overnight-ready pack, tent, sleeping bag and pad, stove, and cookset. Not quite ready to shell out for the whole kit? Check local outdoor shops for rental items (REI is a good bet), or borrow from friends or coworkers. But invest in your own boots with good ankle support and traction.
Choose a destination
The perfect first trek: easy terrain, one night only, and not too long (think 5 to 8 miles round-trip). Look for well-signed trails that pose zero navigational challenges and have abundant water sources. If possible, stick within a couple of hours of home so you can wait for the perfect forecast. But don’t let proximity trump the most important factor: a site with a huge reward. See our scouts’ primo first-night picks starting above.
Plan your menu
Breakfast
You want quick, hearty, and simple. Think oatmeal with peanut butter or powdered milk, grits, or granola. Go a step beyond ho-hum instant coffee with a lightweight filter like MSR’s MugMate ($17; cascadedesigns.com), which serves up a rich pourover.
Lunch
Get your midday fuel from energy bars, dried or fresh fruit, jerky, sausage, crackers and cheese, or tortilla wraps with peanut butter, hummus, or tuna or chicken from a pouch.
Dinner
Save time and minimize mess with a simple, one-pot meal. Your easiest option is a just-add-water, single-serving dehydrated dinner (available at outdoor stores), but they’re pricey. Feeling a little more ambitious? The classic formula: Make quick-cooking carbs (such as pasta, rice, or couscous), then add protein (sausage, tuna or chicken pouches, or dehydrated beans), cheese, and a dash of spice. Check backpacker.com/recipecenter for ideas.
Pack food
Extra packaging—or worse, extra food—is just dead weight. Unwrap or unbox items like tortillas, granola, and oatmeal, and take only as much as you’ll need. Ditto for condiments and spices: Stow them in mini plastic bottles (sold at outdoor stores) or bring single-serving packets. Keep dinners organized by measuring the portions of rice or pasta you’ll need and packing in zip-top bags; premeasure and combine any other dry ingredients and pack them in their own baggies.
Staying safe
Leave word
Write down your itinerary—including the trail you’ll hike, anticipated campsite, and when you expect to be back—and leave a copy with a friend, family member, and/or rangers. Arrange to have a designated person contact rangers if you haven’t returned by a certain time, but build in a buffer for a leisurely hiking pace, poor weather, no cell reception, and other non-emergency delays. (HikerAlert automates the process, sending a text-message to your predetermined contacts).
Learn first aid
Backpacking injuries range from the minor and common (blister) to the severe and much rarer (broken leg). At minimum, read up on backcountry first aid (backpacker.com/firstaid) and pack a stocked med kit. Also consider sharpening your skills with a Wilderness First Aid course.
Hit the trail
Load your backpack
First, print a packing list from backpacker .com/checklists and add any additional items you wish (medication, gaiters, pillow). Gather all of your gear next to your pack, checking items off as you go to ensure you don’t forget anything (but remember that you only need one first-aid kit, cookset, stove, water treatment method, and tent per group). Now load up: Loosen all compression straps and place lighter, bulky gear (A) in first. Slide tent poles (B) or extra socks into any gaps. Heavier items (C), like cooksets, food, and water bladders go in next so that they’re even with or below your shoulder blades. Top it off with an extra layer. Place items you’ll need easy access to, like the first-aid kit, map, headlamp, snacks, and lip balm, in your pack’s side pockets and top lid (D). Tighten all compression straps to streamline your load.
Fit Right
To put on your pack: Dial in the fit by first loosening all straps. Tighten the shoulder straps (A) until they feel comfortable, then pull the load lifters (B) (they connect the tops of your shoulders to the pack’s frame) until they rise at a 30- to 45-degree angle from your shoulders. Buckle and tighten the sternum strap (C) across your chest, then buckle the hipbelt (D) and pull until it’s snug but not constricting. Adjust as you hike.