Heading out the door? Read this article on the new Outside+ app available now on iOS devices for members! Download the app.
If you’re tired of forcing down prepackaged foods on the trail, it might be time to start preparing your own backcountry meals at home. Dehydrating is one popular option among backpackers, but freeze-drying removes an even higher percentage of water, making your meals lighter and more shelf stable. Plus, it’s easier than you think to do at home, says Kathleen Neves, who is also known as The Hungry Hiker on Instagram and YouTube.
“I can only eat so much instant ramen,” she says. “By prepping my own food, that just opens up my whole menu. Anything I love eating at home, I can easily turn into a backpacking meal.”
Below, we break down the steps to DIY freeze-drying—from buying the appliance to making a full Thanksgiving dinner for your next backcountry adventure.
Invest in a Freeze Dryer
Freeze dryers are significantly more expensive than dehydrators—in the thousands instead of hundreds of dollars. But, Neves says, if you plan to use it enough times, it pays for itself, just like any other kitchen appliance you use regularly.
“Before investing in one, make sure you’re actually going to use it,” she says. “Figure out how many backpacking meals you’re going to prepare in a year or two years.”
It might be more cost effective for a family, for instance, to make their own meals as opposed to buying prepackaged meals at the gear store. But for a single person who goes on one or two trips a year, maybe not. Another option is going in on one with your backpacking buddies.
Neves has the medium size Harvest Right freeze-dryer (about $2,500), which can freeze dry 10 to 15 pounds of fresh food per batch. “I’ll push a button and I don’t have to worry about it until I have to take it out,” she says. Costco sometimes has the smallest size Harvest Right, which runs about $1,800. Other common at-home brands include Blue Alpine and StayFresh.
Plan a Meal Prep Day
While it’s as easy as pushing a button, freeze-drying can take 24 hours or longer, so you’ll want to carve out adequate time in the kitchen. “Winters are very snowy and cold here in Montana,” Neves says. “I use my winter to prep for the upcoming backpacking season.”
Another reason to freeze-dry in the winter: The process takes longer when temps rise.
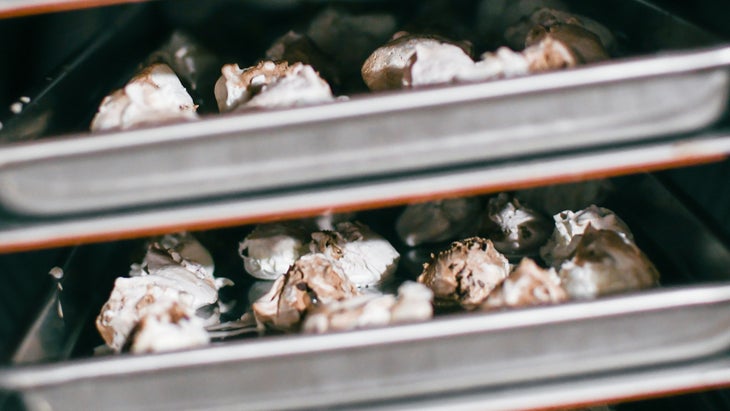
Neves will freeze-dry in bulk, portioning out one meal or one serving per tray to make cleanup easy. Full meals, such as spaghetti or pizza rolls, require cooking or baking in advance, so be sure to plan ahead for anything that needs to be pre-cooked before freeze-drying.
Pick What to Freeze-Dry
Most foods freeze-dry well, with the exception of high fat and high sugar foods. (One time Neves tried to freeze-dry a soy-based dipping sauce and made a mess.) The process relies on sublimation, which transforms ice directly into vapor, leaving behind that airy, porous structure.
The best foods to freeze-dry include fruits and vegetables, dairy products, proteins, and baked goods, because they either rehydrate well or can be eaten without rehydrating.
Some of Neves’s favorites include:
- Pizza rolls, which turn into a satisfying crunch snack
- Slices of cheese (same)
- Wonton soup, or any kind of soup or stew
- Italian sausage pasta
- Greek yogurt and strawberries
- Ice cream bars or tiramisu cheesecake, both of which turn into a crunchy cookie
Once you’ve gotten the hang of the freeze-drier, your imagination is the only limit to what you can do. One year for Thanksgiving, Neves freeze-dried an entire Thanksgiving meal, separating the turkey, ham, mashed potatoes, gravy, stuffing, and green bean casserole on different trays. During her holiday trip into the backcountry, she mixed them all together for a festive meal.
Just like home cooking, freeze-drying is all about experimenting. A small percentage of meals may turn out to be disasters, but the rest will nourish you out in the backcountry.
Portion and Store Your Meals
Because freeze-drying removes more moisture than dehydrating, it extends your backpacking food’s shelf life. No mold or bacteria to worry about. After prepping all winter, Neves stocks her gear room with a bunch of new backcountry meals for the season. “I can literally just go shopping for food when I’m getting ready for a trip,” she says.
Portioning out meals on the trays simplifies the storage process once she’s ready to separate them into Mylar bags or vacuum-sealed bags. Or you could portion them out after the process. When stored in airtight containers in a cool, dark, and dry place, they can last for up to 30 years. But hopefully you get to use them sooner than that.
From 2025