BACKPACKER Photo School: 4 Steps to Better Photos


Going digital has made it fun and easy to take a million photos—but that’s not always a good thing. If you’re not careful, your computer will get filled over and over with multiple versions of the same cluttered snapshot, rather than just the keeper shots you really want.
There are a million rules to composing photos, but you don’t have to memorize them all. One word sums them all up: simplify. Decide what you want take a photo of, and don’t include anything else. Here are four things to think about before clicking that will instantly improve the quality of your trip photos.
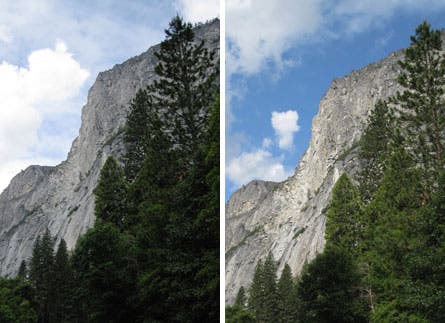
1. Timing: Wait for it… Everything about a scene constantly changes as you hike. Sometimes the best thing you can do to take a better photo is wait a few seconds. While hiking in Yosemite this spring, I was on some really crowded trails with 4 friends. It was a challenge to wait for the trail to clear of strangers, but it was well worth it to wait not to have groups of other tourists cluttering the beautiful scenery or taking away from the four subjects I actually wanted in the shot. Other times, I found myself waiting a couple minutes to get a sliver of blue sky behind a mountain instead of white cloud. In this example, not only does the blue sky look nicer, but sun lit up the granite and the trees for a more brilliant photo overall.
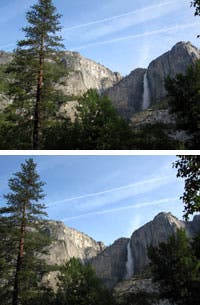
2. Watch the Edges: Before pressing the shutter, frame the image to fully include just what you want in the frame. Then, take time to eliminate any distractions. I adjusted my field of view after the first photo to include the top of the tree, something I wanted in the photo. On forested hikes, you often get stray branches cluttering up the sky. That’s bad: A couple random leaves can detract from an otherwise engaging photo. Either move or zoom to leave them out entirely, or include more than a few. In the second photo I decided to include more of the branches to create a stronger left edge. While a few leaves in the first shot are a distraction, several leaves balance the tree on the left and work as a frame for the main subject (the waterfall).
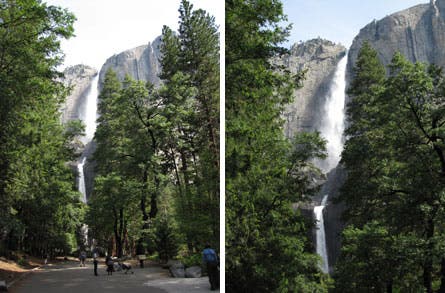
3: Zoom instead of Crop: Once you’ve found a great spot for taking a picture, think abut how close you want the photo to look. If you want a tighter view, zoom in now instead waiting to try and crop the photo later. You can’t make good prints if you crop too far in; ultimately it hurts the overall resolution. Don’t be afraid to make tough decisions: Decide what each photo is really about, and don’t try to force the whole scene into every shot. In the left photo I zoomed out to show all the people wandering around. That adds a sense of scale—perfect for a Picasa gallery I send out to friends. But I also took a version that’s focused tighter on the waterfall. That’s the prettier one worth printing and hanging up to inspire me while I’m working. It doesn’t have the clutter of all those people at the bottom, and it shows the beauty of Yosemite Falls. Ultimately, that’s what I want to remember about being there, not the crowds.
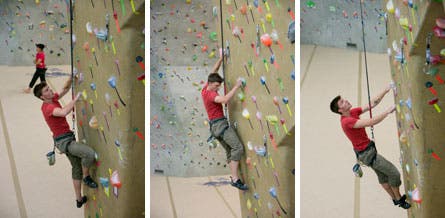
4: Background: Pay attention to what’s going on behind the subject of your photos. A simple way to clean up photos is to avoid distractions in the background. While photographing one of Backpacker’s interns at an amazing new climbing gym in Boulder on Sunday (seriously, stop by Movement Climbing + Fitness if you’re ever in town), I really wanted the focus of my photo to be on Chris, so I tied all the belay ropes out of the frame and waited for other climbers to move out of the way. I paid attention to where Chris’s head was in relation to the background, not wanting the radiator or lines on the floor to create a busy background near his face. Also, if the background and the subject aren’t aligning right you may have to choose a different angle to shoot from. I moved about 4 feet to the right so the wall would hide a rope on the floor.
After you familiarize yourself with the rules, there’s only one thing left to do: practice! You Northeast photographers have two great opportunities to go try them out:
New York City: Take your own climbing wall photos in Central Park at Adventures NYC, a Backpacker-sponsored event on August 28.
Acadia National Park: Try out a camera and see an evening slideshow with Canon in the Parks, everyday except Tuesday now through August 27.
—Genny Wright Fullerton