Backpacker Photo School: 2 quick tips to help you win the Photo Contest
Entered into Backpacker's Photo Contest
While you’re out taking photos on the trail this summer, taking a few extra moments to think about your pictures will help you come back with a better set of photos– maybe even the winner to BACKPACKER’s 2011 Readers’ Choice Photo Contest.
Here are 2 tips you want to keep in mind:
TIP #1: Take Time to Focus
Don’t take pictures while you’re walking along. It’s true that photography on the trail will make the hike take a little longer, but there’s no point in even carrying a camera if you aren’t going to stop walking to compose a photo of the scene in front of you. Most of the time the camera doesn’t have enough time to focus on the subject if you’re moving while trying to take a picture. Do yourself a favor. Pause for a moment before clicking. Take a breath, let the camera focus, and then take the picture.
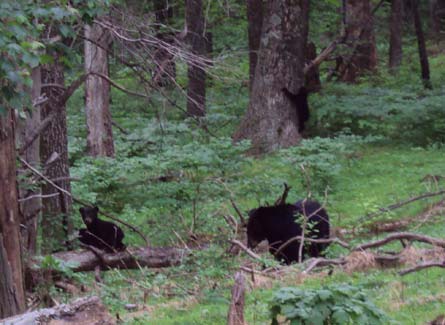
This might seem especially hard when you spot an animal on the trail. You feel like you’ll miss the shot if you take the extra moment to focus. But is a blurry photo really one you want to show anyone? It won’t take more than a fraction of a second. Let the camera focus. Imagine how cute these bears must have been, but they’re blurry.
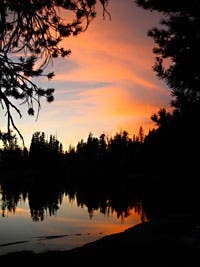
At dawn and dusk, your shutter speed is going to slow down and you may not be able to hold the camera still enough to focus well. That’s one reason why Image Stabilization, Vibration Reduction or Shake Reduction is such an important thing to look for when purchasing a camera or lenses. This feature (called different things by each manufacturer) minimizes blurring in your photos due to camera shake in low light situations.
Another way to hold the camera more still while shooting: breath out slowly and press the shutter button halfway through your exhale. This will help the camera stay steadier than if you shoot while inhaling, or breathing less steadily.
And of course, you can always carry a tripod if you’re planning to shoot sunsets and other subjects in the morning or evening hours.
TIP #2: Remove clutter from the photo
Landscape photos can be so inspiring, but it’s very easy for a landscape to loose its magical qualities if there’s clutter in the picture. When you set your backpack down to take a shot, make sure you put it behind you, where it won’t end up sneaking into the picture if you decide to take a few steps back. A beautiful scene with an abandoned backpack in the frame, will never be as inspiring as a beautiful scene without a backpack in it.
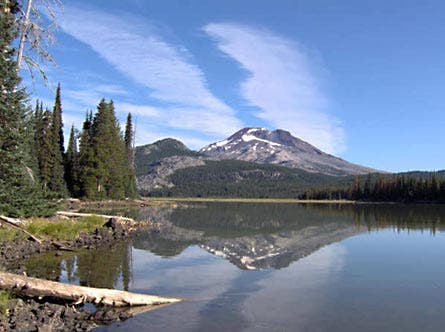
Check the edges of the picture too. If there are tree branches coming into the side of the picture, cluttering the sky, see if you can move a bit so they aren’t in your picture. Dead or leafless branches (below) look worse than live branches, which can sometimes be used to create a framing effect (left). If there’s a tree or mountain cut off at the top of you picture, see if you can find a way to include the mountain or tree fully in your photo.
If you’re hiking with people and trying to take a landscape photo, make sure your friend isn’t in the corner of your shot. If there’s a person in the photo, a viewer should see the person right away, and they should be purposely included in an interesting way. You especially don’t want to take a picture that only has part of your friend in the shot.
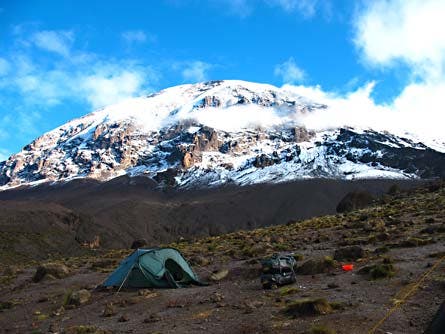
If you’re taking a picture of your campsite, look over the scene ahead of time and see if there’s clutter around that can be tucked away before you begin taking pictures. Stack pots and dishes into a smaller space. They only have to be spread out and usable while you’re cooking. If you brought a camp chair, but it’s empty because you’re behind the lens shooting, take the camp chair out of the scene. Put sleeping bags and extra layers in the tent while you take the picture. The tent and the scenery should be the things a viewer is drawn to when looking at a camp photo. If there’s anything else drawing attention away from those 2 things, they are really distractions that should be moved out of the shot. Campsites aren’t always neat and tidy, but you’ll be able to remember the place you were in better when looking at the photo later if you don’t fill the frame with the man-made objects and have too much to look at in the picture. Below, the bags are dark enough that they aren’t distracting, but the bright bowl is a big distraction, and it draws attention to the guy-lines in the lower right corner, instead of letting the viewer enjoy the mountain view.
So there’s your 2 tips. Hopefully you’ve got a long weekend to get out there and try them. If you come back with some good shots, submit them to our contest. Enjoy the trails and Happy 4th of July!
–Genny Fullerton
Images by BACKPACKER Readers